Xima UCaaS - How to install the SNAPMobile webphone on Windows
This article specifically focuses on the SNAPMobile webphone for Windows
Requirements: Google Chrome must be used
Platform Configuration
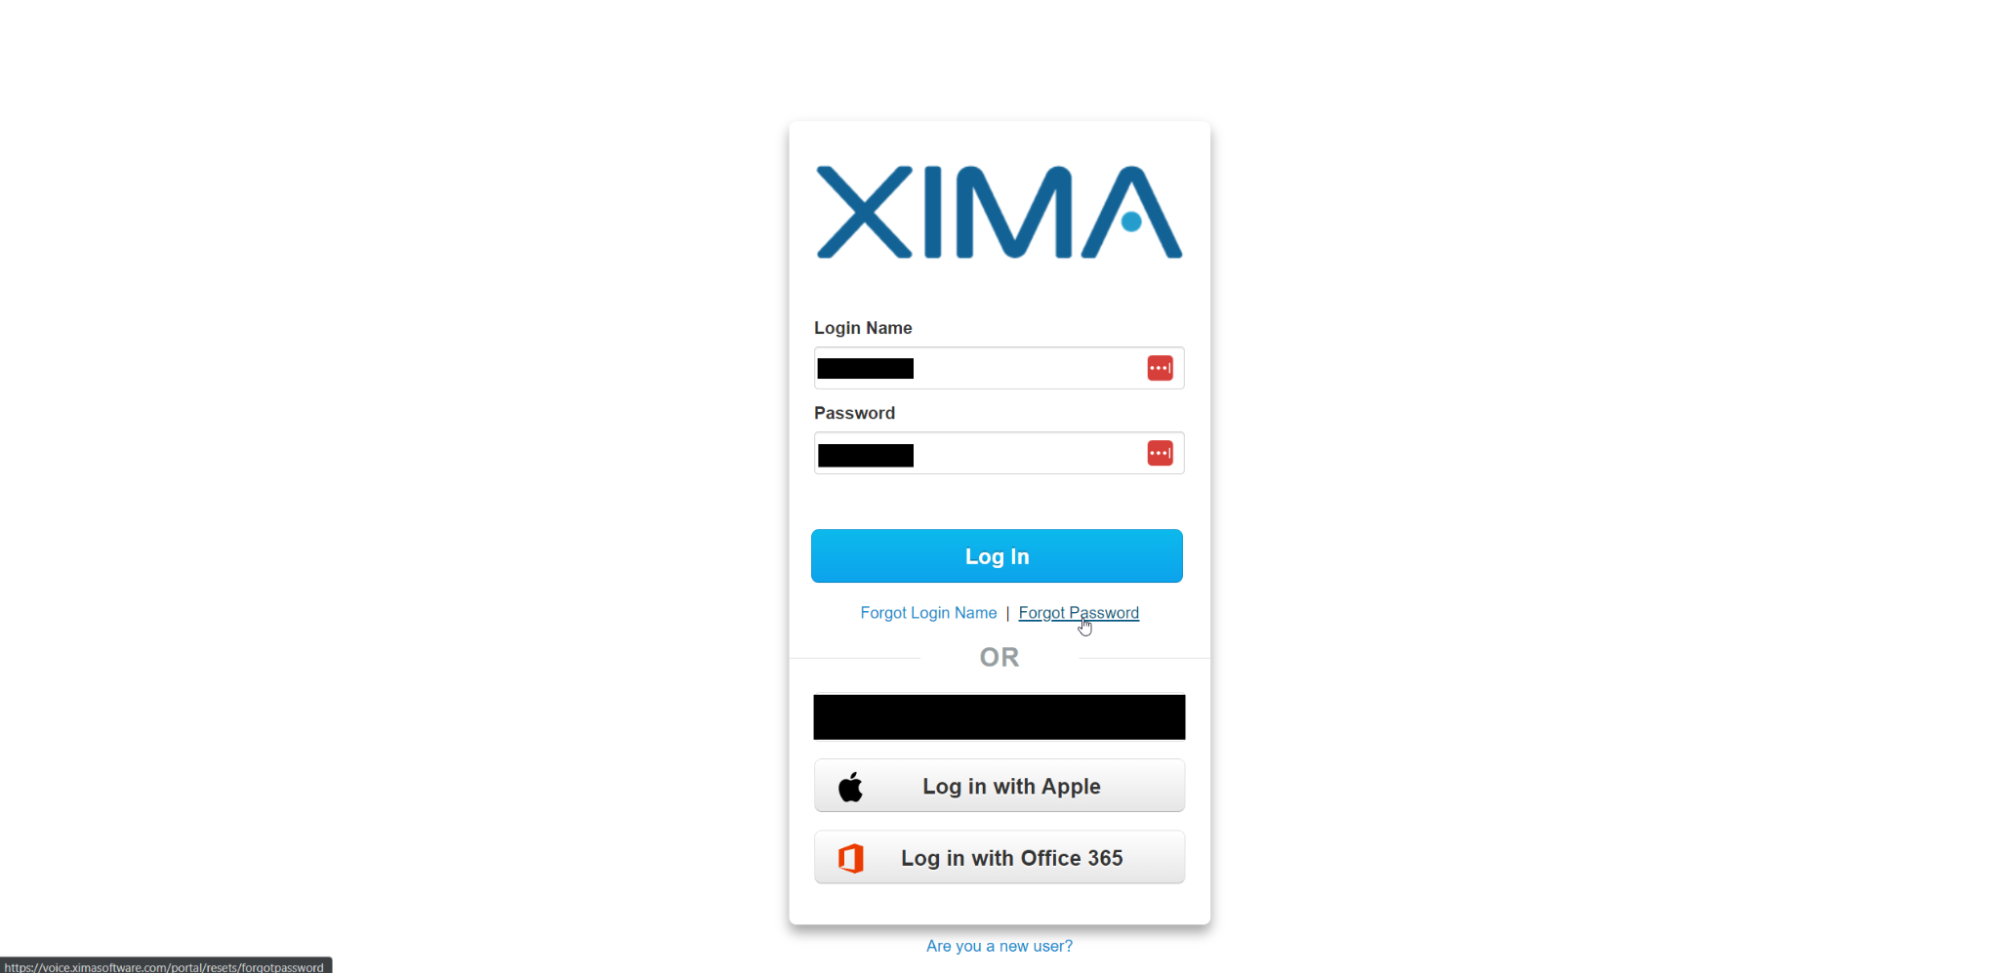
- From a Google Chrome web browser, log into the web portal from your user account at voice.ximasoftware.com\
 \
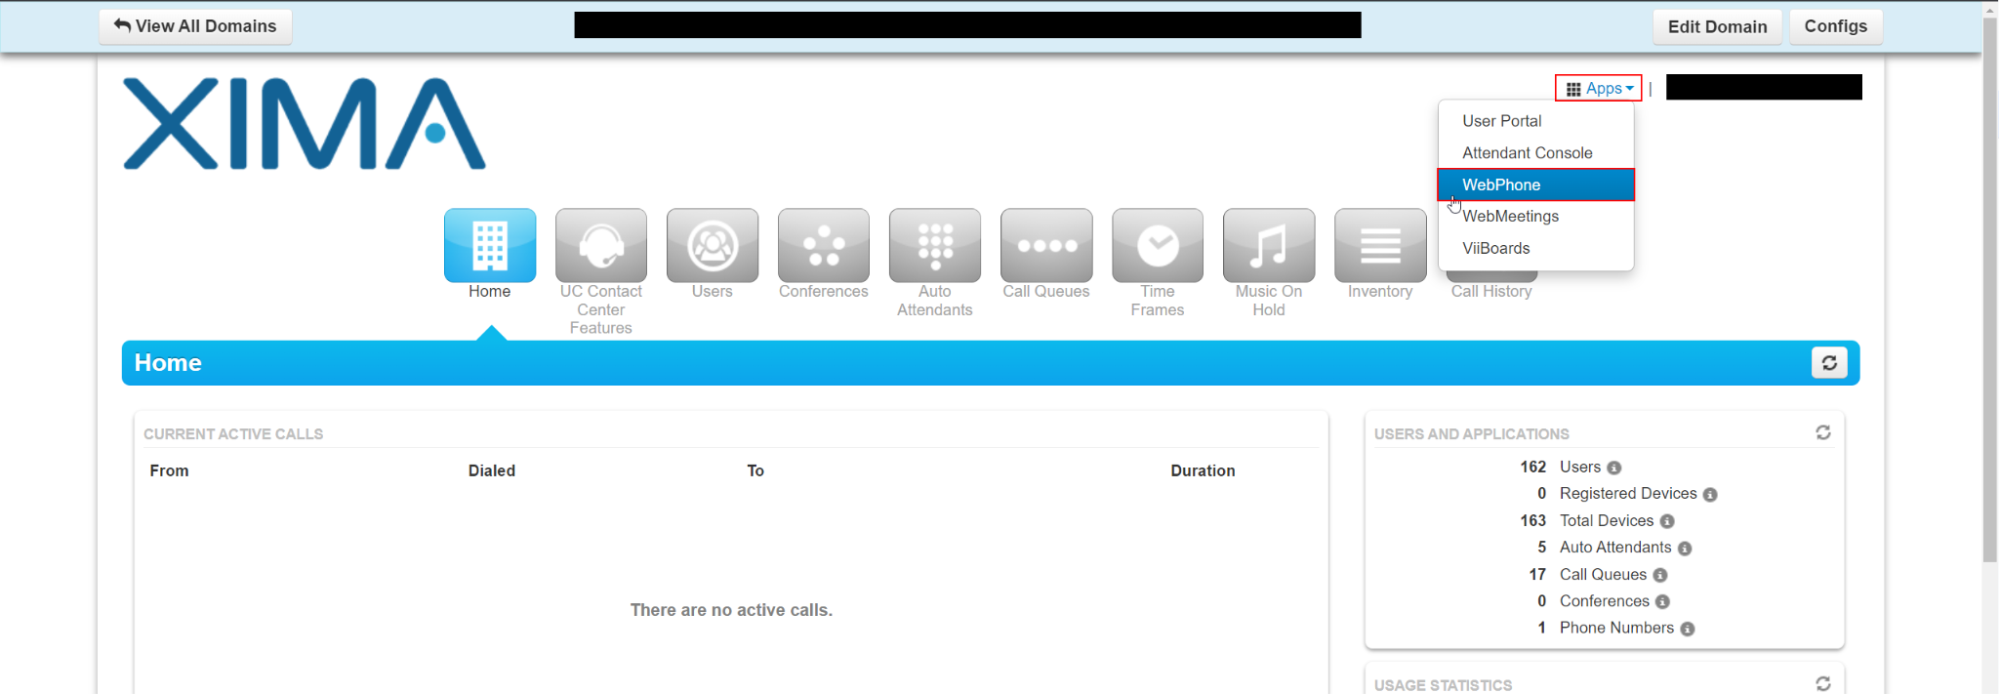
\ - Once you are logged in, in the top right of the webpage, select the “Apps” dropdown and press the option for WebPhone
- NOTE: This is also how you will open the WebPhone from your browser\
 \
\
\
- NOTE: This is also how you will open the WebPhone from your browser\
- The WebPhone will open in a new Google Chrome window
- Expand/maximize the new WebPhone window to see more options
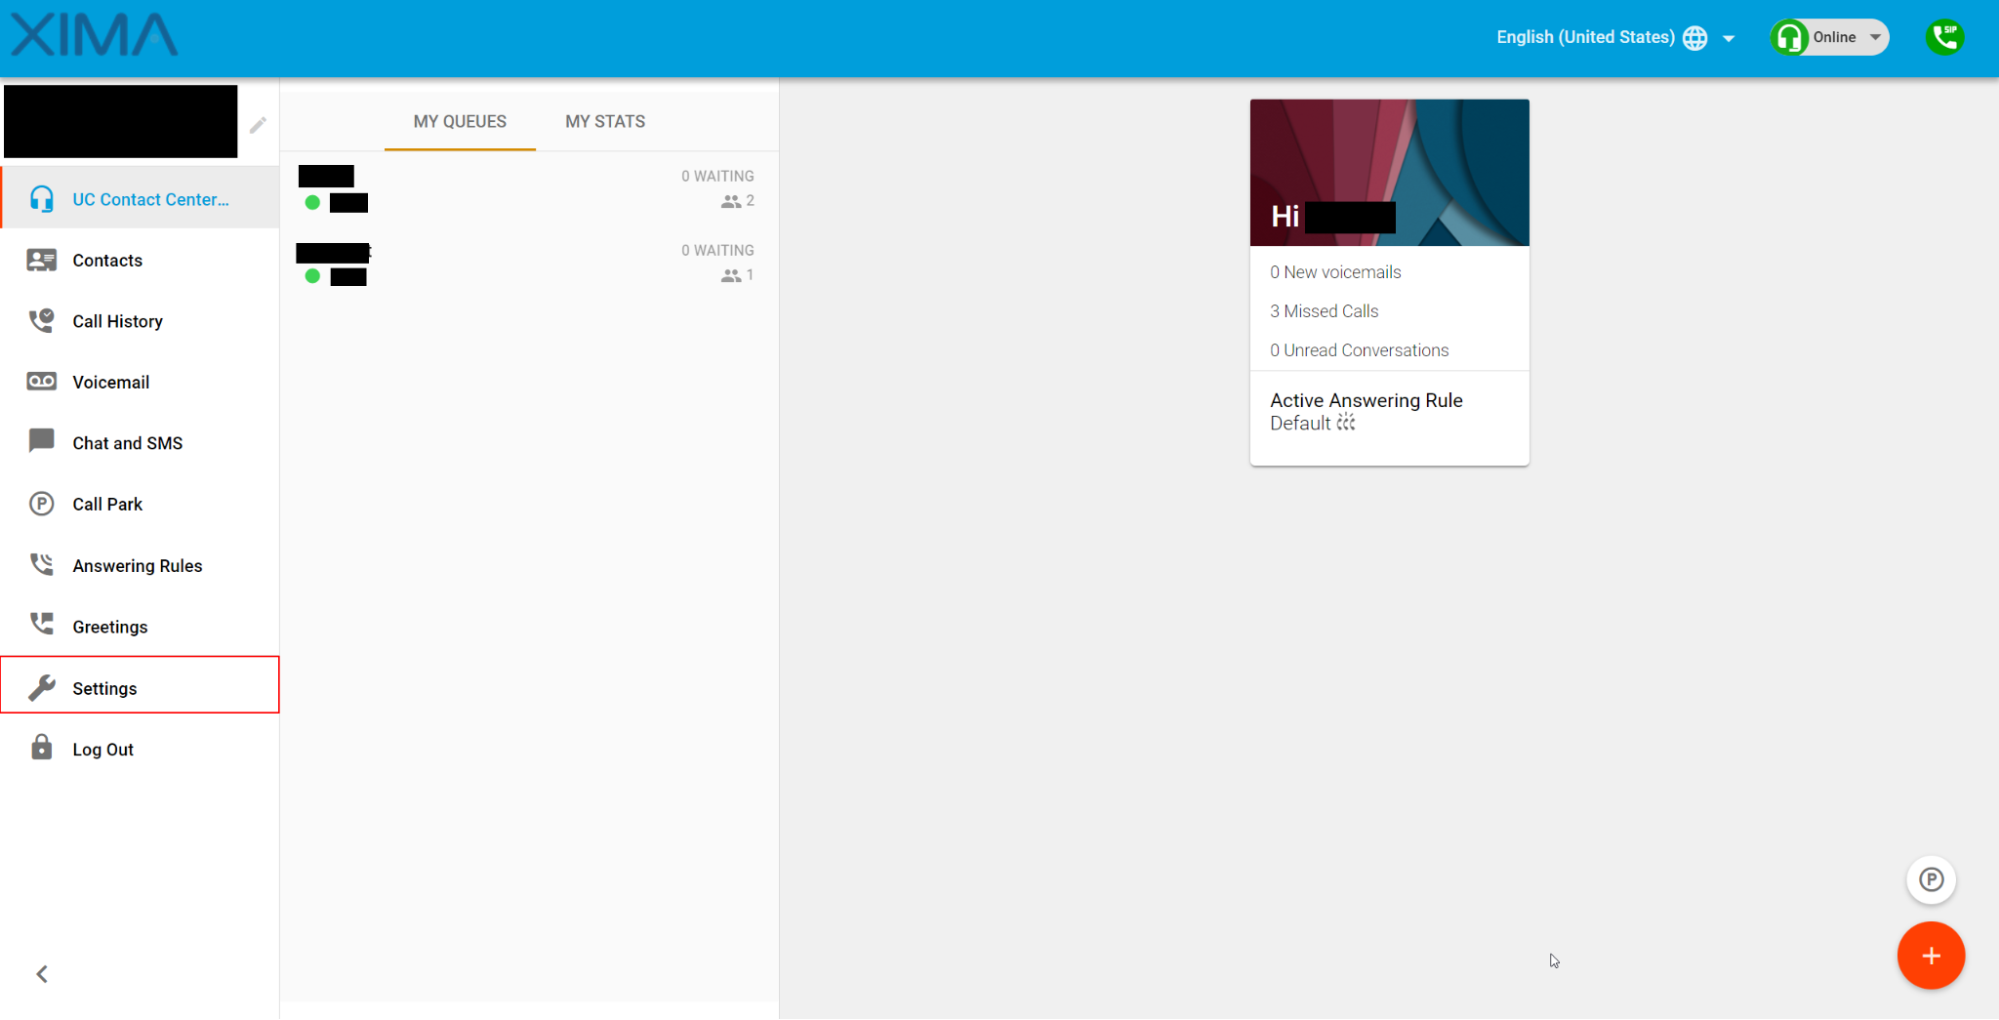
- In the example below, we have the WebPhone maximized
- You’ll notice once you have expanded the WebPhone window that there is a “Settings” option in the bottom left\
 \
\
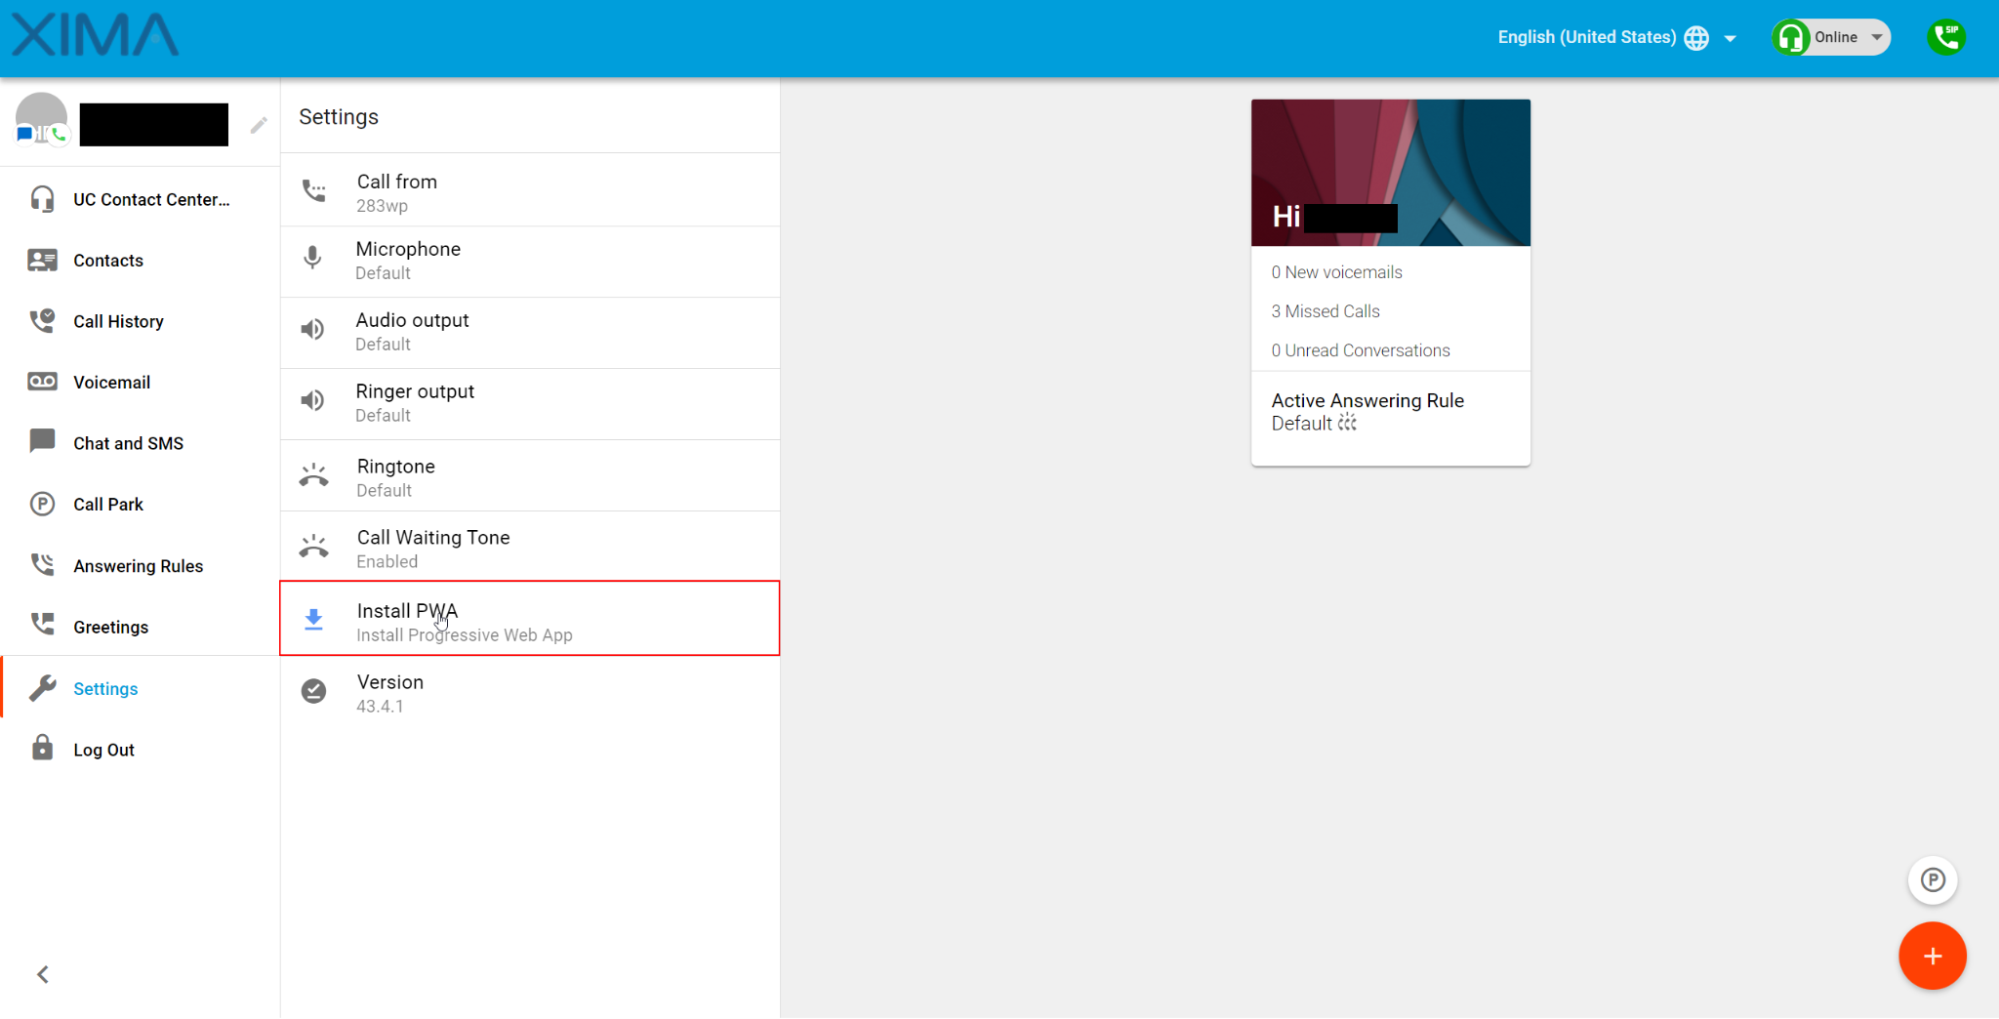
- Once the Settings menu has been opened, you’ll see another option included near the bottom of the list named “Install PWA”
- This is the option you’ll want to click on to install the WebPhone to your PC\
- This is the option you’ll want to click on to install the WebPhone to your PC\
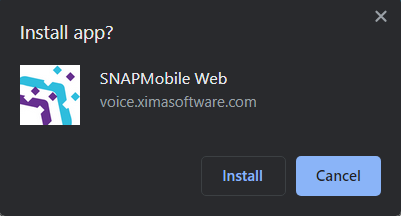
- From here, you’ll see a popup in the top right asking if you would like to install the application, Click “Install”\
 \
\ - From here, the SNAPMobile Web SoftPhone will be installed on your PC, and it will automatically pin to your Windows taskbar
- An alternative way to launch the application would be to search for “Snapmobile” within your Windows search bar to locate the application
Updated 3 months ago
