
Storage Settings
This article will cover how to configure and manage recording storage settings including how recordings are stored, how storage locations are defined, and how retention policies can be applied to control data usage.
The recording storage features referenced below are specifically for Xima CCaaS
Accessing the Recording Storage Menu
To access the recording storage menu, navigate to the System Settings in the navigation pane and select Recording Storage.
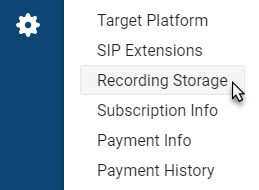
The storage settings menu will appear:
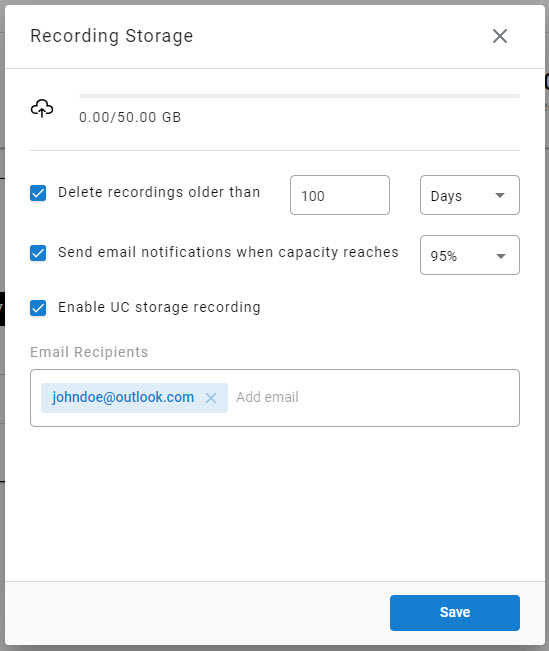
Within this menu you can:
- Monitor the amount of storage used as well as the purchased storage limit, or storage capacity
- Configure the recordings to be deleted if they are older than a set number of Days or Years
If the recording storage capacity is reached, the oldest recordings will automatically be deleted daily to make room for the newest recordings
- Enable email notifications when your recording storage reaches a set storage capacity
Once the set % is reached, the listed email recipients will receive a notice email daily until corrected.
Add Recordings Captured by the UCaaS Platform to Long Term Storage
You can also choose to pull the recordings captured by UCaaS and save them in the Xima provided cloud using the rules and capacity visible in the menu above.
- The UC phone systems can capture the call recordings as well. However, the storage capacity can be limited (i.e. 90 days) and adding long term can be expensive.
To enable Xima to store the pulled recordings, please toggle the Enable UC Storage Recording setting within the Recording Storage menu. Once enabled, future recordings will be pulled into our long term storage.
It will not pull recordings from your history prior to enabling this feature.
Always select Save when making changes within this menu.
Updated about 1 month ago