
Xima UCaaS - Adding a New User
How to add a new user to your Xima UCaaS instance
Steps to add a new UCaaS user
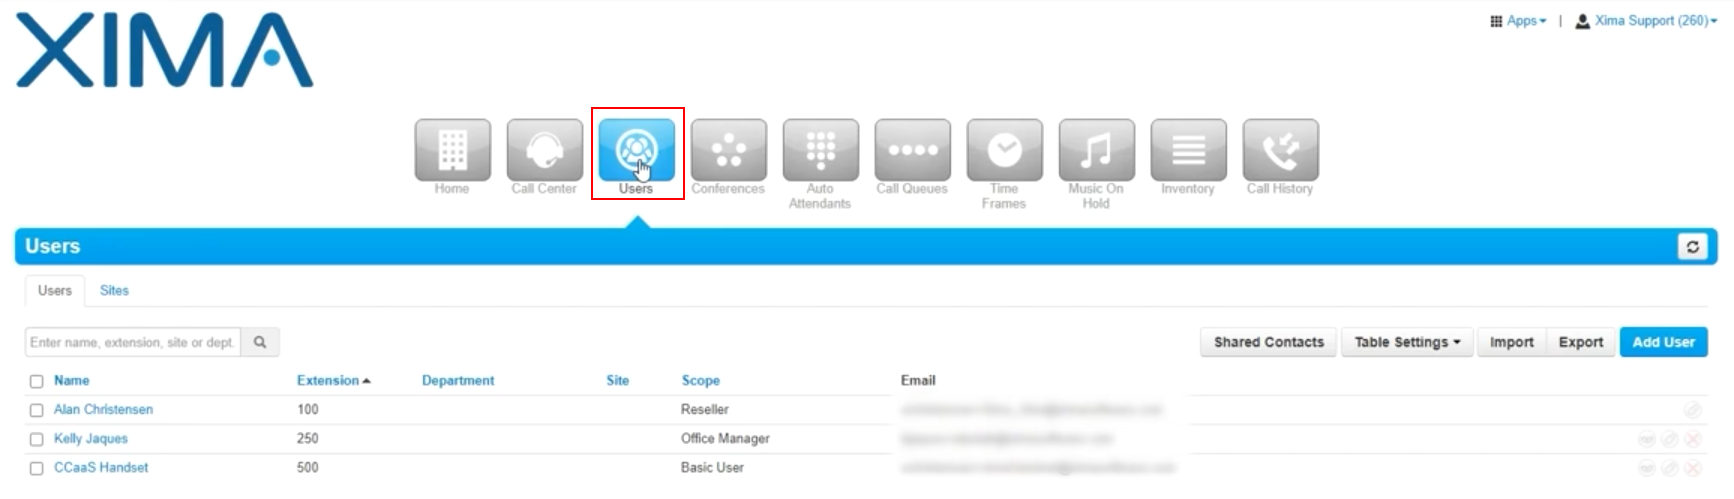
- Select Users from the top menu, and note that you can see existing users below.\
 \
\
\ - To add a new user, select Add User over to the far right\
 \
\
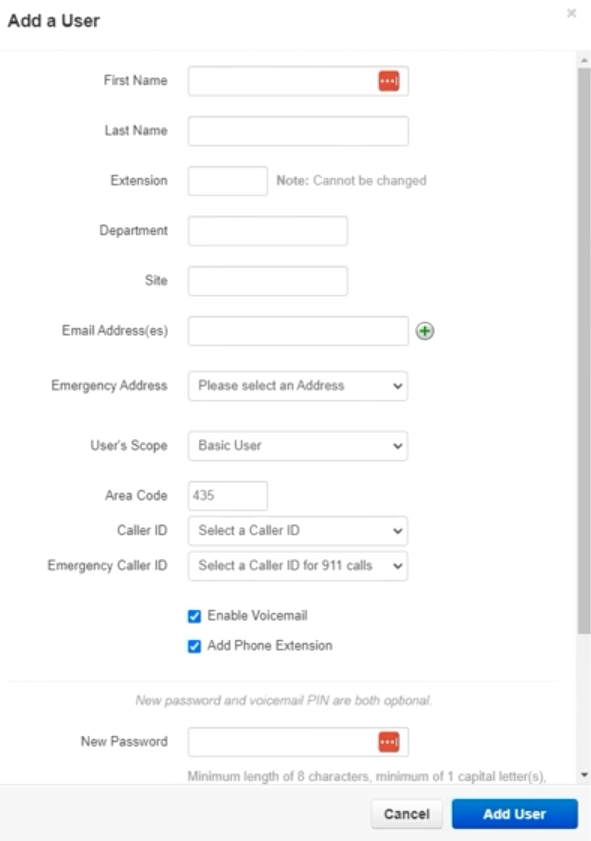
\ - Here you will fill out the relevant user information as covered below\
 \
\
\
- First Name
- Last Name
- Extension - A good practice is to keep various departments in a specific extension range for easy reference
- Department - The department that the team member is a part of
- Site - The physical location of the user
- NOTE: Adding a site is also helpful for additional users if they have Site Manager controls as covered below in sub-step viii
- Email Address(es) - Key to help the user set up a password later
- Emergency Address - The emergency address for the user in case the user has to reach out to emergency services via phone, so they can be quickly located
- Add a new address if you do not see the correct address in the drop-down
- User's Scope -
- Basic User - The most common option, this should apply for most of your users that are customer facing
- Site Manager - Access all information related to the site they are assigned
- Office Manager - Access all information related to the entire domain
- Area Code - Verify the area code for this user is correct
- Caller ID - This is the number your customers will see when your user calls them
- Emergency Caller ID - This number will be forwarded to emergency services if your user calls them, and then the emergency services can call back and get routed straight to the user that called them
- Enable Voicemail - Check this box if you would like to enable voicemail for the user
- Note: It is optional
- Add Phone Extension - This should always be checked
- The following settings are optional, but the user will also get a chance to set these in an email that will be sent to them
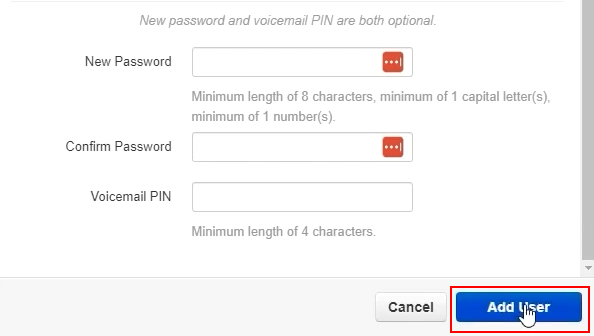
- New Password - The password the user would like to use
- Confirm Password - Type in the users password again to confirm its accuracy
- Voicemail Pin - This is a pin for the user to listen to voicemails
- Select Add User when done\
 \
\
\
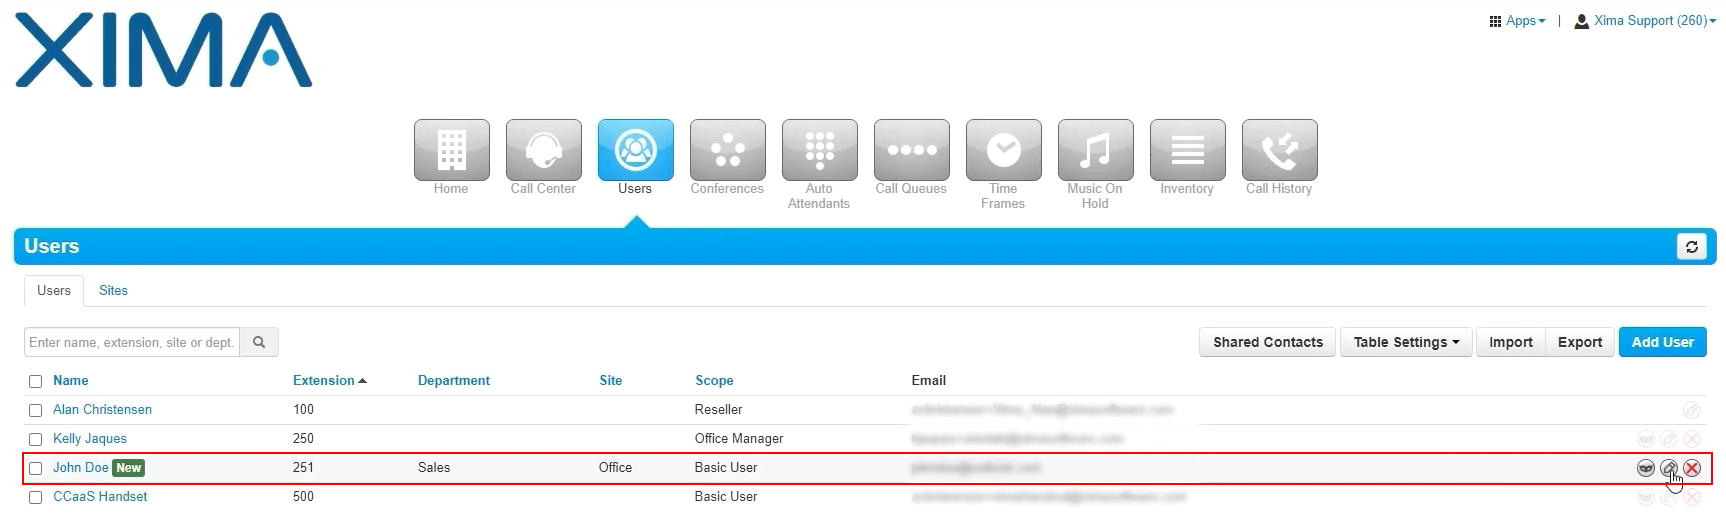
- You should now see the new user listed in Users as shown here\
 \
\
\ - To edit this user, you can select the Pencil icon as shown above to make any desired changes for this user account
- To delete a user, click the X icon
Updated 8 months ago