Routing Using Skill Routing Identifiers in 3CX
This articles provides a step-by-step guide on how to use routing by utilizing the Skill Routing Identifiers feature on Xima CCaaS.
If your customer has multiple DIDs, we can route using Xima CCaaS Skill Routing Identifiers. This will allow you to directly drop the calls into a skill rather than going through another auto attendant and selecting a digital action to be transferred to your skill.
To use Skill Routing Identifiers, follow these steps:
- First, go to the 3CX portal.
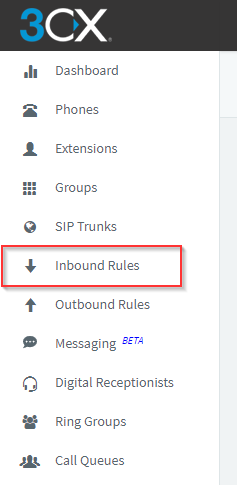
- On the left-hand column, select “Inbound Rules.”

This will open up a list of your DIDs on your system.

-
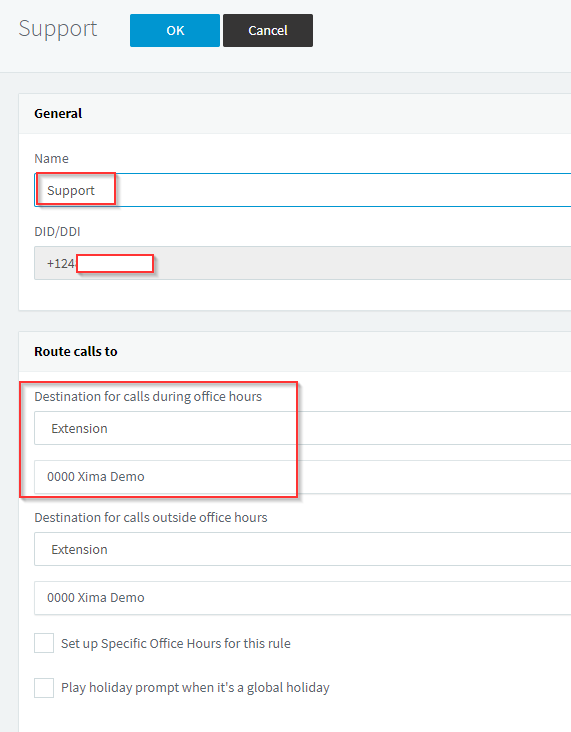
Select the DID that you want to set up with a tag to route your calls to Contact Center.
-
Once done, under the “Name” section, input the tag that you want this DID to go by. This will provide a tag that you can reference in the Xima CCaaS configuration later. In this example, we have used the name “Support.”
Please note that you’ll need to be sure that the calls to this DID are routed to the extension that you’ve configured for the Xima CCaaS virtual handset. Also take note of the “Route Calls to” section.

- Once that is done, click “OK”
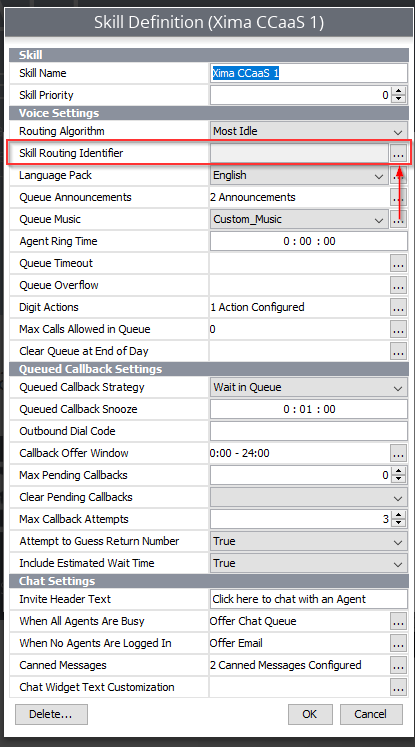
- Open up the Java UI on Xima CCaaS, go to the Contact Center Configuration, and select the skill group that you want the calls routed to.

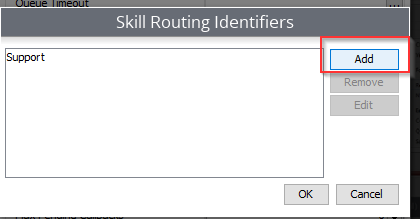
- Under Skill Routing Identifiers, put in the same identifier you did under the “Name” for the Inbound Rules on 3CX (syntax such as capital letters matter).
It should look like this:

- Click OK and Save until you exit the configuration.
- Finally, make a test call to that DID to make sure it is routing to the desired location.
Updated 3 months ago
