
Routing Calls From Netsapiens Auto Attendant to Xima CCaaS
This article provides information on how to route a call from the Netsapiens Auto Attendant to Xima CCaaS. These instructions provide a very basic setup but will give you a good idea of how to make this work for your environment.
Platform Steps
- Log in as an Administrator to the Netsapiens Admin Portal
- Go to the “Auto Attendants” tab and click on the “Add Attendant” button\

- You will need to provide a Name, Extension, and add a Time Frame
- The default is "all the time"

- Click the "Add" button
- Once you do this, you’ll be placed on a new page where you will need to assign digit actions and announcements
- The first item on the list is “Intro Greeting"
- NOTE: You can add a pre-recorded message by browsing to its file, or you can call in with your registered device and record an announcement in that way

- The second option is the “Menu Prompt” with corresponding digit actions for each
- You can click to add a new prompt (e.g., press 1 for sales, 2 for support, etc.)

- Once you have your menu prompt configured, you can assign an array of different options as seen in the screenshot below:

- For our purposes, you’ll need to assign one of these digit actions to your contact center
- Whether that be the internal extension you’ve configured or the DID of that extension is up to your setup
- In this case, we've selected digit action “1” for the “User” option and filled in the corresponding fields

Look AgainWithin the Caller ID Prefix field, note the “/” (slash) symbol at the end.
- This is very important and something that has to be there in order for CCaaS to recognize this as a Skill Routing ID within Xima CCaaS
- This is a very basic setup of how this process will work if you front end Xima’s Contact Center with the Netsapiens Auto Attendant* Following these steps will give you a basic idea of how to do your own setup
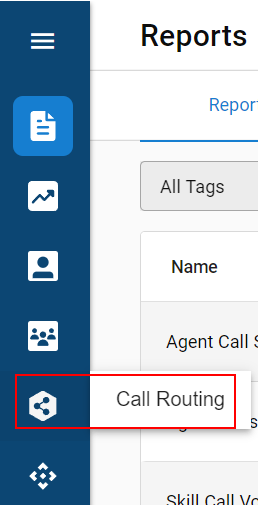
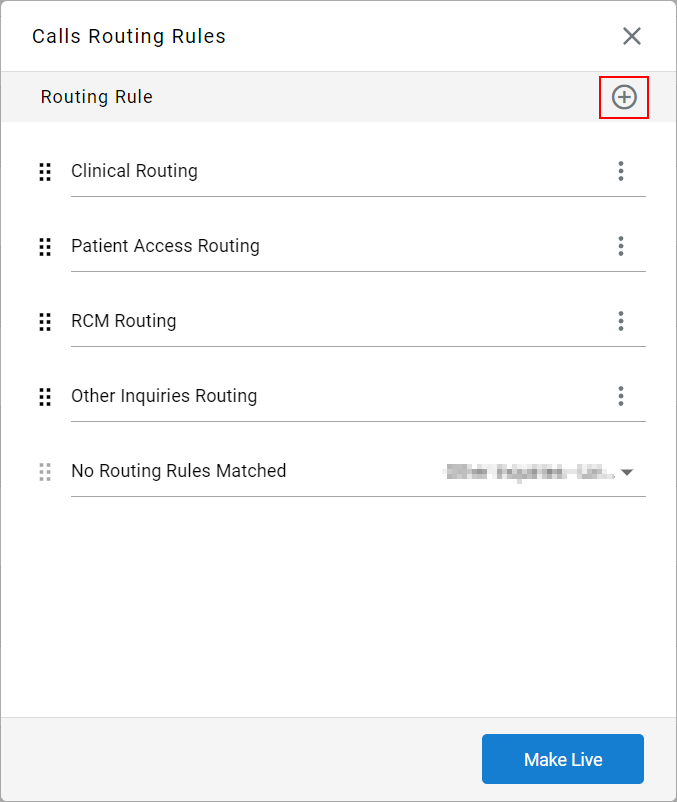
Xima CCaaS Web Portal Steps
-
Open the web portal for your instance of Xima CCaaS
-
Navigate to Call Routing
-
Within the new menu, select the + symbol to create a new Call Routing Rule
-
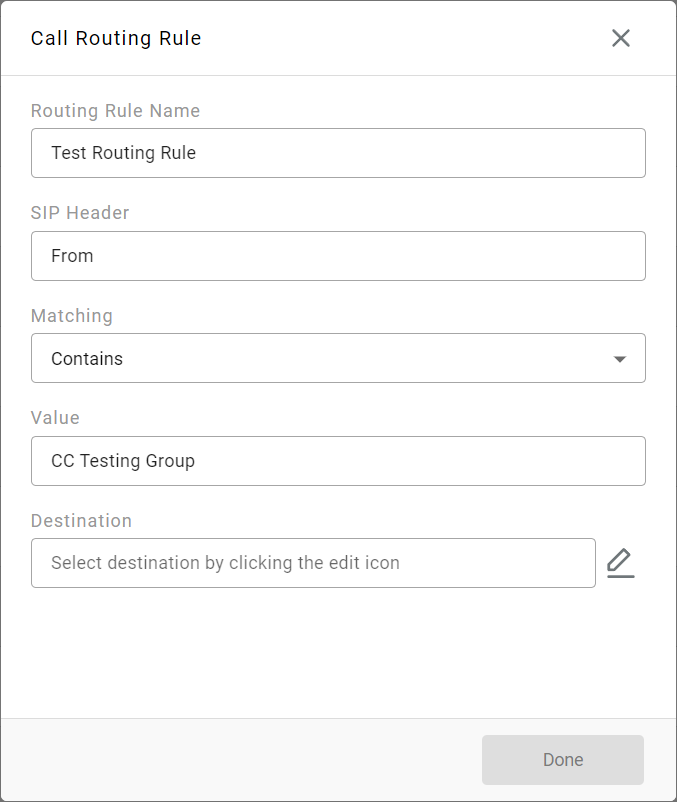
Configure the following within the new menu:
-
Routing Rule Name
- This name can be anything and is meant to help you quickly edit your rules later
-
SIP Header
- Within Netsapiens, this is most commonly From
- You can select anything from the dropdown menu, and even put in your own custom header
-
Matching
- Recommend using Contains in order to best match the platform's naming
-
Value
- The Caller ID Prefix that was created in the steps above
- NOTE: Do NOT add the slash at the end of the prefix
- The Caller ID Prefix that was created in the steps above
-
Destination
-
Select the Xima CCaaS Skill that you would like to send the calls to
-
-
-
Select Done
-
Once all Call Routing Rules are configured, select Make Live
What if a call comes in and no rules are matched?
There are certain circumstances where none of your Call Routing Rules will match a call's SIP Headers. You can set up a “Default” skill group to have these calls routed to it. By default, this is set to “No Skill” so you will need to manually set this up upon initial setup.
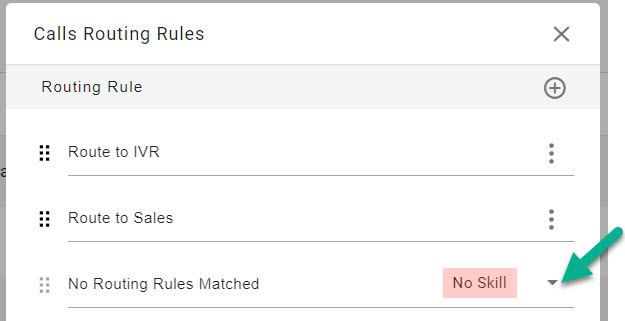
If no rules match and your default isn't set up your calls will come into the Contact Center and immediately be disconnected. (The system doesn’t know where to send them)
Updated 2 days ago