
WebService API with Salesforce Flows
In order to successfully trigger Salesforce flows, steps need to be taken in SalesForce and in Xima CCaaS. This article will walk you through each step.
Steps to get this working on the Salesforce Side:
-
Create a User whose credentials will be given to CCaaS (a user that is only used for CCaaS integrations)
- Set the User License as "Salesforce Integration"
- Set the Profile as "Salesforce API Only System Integrations"
- Check the "Flow User" checkbox
-
Create a new Connected App
- Enable OAuth Settings
- Enable for Device Flow
- Enable the appropriate OAuth Scopes (I set it to Full Access for testing)
- Enable Token Exchange Flow
- Set the OAuth Policy of "Permitted Users" to "All users may self-authorize"
- Set the OAuth Policy of "IP Relaxation" to "Relax IP restrictions"
-
Create whatever flow you want to send data into
- Make sure the flow gives the right access
- Make the variables 'available for input'
-
Collect the security token for the new user.
-
The token is not displayed in the user's profile in Salesforce. You will need to have the token reset which will send it to the assigned email address.
-
This step may require a system admin login to take the following steps:
-
In the Salesforce Admin portal, int the Administration section, select "Users" and then "Users" to see active users.
-
Next Select "login" to masquerade as the newly built user
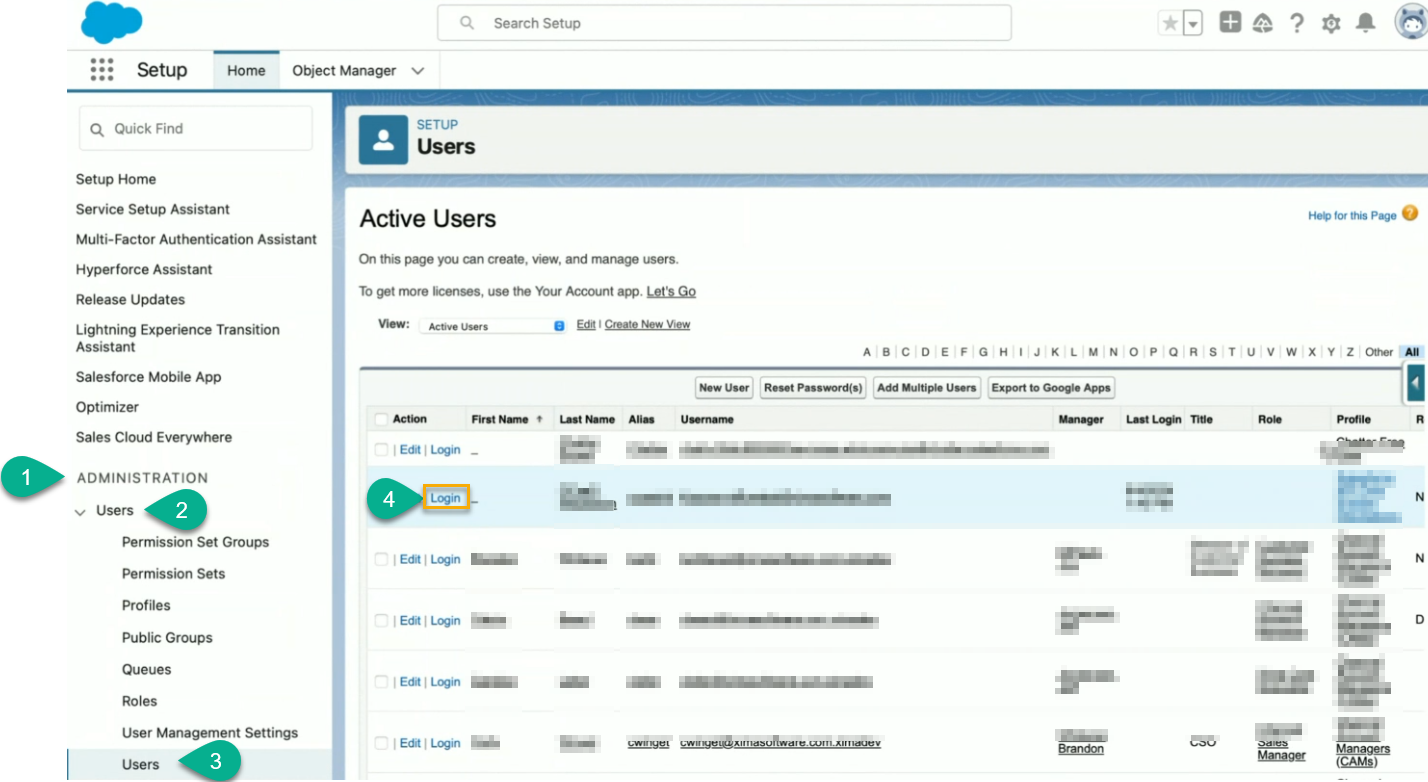
-
Once the admin is viewing the login experience for the user, they'll be able to reset the security token via email by selecting My Settings ► Personal ► Reset my Security Token
-
Check the email for the new user and save the token for a later step in the article.
-
-
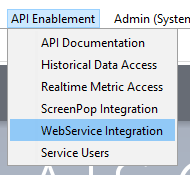
Steps to get this working on the CCaaS or Chronicall Side:
- Create a new WebService Profile under WebService Integration in the desktop app
 [block:image]{"images":[{"image":["https://files.readme.io/0fa7cce-image.png",null,null],"align":"center","sizing":"1000px"}]}[/block]
![https://files.readme.io/0fa7cce-image.png",null,null],"align":"center","sizing":"1000px"}]}[/block](https://files.readme.io/0fa7cce-image.png%22,null,null%5D,%22align%22:%22center%22,%22sizing%22:%221000px%22%7D%5D%7D%5B/block)
-
The Target URL will be the URL for the Flow in Salesforce
As an example:
https:// myproductionorg.my.salesforce.com/services/data/v59.0/actions/custom/flow/API_Name_Of_My_Flow -
Set the HTTP Method as POST
-
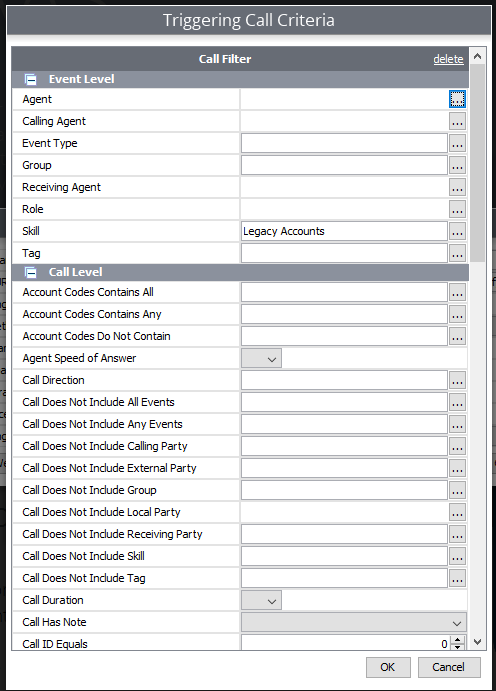
Set the Triggering Call Criteria
-
Here you'll be able to define what type of call or event within a call should trigger the flow request.
-
As an example, this was set to trigger so long as the call included the skill "Legacy Accounts"
-
-
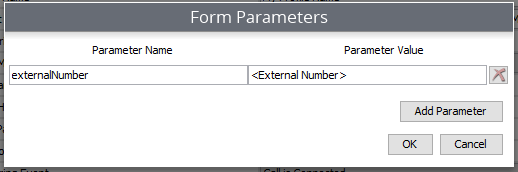
Set whatever parameters you need under Form Parameters, with the Parameter Names matching perfectly with the variables needed in the Salesforce Flow.
-
In this example, the flow needs a externalNumber so we're using the following form parameter:
-
-
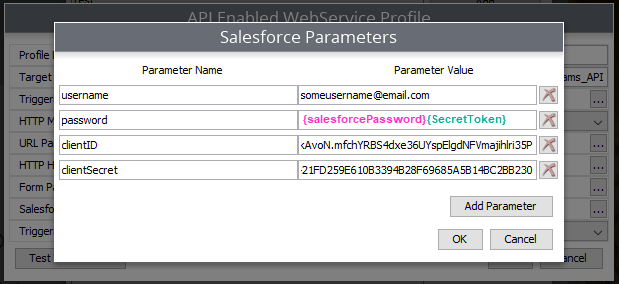
Unders Salesforce Parameters, add 4 Salesforce Auth rows with the following names and values (the names must be typed exactly as listed for it to work):
-
username
- value is the username set up in Salesforce
-
password
- value is the password for that user AND the security token collected in salesforce
- enter with NO spaces between the user's salesforce password and the secret token
{salesforcePassword}{secretToken}
-
clientId
- value is the Consumer Key for the connected app in Salesforce
-
clientSecret
-
value is the Consumer Secret for the connected app in Salesforce
-
-
-
You'll define when the flow is triggered with Triggering Event. A common example is "Call is Connected" to trigger the flow once the agent answers the call.
Be sure to save your settings.
Once those few things are configured, when the Triggering Call Criteria is/are met and the Triggering Event happens, the Salesforce Parameters will be sent into the flow specified in the Target URL.
Updated 15 days ago