
CCaaS - Outlook Email Configuration
Configuring Outlook to work with Xima's CCaaS Contact Center Solution
Summary
This article covers how to set up inbound email with Outlook for your Contact Center within Xima's UCaaS
Contents
- Add Email Account
- Add Email Routing Rules
- Follow an Inbound Email
- Licensing and Assigning Agents
- Agent Experience
- Reporting/C2G Review
- Requeuing Emails
- Last Agent Routing
- Things To Note
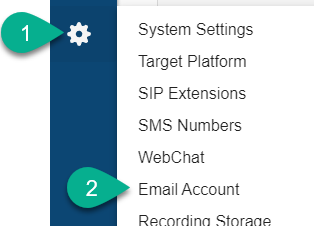
Add Email Account
-
Select the Gear Icon, and then Email Account\
-
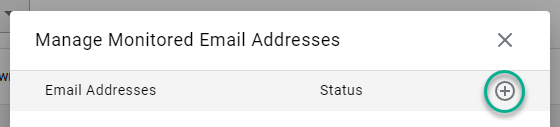
Select the + sign to add a new email account, to add the email account that we will be pulling emails from\
-
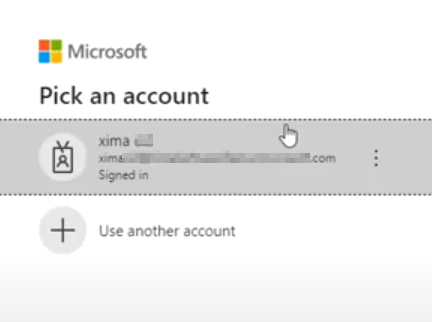
Select your desired email account to pull emails from for your contact center group, and then enter the password to validate it\
 \
\
\ -
You should now see your selected email account listed as Authorized\

- NOTE: You can have multiple email accounts listed if you wanted to set up various email inboxes for different support teams
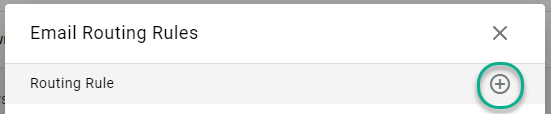
Email Routing Rules
-
Select the Routing Configuration tab, and then Email Routing\
-
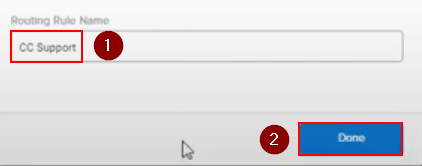
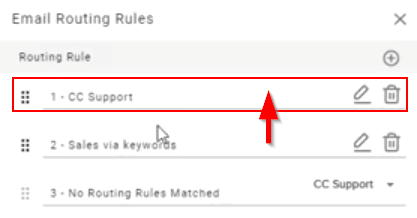
Configure your Email Routing Rules, and note they operate from top to bottom in routing priority\
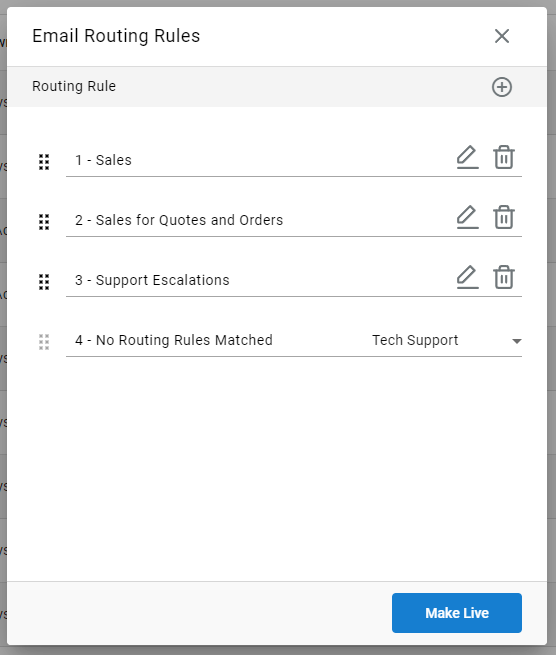
- You should see a default rule for the parameter No Routing Rules Matched
- This is for when an email doesn't match any other routing rules.
- Select what destination you would like emails that do not match a routing rule to route to.
- For example, we have selected "CC Support" in the above screenshot
- You should see a default rule for the parameter No Routing Rules Matched
-
To build a new routing rule click the + sign under Email Routing Rules\
- Set the Destination Skill from your available skillgroups\
 \
\
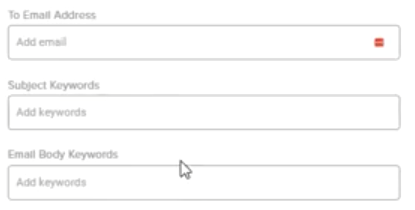
\ - Pick just one of the following three parameters to help define your Routing Rule
- NOTE: You only have to pick one of the following three options to complete a Routing Rule\
 \
\
\
- To Email Address - Note that this filters on the To email address, not the From email address
- Subject Keywords - If a certain keyword is in that subject line, we can use your specified parameter to route the email
- Please note, that if you use multiple keywords as shown below, the email subject will need to include every word selected to meet this routing rule
- For example below, this parameter would only route emails with both Warranty and Help in the subject line\
 \
\
\
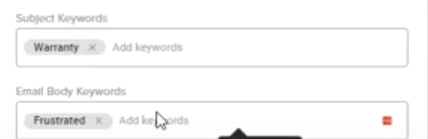
- Email Body Keywords - This parameter will search the email body for words matching the selected routing rule, and if you select multiple keywords this routing rule will also need every word selected to match if you use multiple body keywords
- NOTE: If you put a word in both Subject Keywords and Email Body Keywords, it will be an OR rule instead of an AND rule, as it is with multiple subjects on the same line
- In this example below, it would route emails with Warranty in the Subject, or Frustrated in the email body. It would not have to match both rules to route appropriately\
 \
\
\
- In this example below, it would route emails with Warranty in the Subject, or Frustrated in the email body. It would not have to match both rules to route appropriately\
- NOTE: If you put a word in both Subject Keywords and Email Body Keywords, it will be an OR rule instead of an AND rule, as it is with multiple subjects on the same line
- NOTE: You only have to pick one of the following three options to complete a Routing Rule\
- Give your Routing Rule a Routing Rule Name, and then select Done\
 \
\
\
- NOTE: You can move this created routing rule to the top of the list if you want it to be prioritized over the other listed routing rules\
 \
\
\
- NOTE: You can move this created routing rule to the top of the list if you want it to be prioritized over the other listed routing rules\
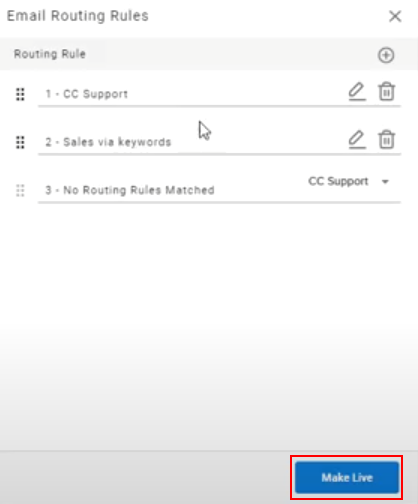
- Select Make Live to complete the Routing Rule\
 \
\
\
- NOTE: Email Routing uses Linear Routing. Therefore, agents with a higher skill level (up to 10) will be prioritized for emails when available
- You can learn more about routing algorithms here
- NOTE: Email Routing uses Linear Routing. Therefore, agents with a higher skill level (up to 10) will be prioritized for emails when available
- Set the Destination Skill from your available skillgroups\
Follow an Inbound Email
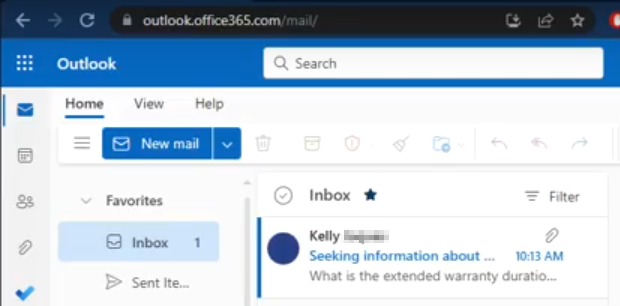
- We sent off an inbound test email that would meet our routing rule
- We can check the emails inbound inbox to verify we have received the test email
- NOTE: You will need to see the email in the email inbox before Xima CCaaS is able to grab the email and route it to an agent
- Please verify the email is hitting your email inbox that we pull from, and that it is matching an Inbound Routing Rule for emails if your agent isn't being presented with the email\
 \
\
\ - You should be able to see the email in question after it is processed in the PostProcess folder created by Outlook if using Outlook, as well as the Sent Items once forwarded\
 \
\
\
- Please verify the email is hitting your email inbox that we pull from, and that it is matching an Inbound Routing Rule for emails if your agent isn't being presented with the email\
Licensing And Assigning Agents
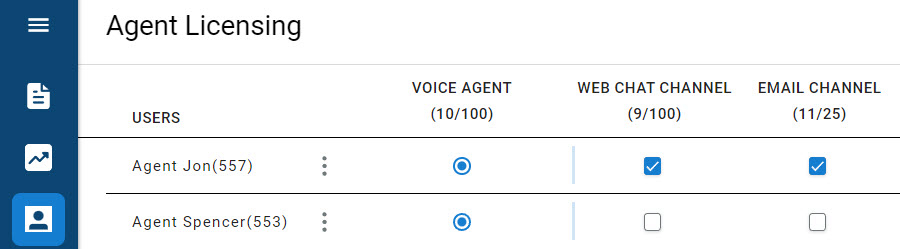
- While logged into Xima CCaaS as an admin, navigate to User Management►Phone/Agent Licensing
- Locate each agent you'd like to enable for email channels and ensure they either have one of the following licenses assigned:
- Email Channel
- Multi-Channel\
 \
\
\ - Save your changes before exiting
- Next we will assign your agent to the appropriate skill
- Note: You must assign skill level for agents whom you'd like to participate in getting emails for that skill
- As an Administrator in CCaaS, navigate to Contact Center ► Skill Levels
- In the cell aligned with the agent's row and the skill column, give the agent a skill number
- Ensure "Email Session" is enabled
- Save your changes before closing
- In this example, I've assigned Jon to be able to take CC Sales emails at a high priority and enabled his email session ability\
 \
\
\
Agent Experience
- If an agent is logged in and ready to receive an inbound email they should see the (An incoming email...) pop-up below indicating that an email has been assigned to the agent for review\
 \
\
\ - The email should open up in the main panel, allowing you to view the email, as well as any attachments\
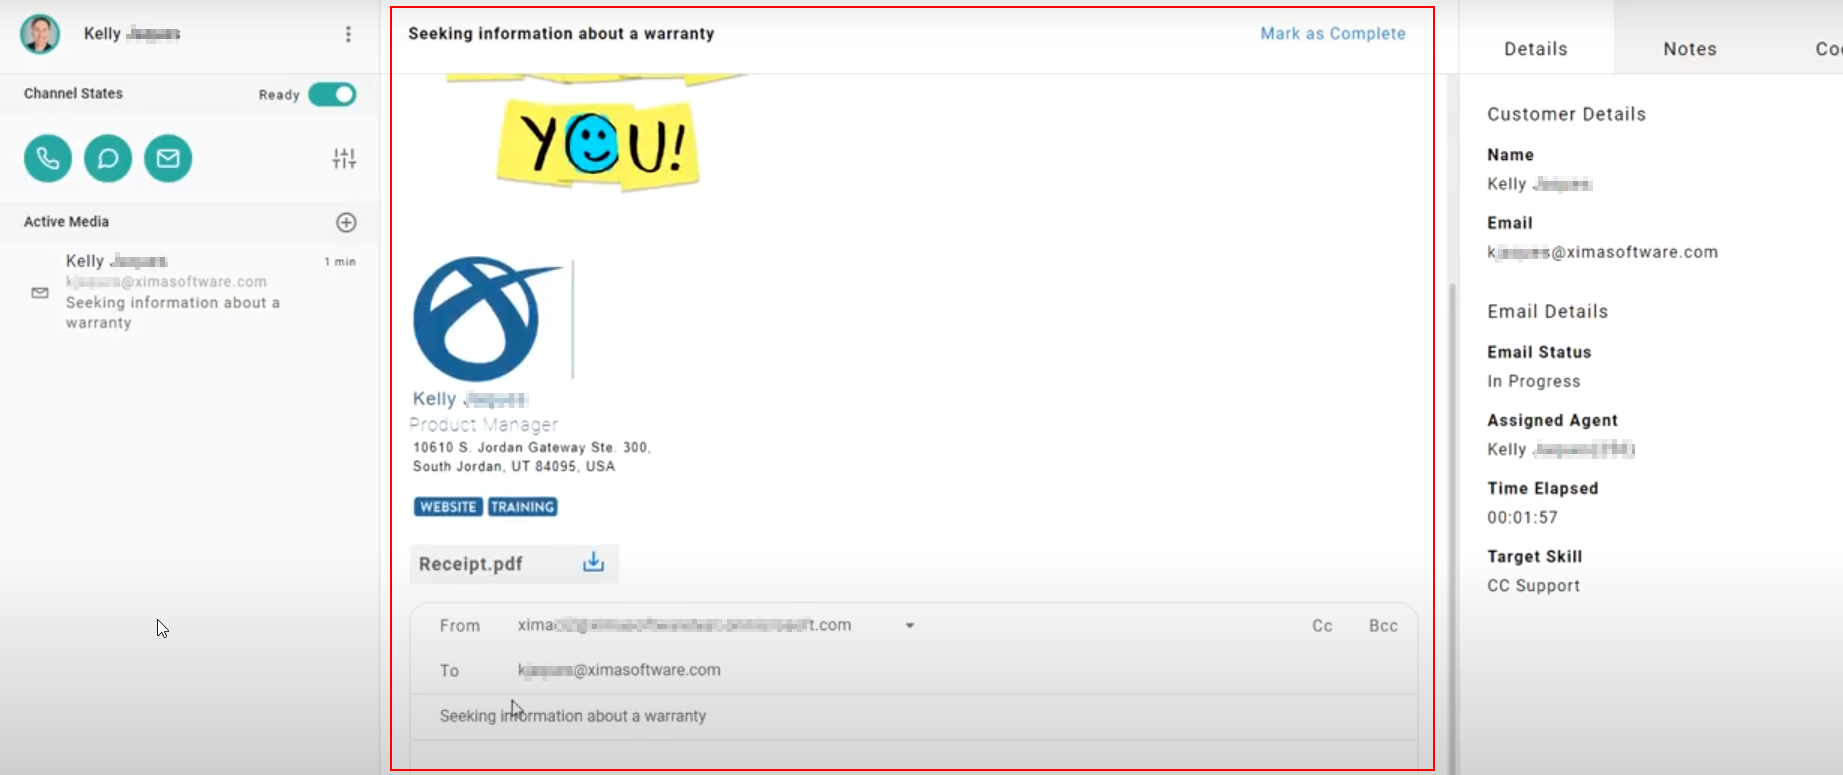 \
\
\
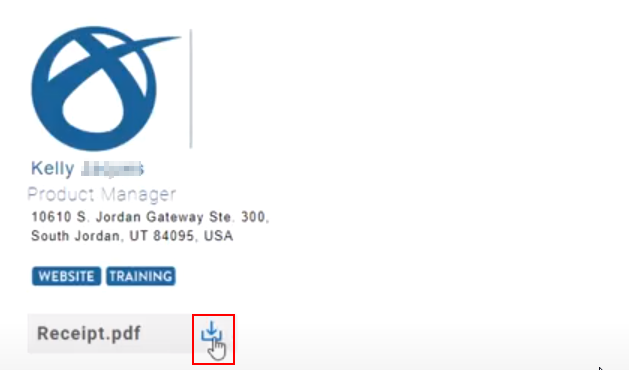
- NOTE: You can click this icon to download any attachments\
 \
\
\
- We pull the attachments from the email server, they are not stored on our end
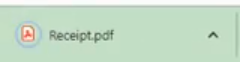
- You should see the downloaded attachment in your browser\
 \
\
\
- NOTE: You can click this icon to download any attachments\
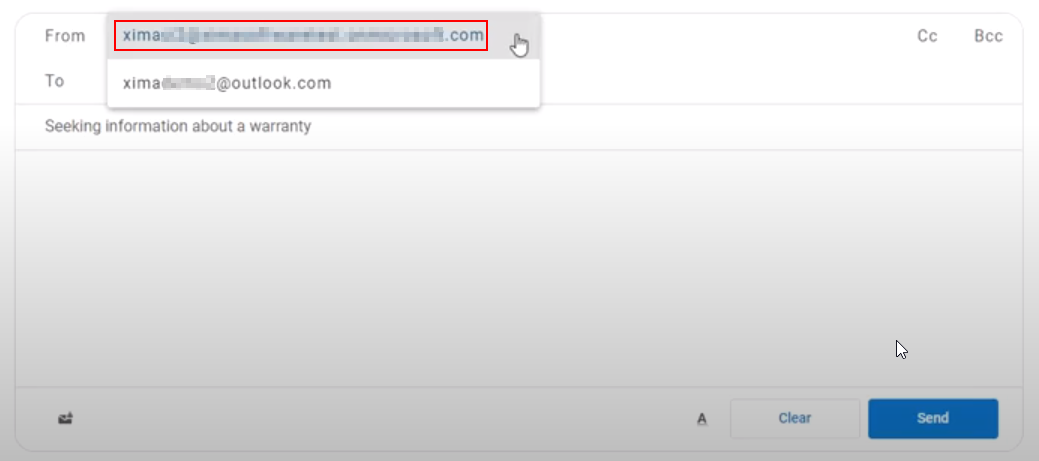
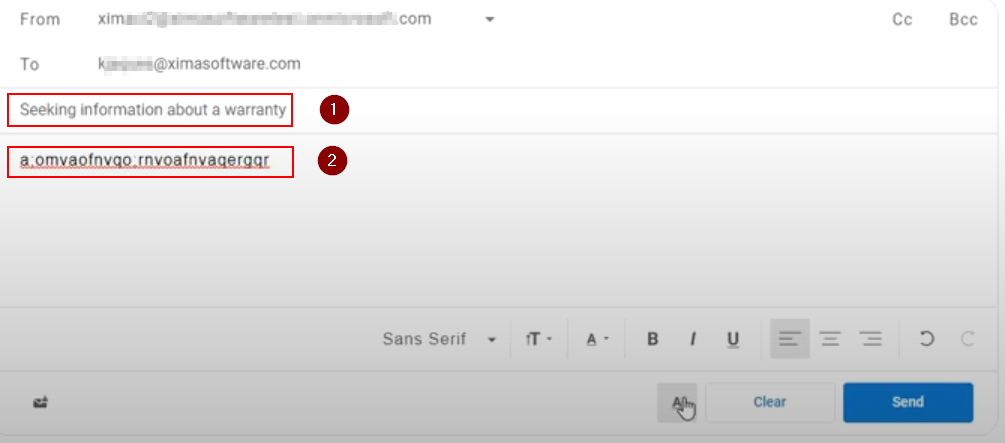
- You will want to verify your From email address when replying to an email, as it should be from your team email box and not from the agent themselves\
 \
\
\ - Verify the To address as well, but as with the From field it should auto-fill, and automatically add anyone Cc'd onto the email\
 \
\
\ - Fill out the Subject and Body of the email to reply to the customer\
 \
\
\
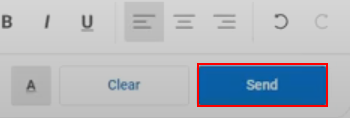
- Text Editor Options
- Font
- Font Size
- Font Color
- Bold
- Italic
- Underline
- Left Indent
- Centered
- Right Indent
- Undo
- Redo
- Clear
- Send
- Send the email once complete\
 \
\
\
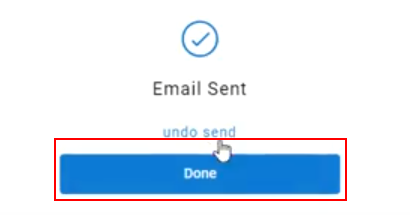
- NOTE: You also need to select Done to complete the sending of the email, or undo send if you wish to cancel your Send request\
 \
\
\
- NOTE: You also need to select Done to complete the sending of the email, or undo send if you wish to cancel your Send request\
- Mark as Spam The agent can also flag the email as spam
- NOTE: This does not block the email sender\
 \
\
\
- NOTE: This does not block the email sender\
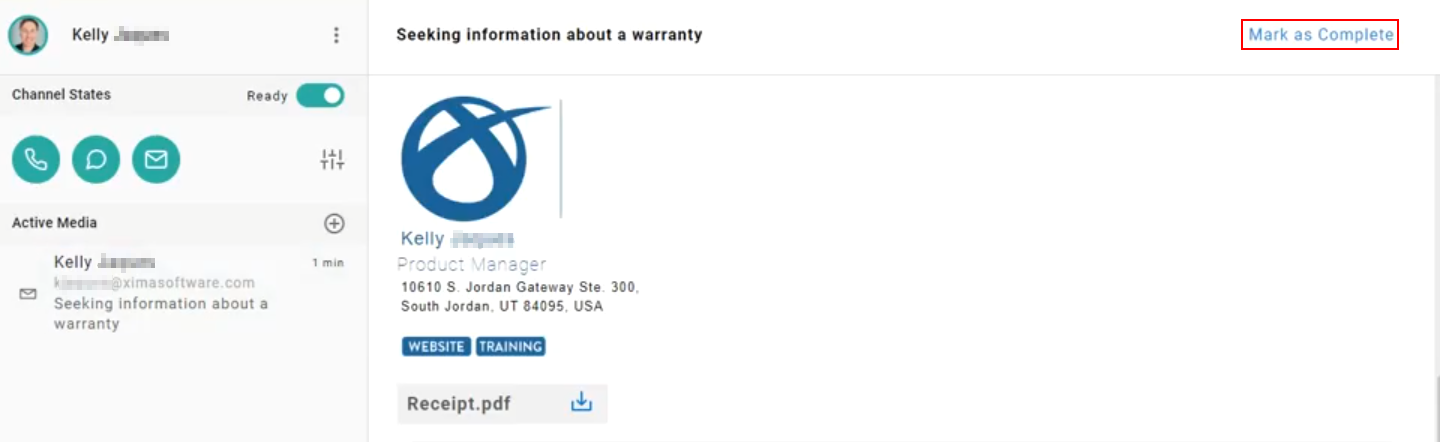
- Mark As Complete - This option is for when the email chain has been resolved, and the customer no longer needs help
- For example, if you resolve a customer's issue and say have a great weekend, and they respond, "You too!", you can resolve the email chain by selecting Mark as Complete vs. responding to them\
 \
\
\ - NOTE: Emails can intrude onto an agents session if the agent is currently on a Webchat
- Emails will not intrude onto active phone calls
- Phone calls and Web Chats can intrude onto an agent's active email session as they take priority over email requests
- For example, if you resolve a customer's issue and say have a great weekend, and they respond, "You too!", you can resolve the email chain by selecting Mark as Complete vs. responding to them\
- Text Editor Options
Cradle to Grave - Emails
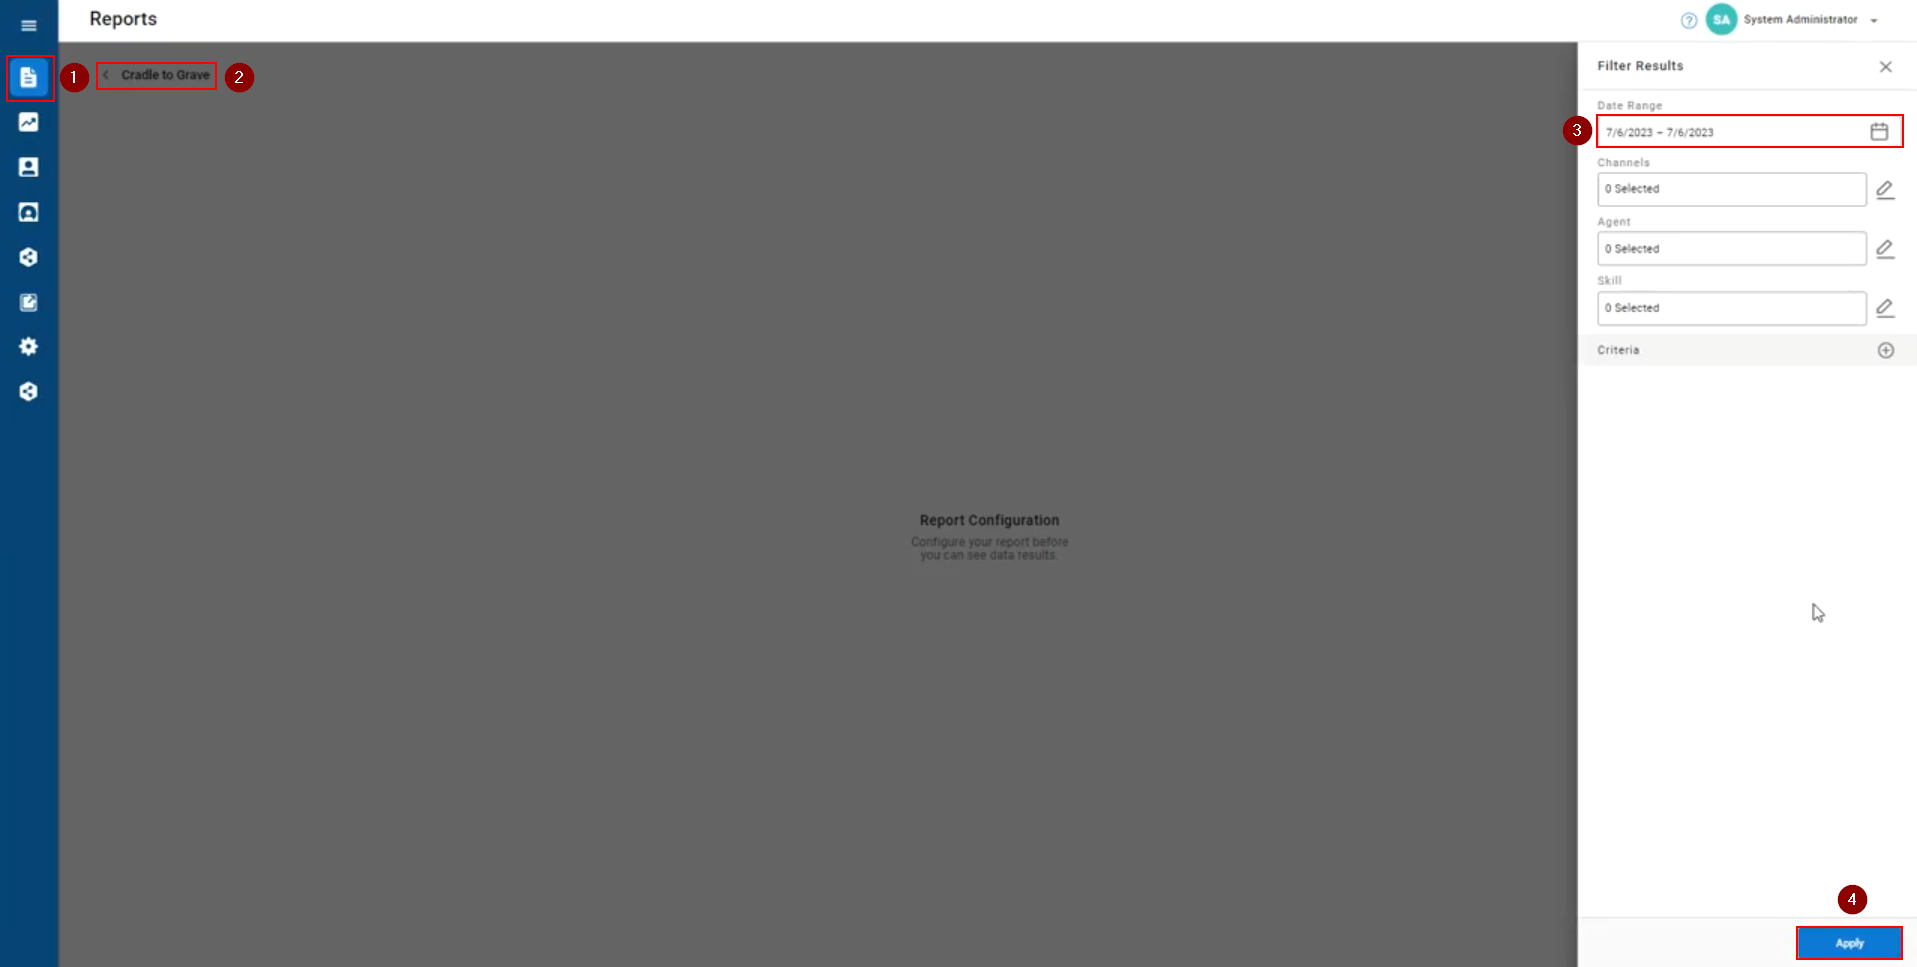
- Pull up the email in Cradle to Grave
- Reporting > Cradle to Grave > Date Range > Apply\
 \
\
\
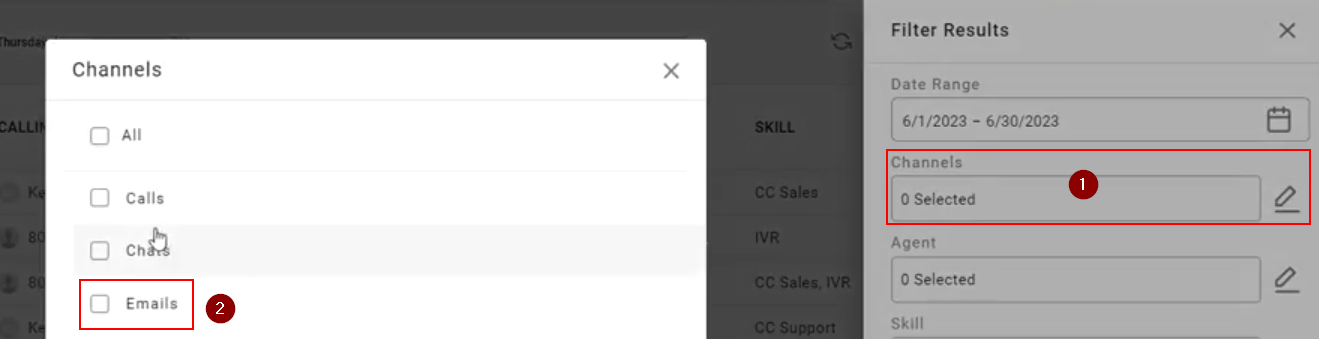
- You can also filter for just Emails, by selecting Channels > Emails > Apply\
 \
\
\
- You can also filter for just Emails, by selecting Channels > Emails > Apply\
- Reporting > Cradle to Grave > Date Range > Apply\
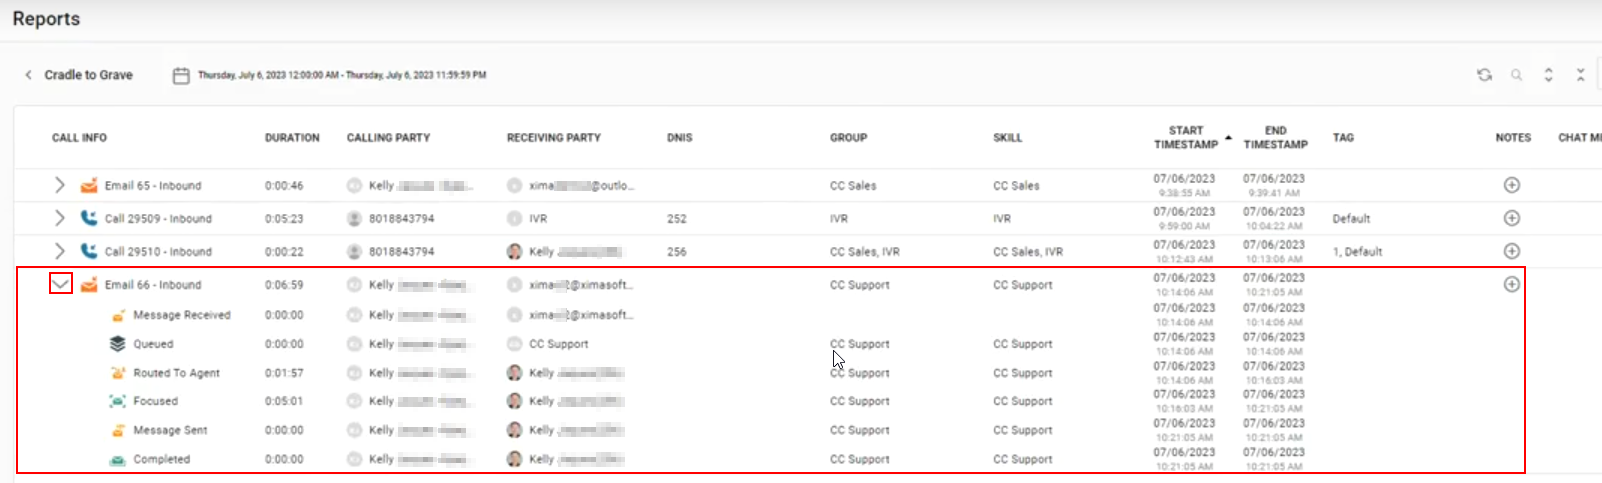
- You will see your Email in Cradle to Grave as shown below
- Here we clicked on the > arrow to expand the email to see event-level details on this email\
 \
\
\ - Event Details
- Message Received - We pulled the messaged from the listed mailbox for processing
- Queued - The email was placed in queue to be handled by the next available agent
- Routed To Agent - This is when the email was routed to an agent
- Focused - This was the time the agent was focused on this email in particular and had it pulled up on their screen
- Message Sent - This is when the agent finished the email and clicks send
- Completed - You will see this at the end of every response, and it indicates as a close to that Cradle to Grave record
- Note to Supervisor - You can select (...) from the email listed in Cradle to Grave and then select View Email or Mark as Complete
- This can be helpful if, for example, you had an agent get an email before going out of the office for a few days and the email needs a response or to be closed
- Here we clicked on the > arrow to expand the email to see event-level details on this email\
Reporting On Emails
- Listed below are some helpful tips and tricks for reporting on emails
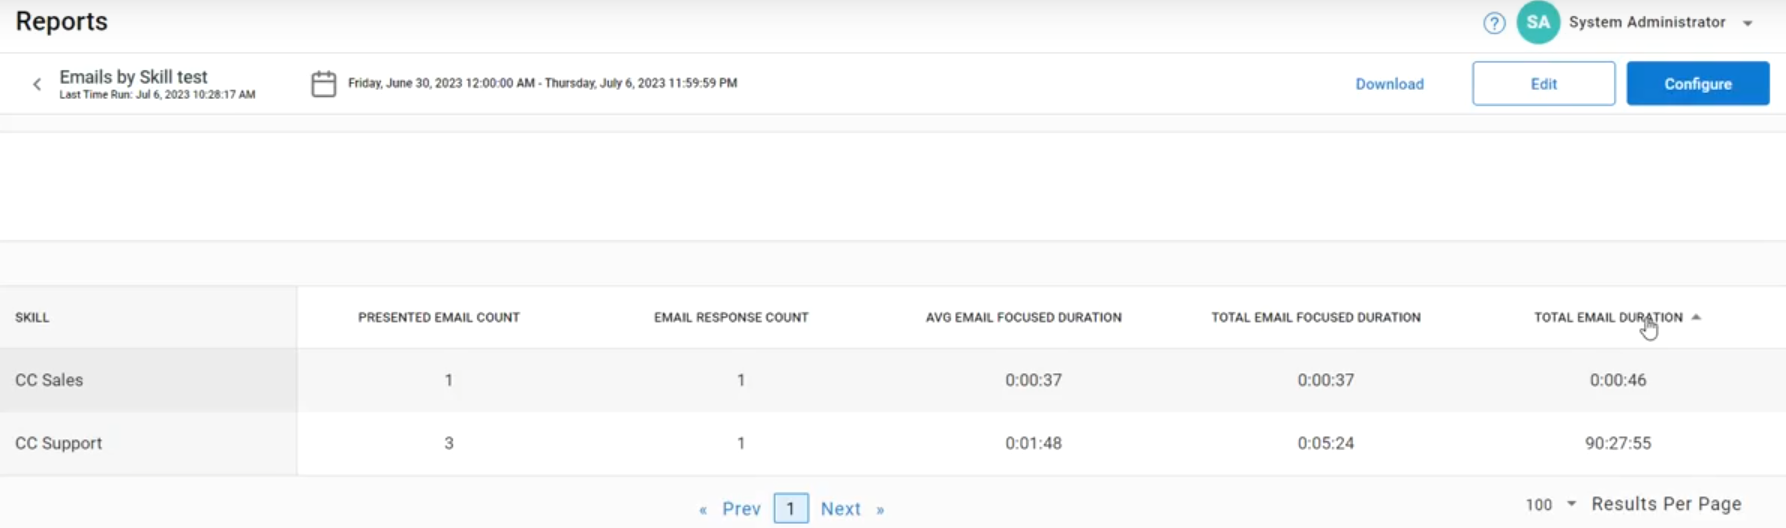
- You can report on emails by your selected skills\
 \
\
\
- It will show emails received, emails completed, email responses, how many emails have been marked as spam, average focus time, average duration
- You can also report on emails by Agents
- For a detailed email report, CCaaS will list the individual emails row by row
- You can report on emails by your selected skills\
Requeuing Emails
- This prevents an email from remaining with an agent who is gone or is not giving the email proper attention
- If requeued, the email will be at the front of the queue for the next available agent
- We'll requeue emails after (*subject to change):
- 3 Hours - Assigned to an agent but the agent logs off before starting a draft (excluding transferred emails)
- 24 Hours - Assigned to an agent and a draft is made but unsent
- 72 Hours - Transferred to an agent but agent is unfocused on the assigned email
Last Agent Routing
- Prioritizes the last corresponding agent for email threads
- "Last Agent" applies when:
- Same Email Thread - Does not apply if a new thread is sent in by the external party
- The customer reply is within 7 days
- Xima will assign a returned email to the last associated agent if:
- The agent is logged in and the email channel is enabled
- Last agent emails will bypass DND and appear in their active media tray
- If the last agent is logged out, the email will be routed to the next available agent
Things To Note
- Only available in Outlook at this time
- Licensing
- Available in Xima CCaaS only
- Automatically included in Mult-Channel Agent License
- Attachments
- We do not actually store attachments in our service
- We fetch them from the email service when selected
- If attachments are removed from the original email, we cannot restore them
- Every email response is its own Cradle to Grave record
- Threading is tracked across the entire email chain for Xima troubleshooting, and you can also add the hidden field in C2G "Email Thread" if you would like to show this value
Updated 9 months ago