
Build a New IVR Flow
This article will cover the basics to building a new IVR Flow
-
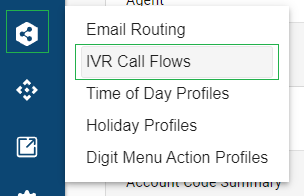
First, open the IVR Flow builder by selecting "IVR Call Flows" from the Routing Configuration menu
-
If it is your first IVR, the editor will open as a blank template ready to be configured.
If you have existing IVRs and you want to build a new IVR, you'll need to select "+ Add New IVR Flow" in the bottom left.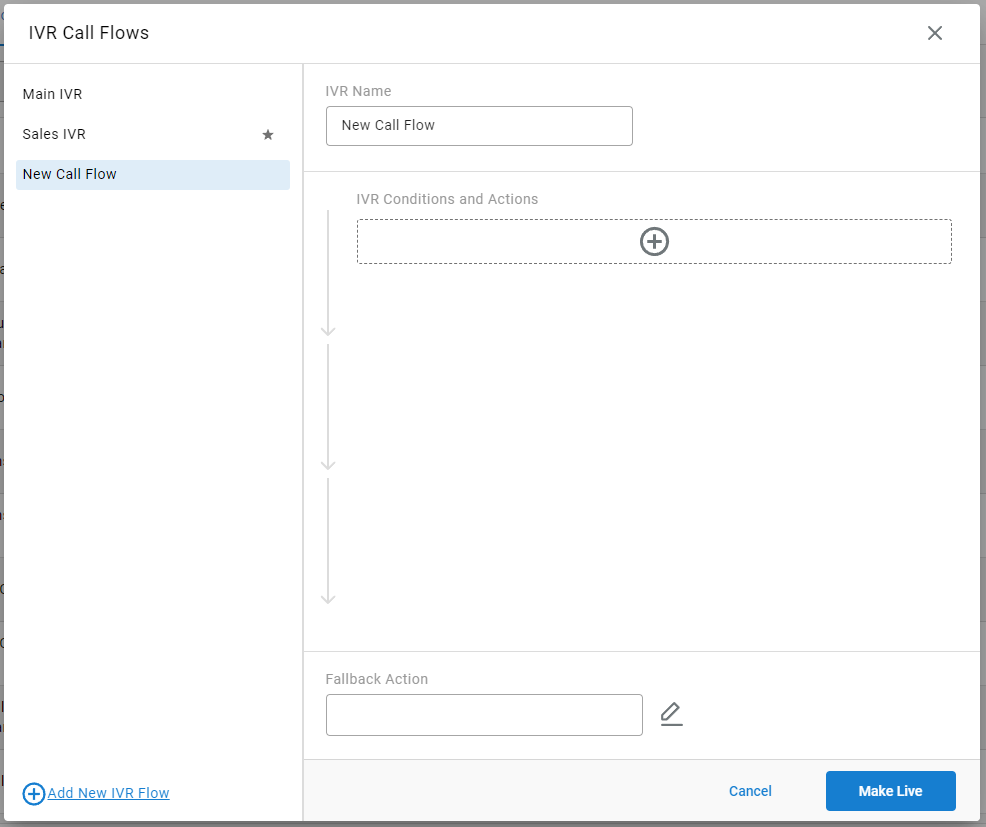
-
Start by giving your IVR a name. This will be how it's displayed in Cradle to Grave and historical logging.
-
Next, select the "+" bar under "IVR Conditions and Actions" to add your first action or condition
-
You'll be prompted to select the desired action or condition from a drop-down list.
-
After a selection is made, simply follow the configuration menu that varies for each type of action or condition
- Be sure to give the action/condition a clear precise name for easy identification later.
-
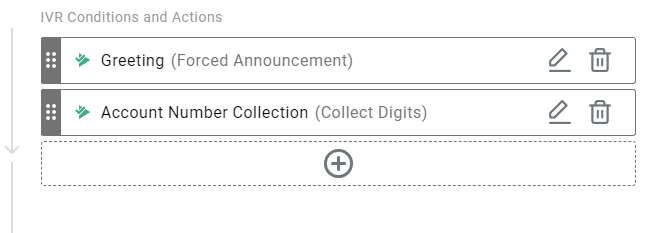
Once an action or condition is configured, it will be added to the IVR flow list with it's given custom name and its action/condition method
-
-
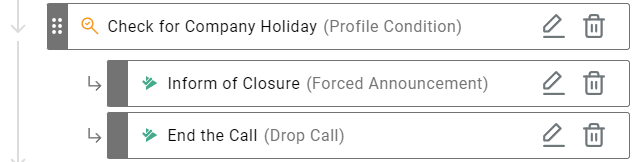
If the added step is a condition, you may add sub-actions to that condition by hovering the mouse just below the condition bar until you see a slightly smaller "+" box. Click the new add box and select an action that should take place if the parent condition has been met.
-
Add additional conditions or actions as needed.
NOTE: Actions, conditions, and sub-action will occur in top-down order. -
The final step is setting a "Fallback Action" to be used in the event a call goes through the full flow and did not end with a terminating action (transfer, drop, or digit menu) OR an issue occurred with an action and a call did not exit the IVR.
The available options are to drop the call or to select a transfer destination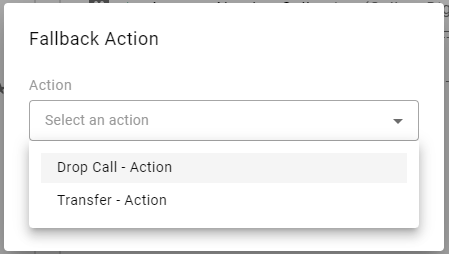
-
Once you've configured the name, steps, and fallback as desired, the final step is to save and apply the IVR. This is done by selecting the "Make Live" button. Note: after the button is selected, it will display as "Live" and will be disabled until there is a new change to save. This will allow you to adjust other IVRs without leaving the menu following your changes.