Configuring Avaya J-Series Phone for Xima CCaaS
This article provides a step-by-step process on how to configure an Avaya J-Series phone for Xima CCaaS. It walks through how to do this for Netsapiens, 3CX, and RingCentral.
On the Avaya J-Series phone, the default login for “Administration” is 27238 (craft). After logging in, you’ll be on the main Administration page, which looks like this.
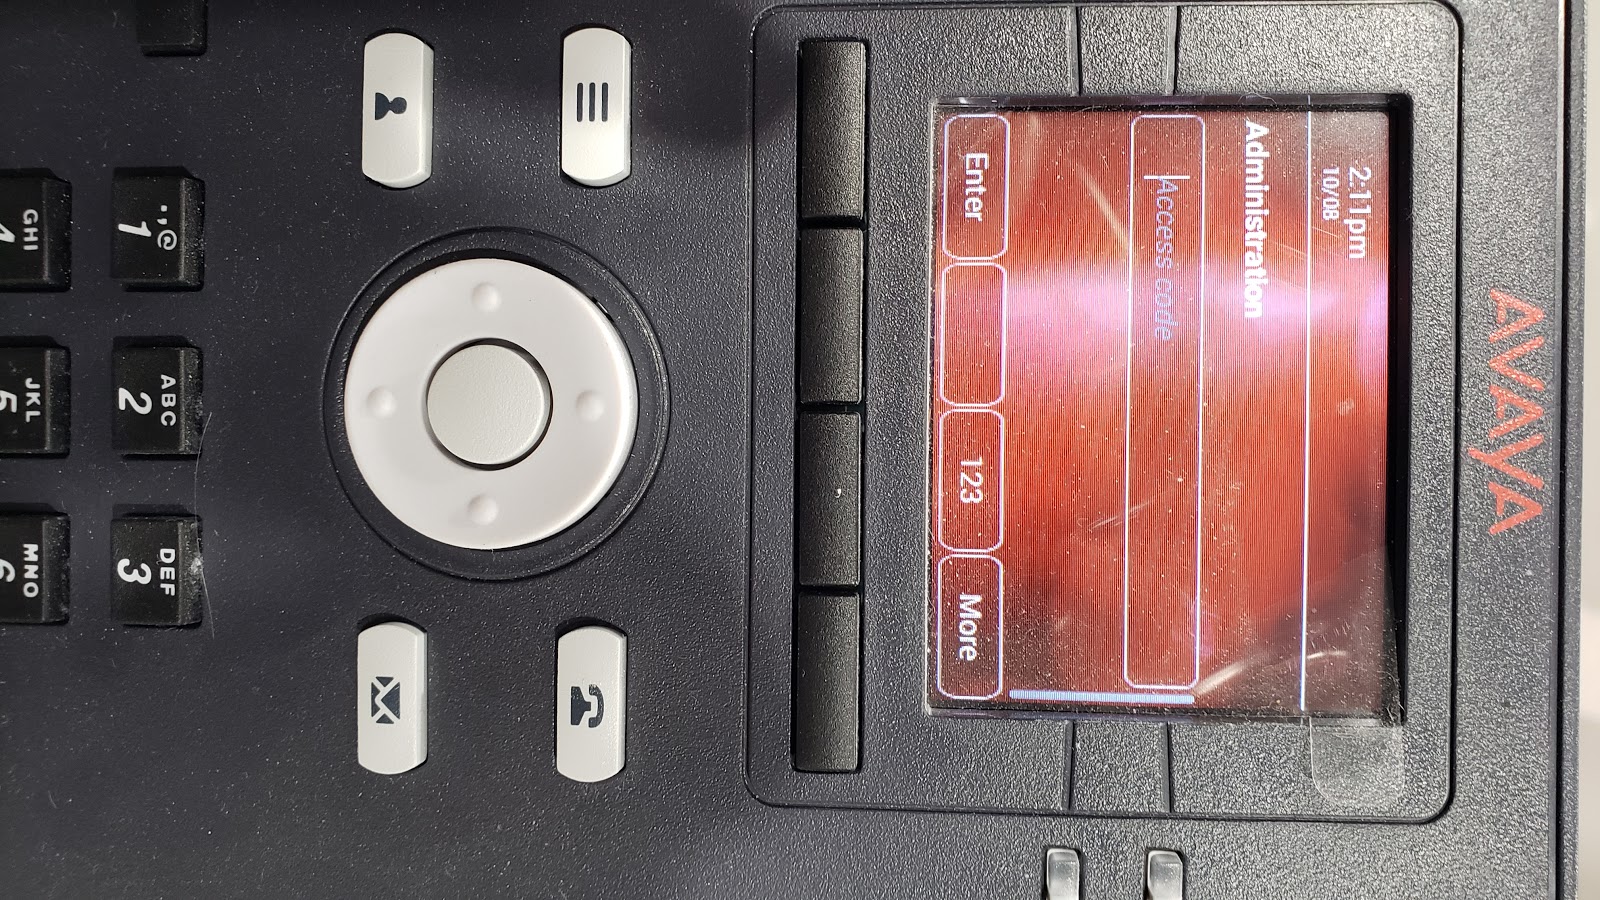
- Scroll down to the SIP section, which is 10 clicks downward.
- Under “SIP Global Settings,” fill in the following fields.
SIP domain - (noted on the portal itself)
Registration Policy - “Simultaneous”
Failback Policy - “Admin”
SIP Proxy Policy - “Manual”
AND - (Only on RingCentral and 3CX) - “Toggle On” the “User ID Field”
If you don’t know where to find this information, you will need to sign into your Netsapiens, 3CX, or RingCentral portals.
Netsapiens
- After logging in, go to “Users.”
- Find the extension in question, click the “Phone” tab, and then click the pencil icon to edit it.

- In the “Model” value (located near the top), click the drop-down menu and select “Manual or Softphone.” This will reveal the information that you need to register the phone to Netsapiens.
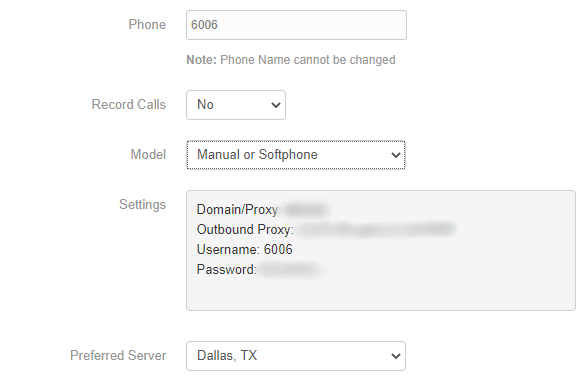
- Make note of the “Outbound Proxy” because you will need it on the next step.
- With the command prompt, use “tracert” <IP address> Do not include the port.
Based upon the above example, it will look like this:
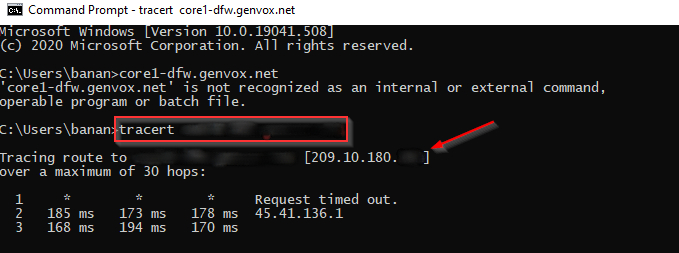
It will produce several IP addresses as it is finished resolving, but you are only interested in the top one.
- This will be entered into the “SIP Proxy List” section, so if you’re still on the “SIP Global Settings Page,” click “Save” and exit out. This will put you back on the SIP main page.
- Select “SIP Proxy List,” and then click “New.”
- Fill out the following fields:
SIP Proxy - (The IP address you resolved via the outbound proxy). Please note that on the phone itself, you’ll need to use the * button to enter the period (dot) symbol in between the numbers of the IP address.
Protocol - TCP
SIP Port - (Usually 5060 with Netsapiens, but not always). Make note of the port number after the Outbound Proxy as noted within the portal. This one just so happens to be 5060.
- The last step, as with all of the platforms, is to go back to the main page. It will look like this.
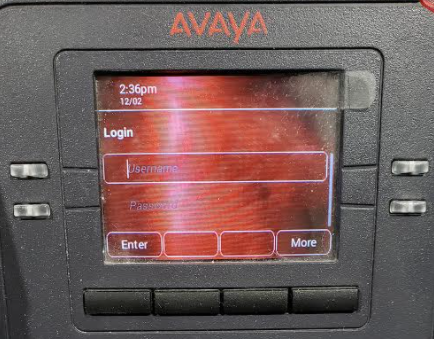
You will enter in the username and password, as noted previously, via the buttons on the phone. (For convenience on this point, see the "Logging into Phone through Web UI" section at the bottom of this article.)
RingCentral
- After logging into the RingCentral Portal, click Phone System > Phones and Devices > User Phones.
- Click the ellipsis tool (which is located under the Actions column) of the extension you wish to configure, and click “Setup and Provision.”
- Click the “Other Phones” tab, then select “Existing Phone.”
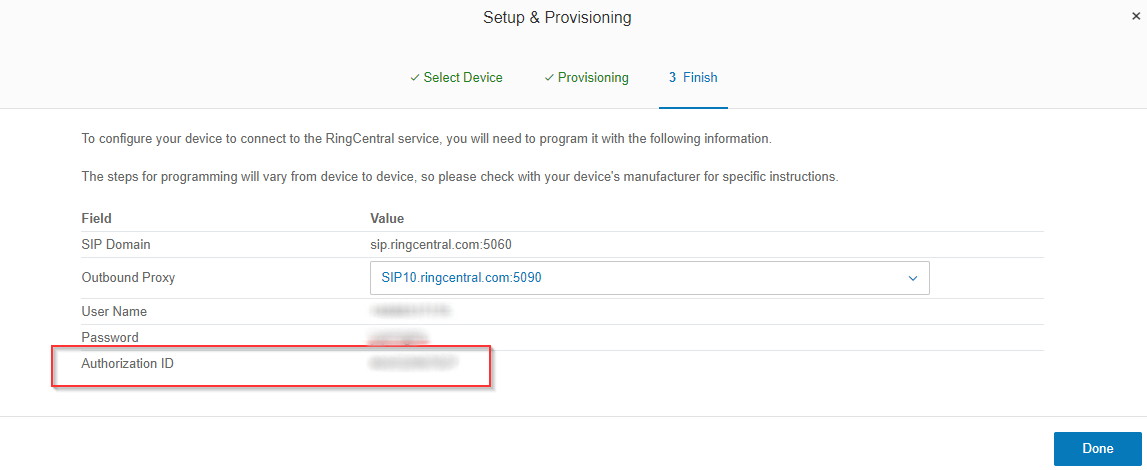
- For Outbound Proxy (and the URL needed to resolve - see above), click the “Outbound Proxy” drop-down.
Since I am in North America, I’ve selected “SIP10.ringcentral.com:5090”.
The last thing to note in this area is the “Authorization ID.” This is unique to RingCentral and will need to be entered in order to register the phone.
See steps above under the “SIP Global Settings.” This is exactly the same process as Netsapiens with the exception of the “User Field Toggle.”
Now that you have seen the steps, you are ready to enter in your username and password.
- Click “Back” until you get to the main page and it prompts you for login and password.
- Enter the credentials as they are outlined within both portals. Keep in mind that if you don’t have the “User Field” toggle enabled, then it won’t show up as an option and you won’t be able to register to RingCentral.
The third click down should reveal the “User ID” field. This is the way to know for sure that you’ve enabled it.
3CX
- After logging into the 3CX Portal, go to “Extensions” on the left-hand side bar. Select the extension you wish to provision.
- Before moving on, go to the “Options” tab first.
- Be sure that this option of “Disallow use of extension outside of LAN…” is disabled. It is enabled by default on every new user.
- Also under the “Troubleshooting” section near the bottom, be sure that “PBX Delivers Audio” is enabled.

- Once that is done, go to the “Phone Provisioning” tab, which is at the center of the page at the top. Take note of the ID and Password.
- This uses the same “Authorization ID” that RingCentral does, so be sure that you’ve enabled the toggle as outlined above.
See steps above under the “SIP Global Settings.” This is exactly the same process as Netsapiens and RingCentral (noting that RingCentral has the addition of Authorization ID).
Logging into Phone through Web UI
- After logging in as an Admin, go to the top option “IP Configuration,” and then “Ethernet IPv4.”
It should look like this:
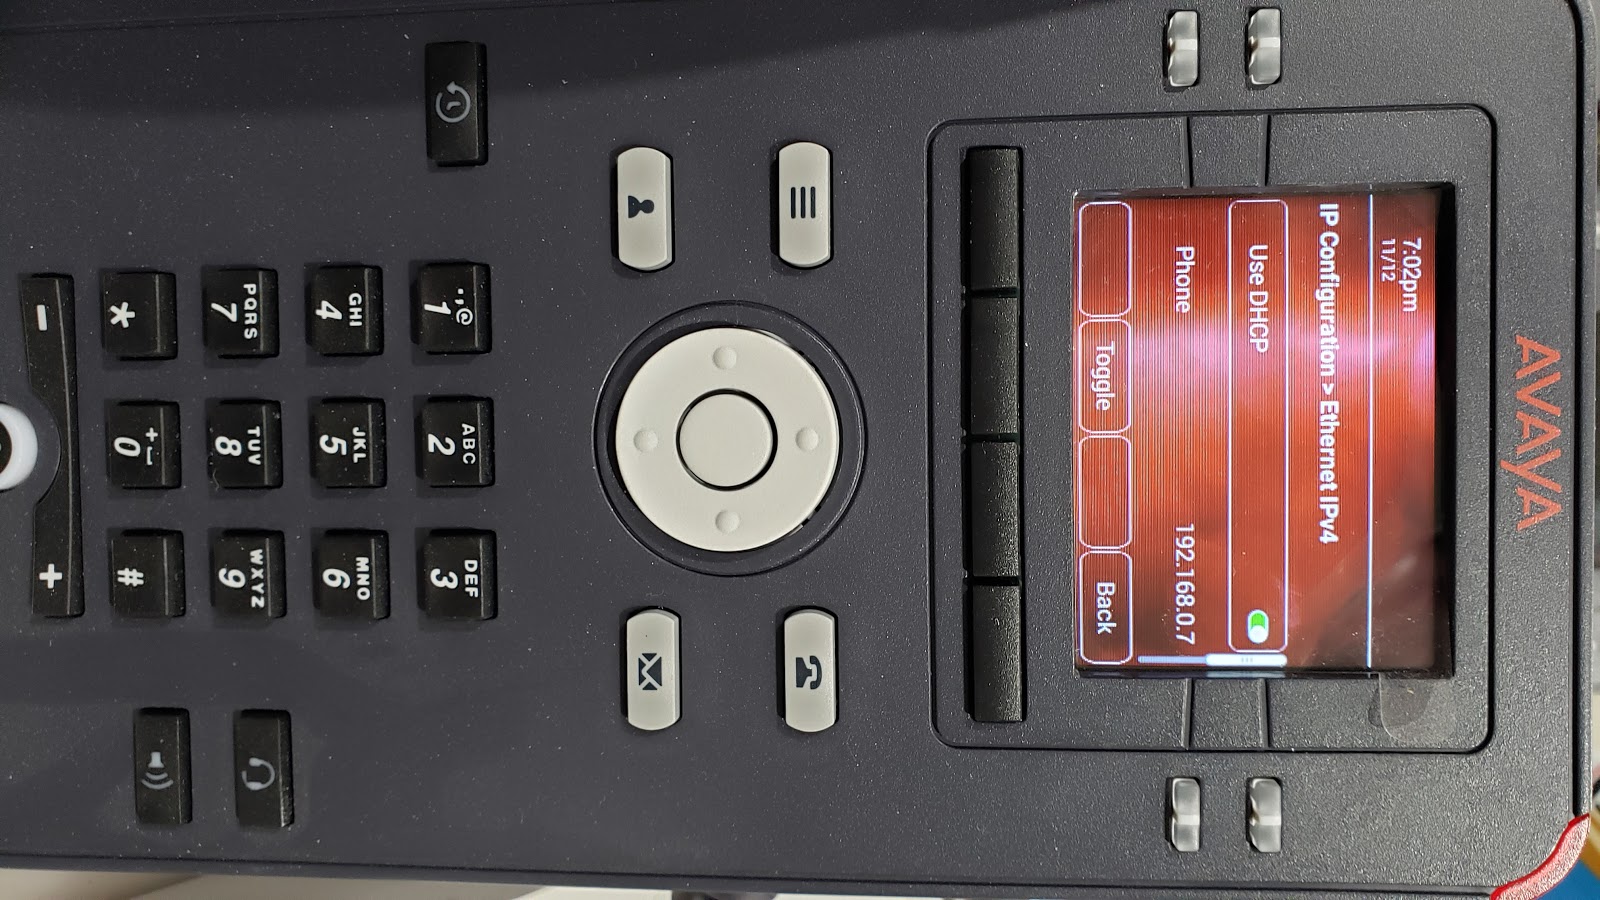
- Under the “Phone," you will see the IP Address to access the phone and login via the web UI. In this example, I would go here: https://192.168.0.7
- This will then ask for login credentials.
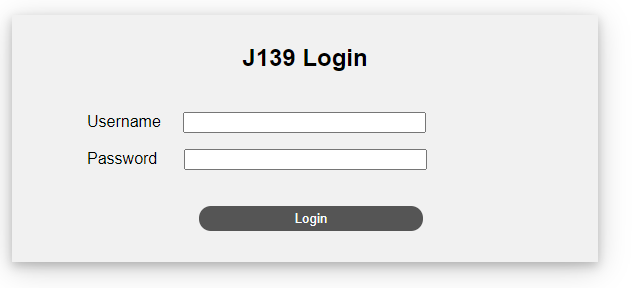
The default login is:
Username: admin
Password: 27238 (which spells craft)
- Upon login it will ask you to change your password, so feel free to change the password to a password of your choice.
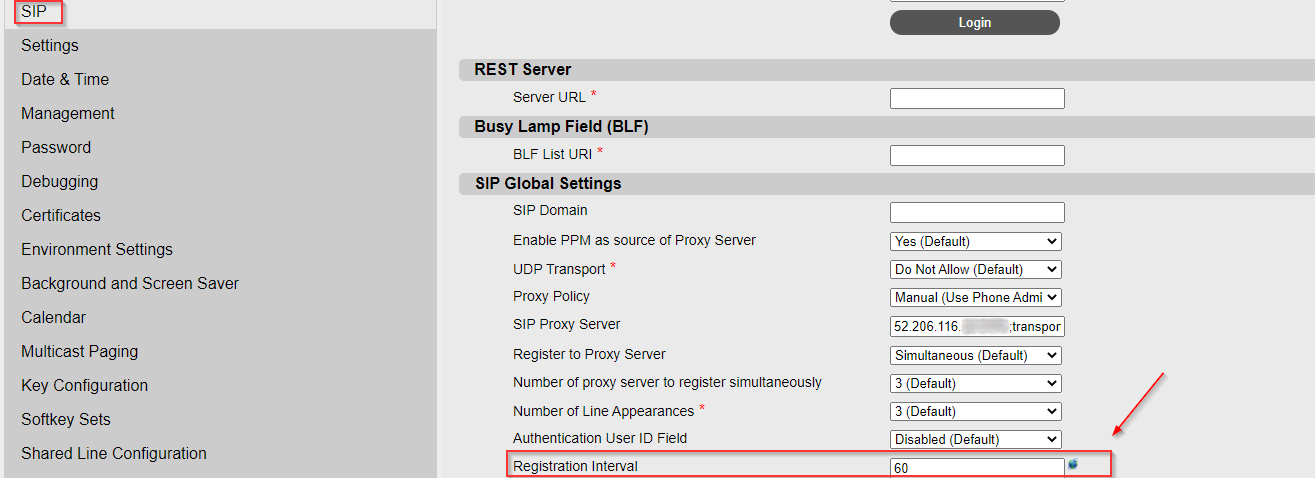
You'll be changing your settings under the SIP section most of the time.
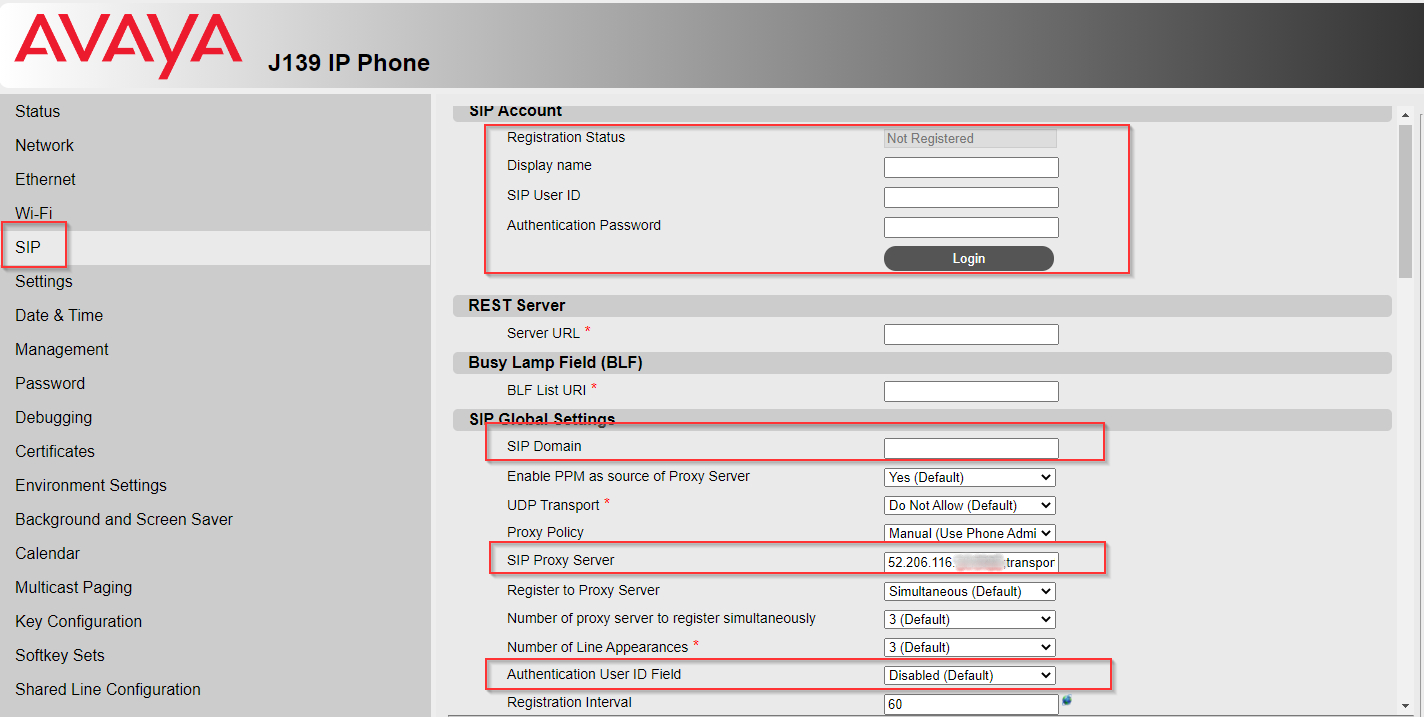
This will be the same as the steps above, but instead of using the dial pad of the phone itself, you’ll be able to type them or toggle them in here.
It’s very important to understand that these phones default to 900 for the duration of “Registration Interval." This doesn’t allow the phone to play very nicely with Xima CCaaS, so it is suggested that you change the Registration Interval to 60. View an example of this Registration Interval number change in the image below.
Updated 3 months ago
