
WebRTC Outbound DID Configuration
This article covers how to build Outbound DID's and how to configure them for both Queue Callback, as well as regular outbound standard calls.
WebEx Requires a Different Configuration
If your UC is WebEx, please follow a different article FOUND HERE for the proper steps.
Reminder: Xima integrates as an extension or extensions to make and receive calls on behalf of your call platform. So this setup is no different than a traditional CCaaS setup.
Configuring Outbound SIP Extensions
NOTE: If you add a new SIP extension, it unregisters all sip extensions, and then registers them again, so we always recommend doing these steps after hours
-
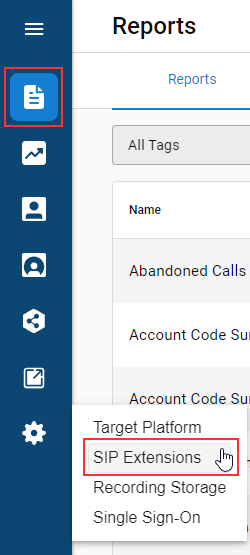
You can view your Outbound Extensions by clicking on the Gear Icon, and then SIP Extensions inside the Xima CCaaS Interface. The Inbound Extensions are for inbound call traffic to skills, so we can ignore those for now.\
-
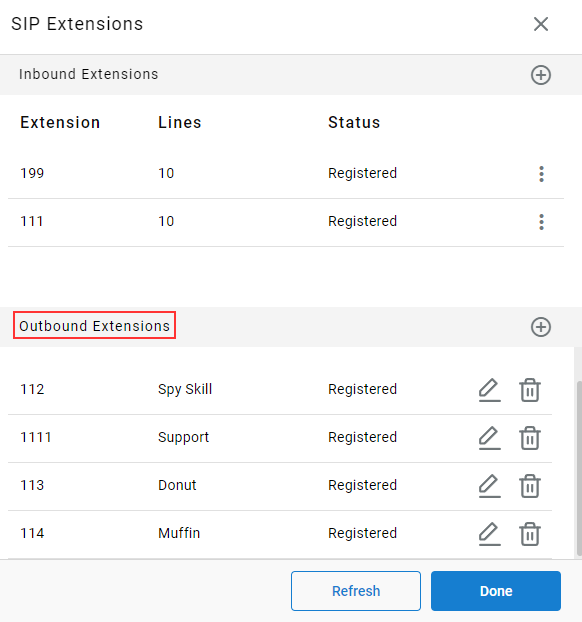
Example of Outbound SIP Extensions showing up after created and registered inside the Xima application\
-
Outbound Extensions -
-
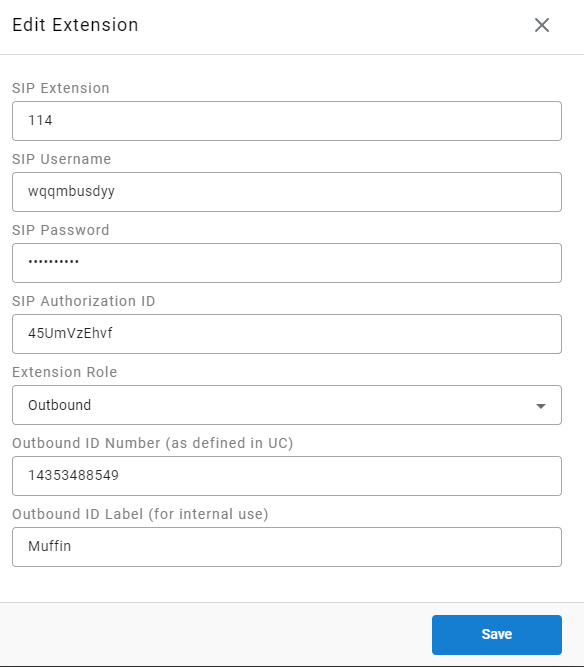
You will want to fill out each of these credentials for the outbound extension you are creating
-
SIP Username
-
SIP Password
-
SIP Authorization ID
-
Select Outbound for the Extension Role
-
Outbound ID Number - Extensions can have an Outbound ID configured for outbound calls
-
As defined in your phone platform for the SIP extension
-
In this example, SIP Extension 114 has the below number as the Outbound Call ID on the platform side\
-
-
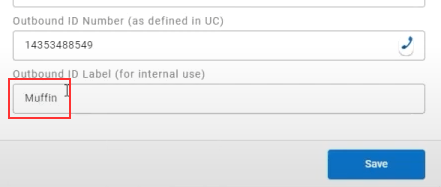
You will also want to configure an Outbound ID Label so your agents see this as an option when dialing out using WebRTC
-
Agents can pick this selection from a drop-down when placing outbound calls via the WebRTC agent client as shown below\
-
Click Save and Confirm to save your changes
- WARNING: This will unregister and then re-register your sip extensions, so ensure to do this after hours so you do not run the risk of dropping any live calls during business hours
-
-
-
-
Configure Callback Caller ID for Skillgroups
-
You can also set specific skills groups to use a specific label for outbound calls in the Java Admin Portal using our Desktop Client as shown below
-
Contact Center Configuration > Skill Management > (...) for Skill in question\
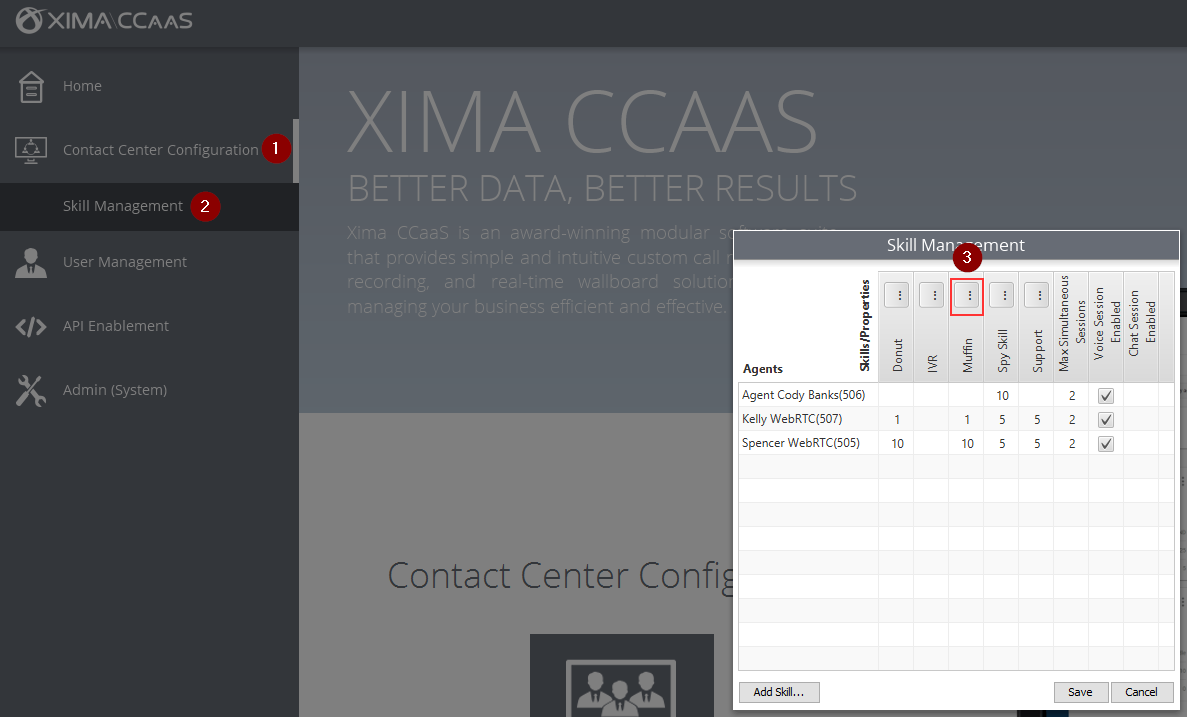
-
Select your desired Callback Caller ID from the drop down menu in the Skill Definition Settings\
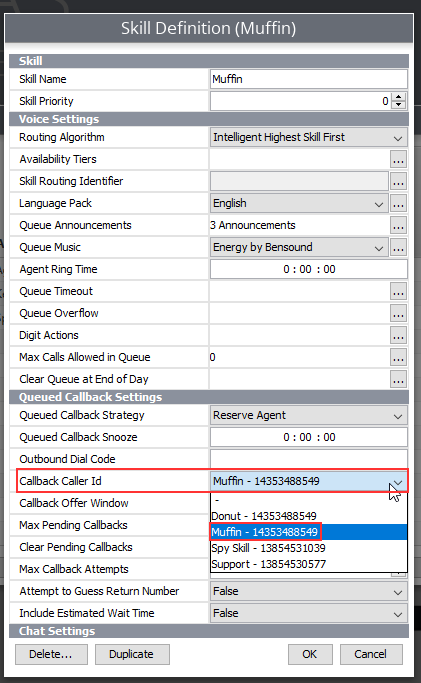
-
Click OK, then Save on the next menu to save your changes
-
-
Now when a QCB (Queued Callback) goes out from this skillgroup, it will have the associated Callback Caller ID you configured in the Java Admin Client
Agent Experience Inside Contact Center Agent Client (CCAC)
-
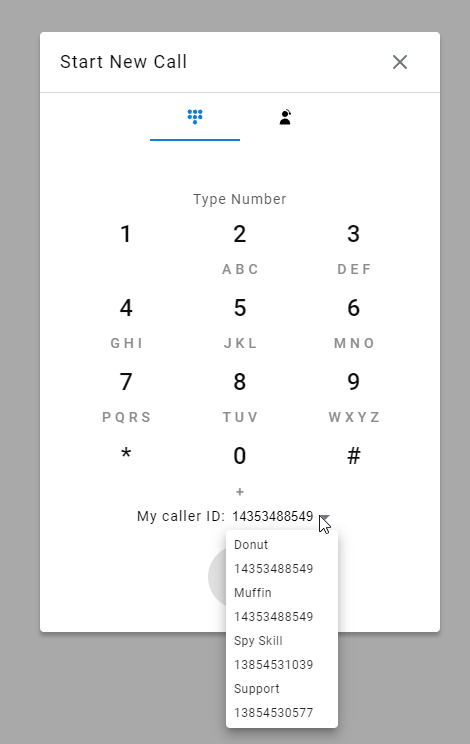
When an agent uses WebRTC to dial out, if configured as shown above, they should see some options available to associate with their outbound call as shown in this drop-down box\
-
Once they place an outbound call, it displays the outbound caller ID for that outbound call under the agents name and extension as shown below\
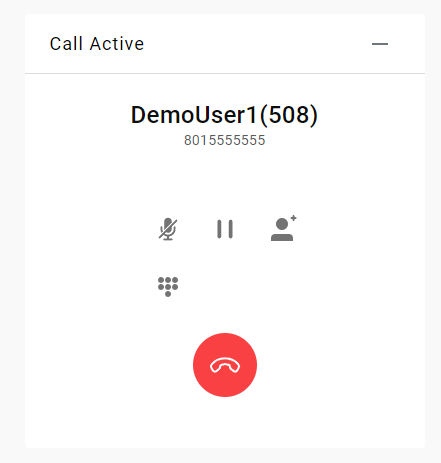
- Note: It will cache the last outbound call ID you used for your next call, so ensure your agents are selecting the correct outbound call ID from the drop-down box if you have multiple options
Video Training
Updated 8 months ago