
Routing Using Call Routing Rules (formerly Skill Routing Identifiers) in Metaswitch
This article provides information on how to route using the Xima CCaaS feature Call Routing Rules (Formerly Skill Routing Identifiers) in Metaswitch.
How To: Route calls using Call Routing Rules (formerly Skill Routing Identifiers) on Metaswitch
Similar questions: Metaswitch routing, set up Metaswitch, configure Metaswitch with Xima CCaaS, set up Metaswitch with Xima CCaaS
Purpose: Demonstrate how to configure Call Routing Rules (formerly Skill Routing Identifiers) within Metaswitch
Getting Started Info
If your customer has multiple DIDs, we can route using the CCaaS Call Routing Rules (formerly Skill Routing Identifiers). This will allow you to directly drop the calls into a Skill, rather than having to go through another auto attendant and selecting a digit action to be transferred to your Skill.
Steps
Platform Admin Portal Steps
- Navigate to the MetaView Web Portal
- NOTE: This is typically only accessible and available if you’re a reseller of Metaswitch
- The name and number in the SIP message are both derived from the MLHG Pilot number
- Search and find the "Business Group" you are configuring the new MLHG for

Searching Business Groups
- You will need to add a new MLHG by clicking the “Add MLHG +” button

-
Apply any templates you may use
-
Add the Name and Identifying Number and make sure that the "Delivery of pilot information as Caller ID" setting is NOT selected

-
NOTE: If your MLHG is only allowing one call at a time, please select the "Offer calls to SIP lines in calls with spare MCAs" option
-
Add the Xima SIP subscriber that was previously built as a member, and log that subscriber in

- Add your new Pilot Number
- This is the number customers will call
- This is also where the name/number is derived from in the SIP message to route to the proper IVR

- For more context, the highlighted section on the right-hand side of the screenshot below is the name that we will be using to route the call to the specified CCaaS DID
- NOTE: The Name cannot be longer than 20 characters; this total includes spaces
- Under the Preferences dropdown menu, please make sure to check the "Present pilot name to agents" box
- NOTE: If you do not, the platform won't send these details along to the Skill Groups in Xima CCaaS, and calls will not route properly

Xima CCaaS Web Portal Steps
-
Open the web portal for your instance of Xima CCaaS
-
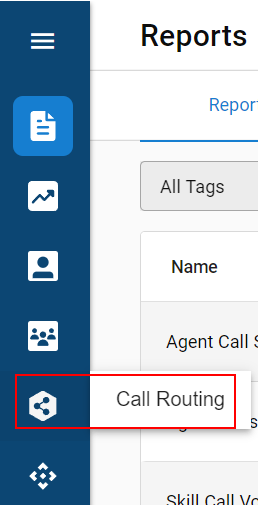
Navigate to Call Routing
-
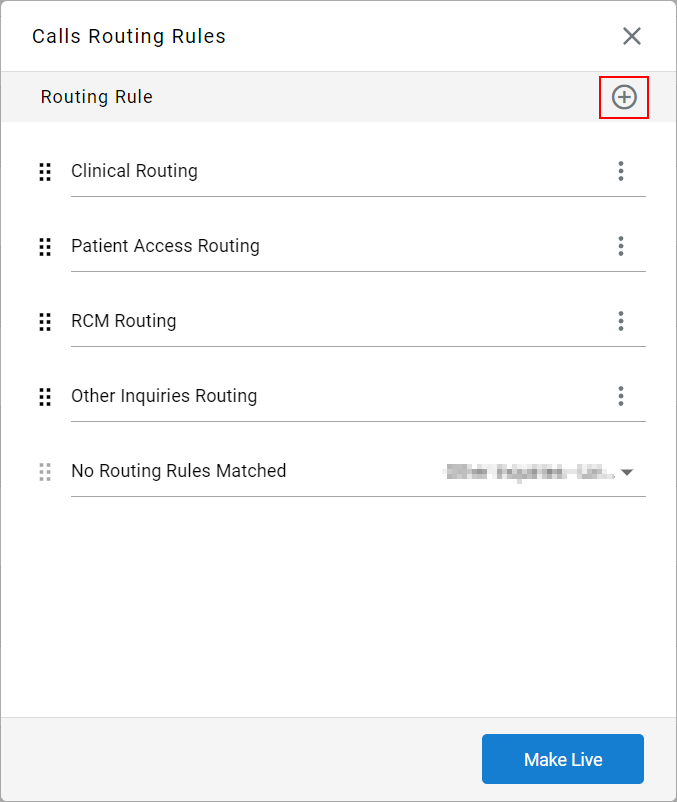
Within the new menu, select the + symbol to create a new Call Routing Rule
-
Configure the following within the new menu:
-
Routing Rule Name
- This name can be anything and is meant to help you quickly edit your rules later
-
SIP Header
- Within Metaswitch, this is most commonly Referred-By
- You can select anything from the dropdown menu, and even put in your own custom header
-
Matching
- Recommend using Contains in order to best match the platform's naming
-
Value
- The Pilot Name that was created in the steps above
-
Destination
-
Select the Xima CCaaS Skill that you would like to send the calls to

-
-
-
Select Done
-
Once all Call Routing Rules are configured, select Make Live
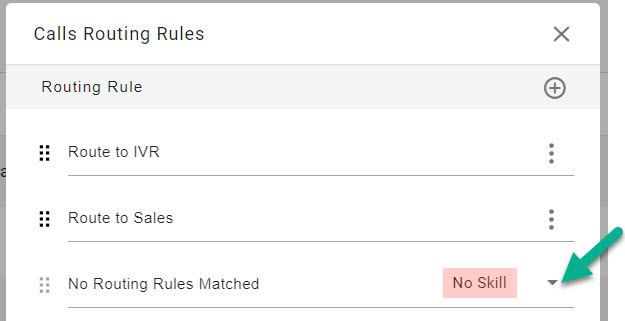
What if a call comes in and no rules are matched?
There are certain circumstances where none of your Call Routing Rules will match a call's SIP Headers. You can set up a “Default” skill group to have these calls routed to it. By default, this is set to “No Skill” so you will need to manually set this up upon initial setup.
If no rules match and your default isn't set up your calls will come into the Contact Center and immediately be disconnected. (The system doesn’t know where to send them)
NOTE:Within Metaswitch there is a soft limit of 20 MLHG’s that you can add a single extension to. If you have an environment that will require the Xima CCaaS extension to be assigned to more than 20 MLHG’s, please review the comments in this article
You may get a notification similar to this if this fits your situation:

Xima CCaaS Admin Portal Steps (Deprecated)
- Open the Admin Portal for Xima CCaaS
- Navigate to Contact Center Configuration > Skill Management
- Open each Skill for which you are going to add a Skill Routing Identifier
- Within each "Skill Definition" menu, select the ellipsis next to Skill Routing Identifier
- Click the Add button
- Type in the Name that was set up within the platform
- NOTE: The syntax does matter! If there is a capital letter or space, make sure it matches exactly the way that you created it within the MetaView Portal.
- Save your changes

Skill Definition Menu
Updated 7 days ago