E911 DID Selection
This article covers how to configure the caller ID correctly to show the number and location of the agent when they dial an outbound emergency number.
- See also: “WebRTC Outbound DID Configuration” article. While similar in setup, this article focuses on associating outbound DIDs with emergency numbers
Summary
- When a Contact Center agent dials an outbound emergency number, it is essential for emergency dispatchers to see the accurate number and location of the caller. Many systems default to using the “main” number as the caller ID, which provides no insight into the caller's identity or location
- This solution is a Contact Center system built upon a UC system, as a result, it does not store the location of the caller
- Instead, it pulls the DID as it exists in the UC system, relying on the UC system to maintain and update the address and location of their respective users
- This ensures the correct DID is passed to emergency services when dialing an emergency number like “911”
Supervisor/Administrator Setup
-
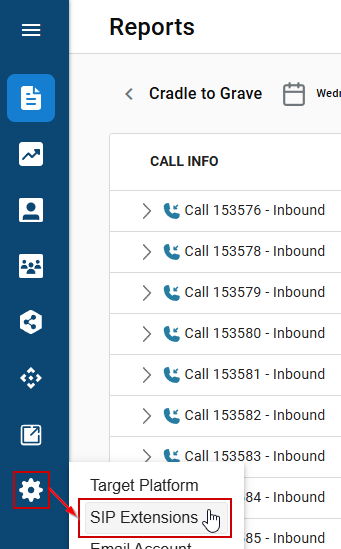
While logged in as an Adminstrator to the CCaaS interface, navigate to the Gear icon, and then SIP Extensions
-
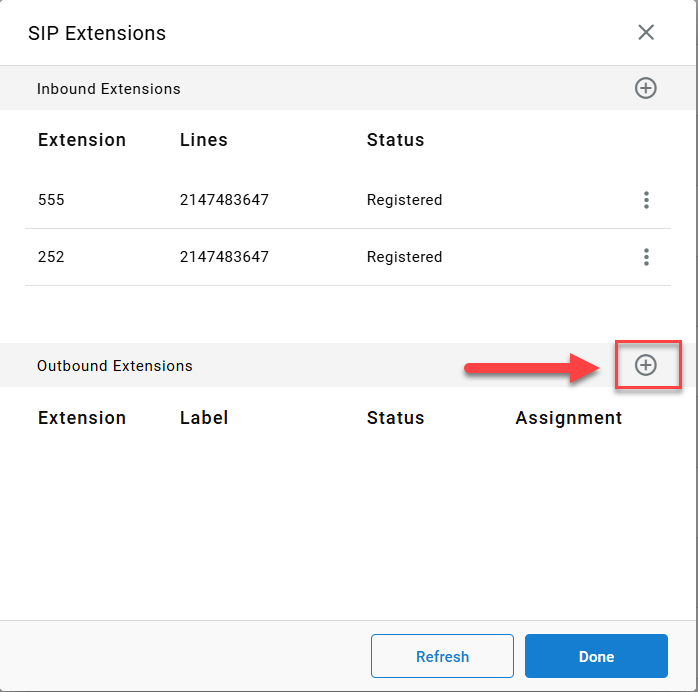
Click the “+” button to add a new outbound extension
-
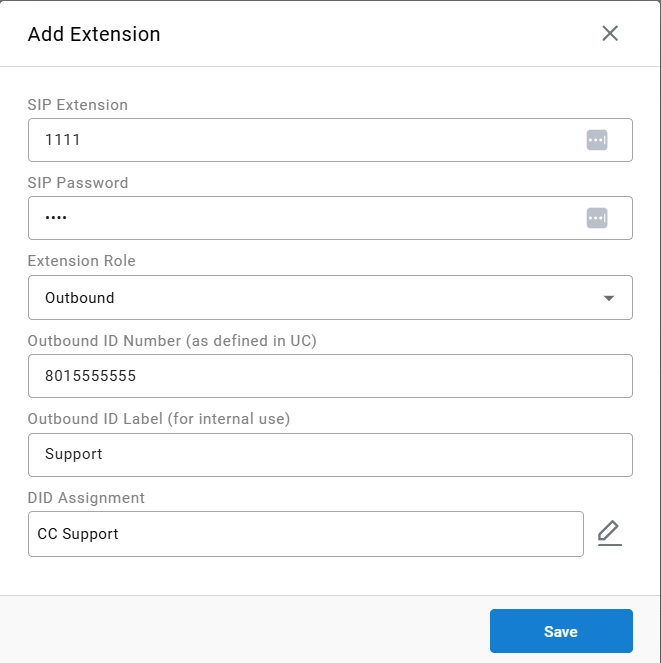
In the Add Extension menu, configure the following fields (Note - when an extension is already built, you disregard the registration details and move on to the configuration of the "type" of extension it is and what/who it's assigned to) :
-
Outbound ID Number (as defined in UC): Specify the DID as defined in the UC system. Note: This is a freeform text field. Ensure all DIDs match exactly with the ones registered in the UC system
-
Outbound ID Label (for internal use only): Assign a label for easier agent identification, e.g., "Support”
-
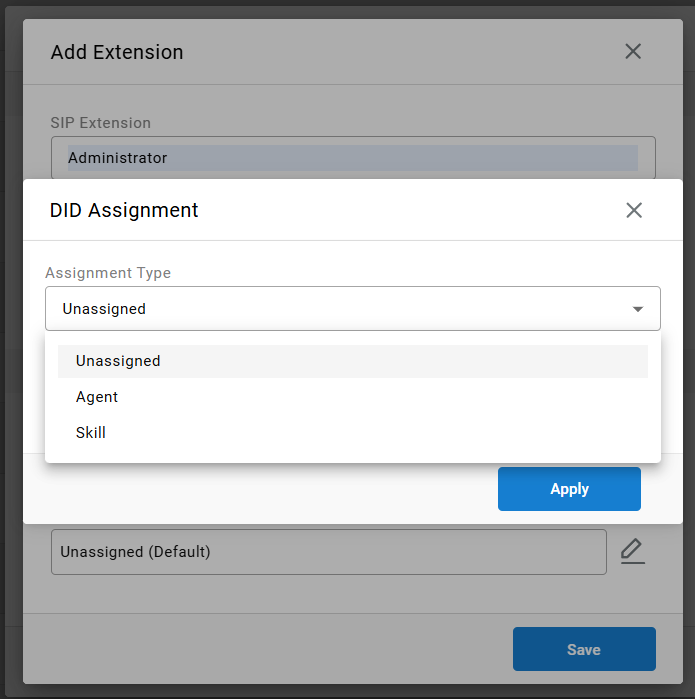
For DID Assignment: Choose one of the following:
- Unassigned: Applies to all users in the system
- Agent: Applies to the individual agent assigned
- Skill: Applies to all agents within a skill group
-
Example of DID Assignment dropdown:
-
-
Assigning an Emergency Number
To associate phone numbers as emergency numbers:
-
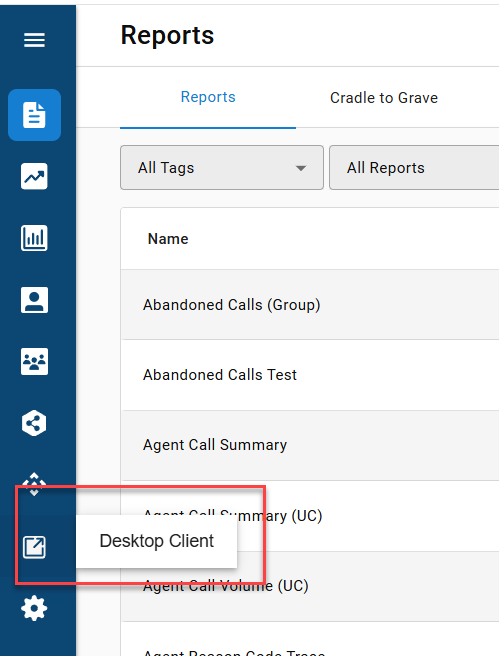
Log into the Admin Portal/Desktop Client (requires administrator permissions). This is accessible via the web portal and by clicking on the “Desktop Client”
-
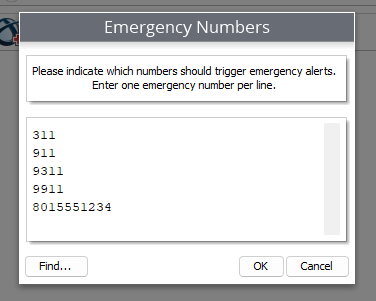
Once the client is launched, navigate to: Admin (System) → System Settings → Basic Settings → Expand Emergency Numbers
-
Add or edit emergency numbers.
-
In the U.S., 911 is standard, but you can define additional numbers based on location-specific needs and/or what you deem an “emergency” number
-
NOTE: When an emergency number is dialed, the system automatically matches it with the agent’s assigned DID. The agent does not need to select their DID manually from the dropdown, even if their last outbound call used a different DID
-
The Agent Experience
-
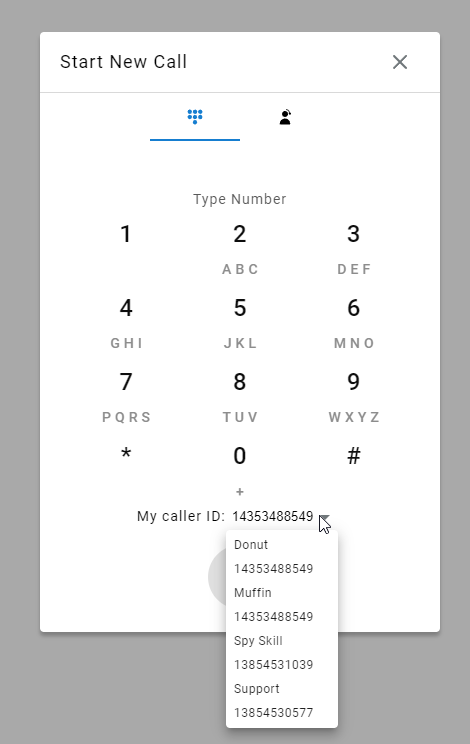
Based on the assigned DIDs (e.g., direct “Agent” DID, skill-based DID, or default “unassigned”), agents will see a dropdown of available numbers in their Contact Center interface
-
This dropdown simplifies outbound dialing by displaying associated labels and numbers, streamlining the calling process for agents handling multiple departments.
-
Here is an example of what it looks like from one that was set up previously
-
Updated 3 months ago
