
CiscoWebEx Configuration - CCaaS
This article covers how to configure CiscoWebEX to work with Xima CCaaS
Target Platform Integration and SIP Settings
- Each Cisco WebEx extension can have up to 10 calls at a time
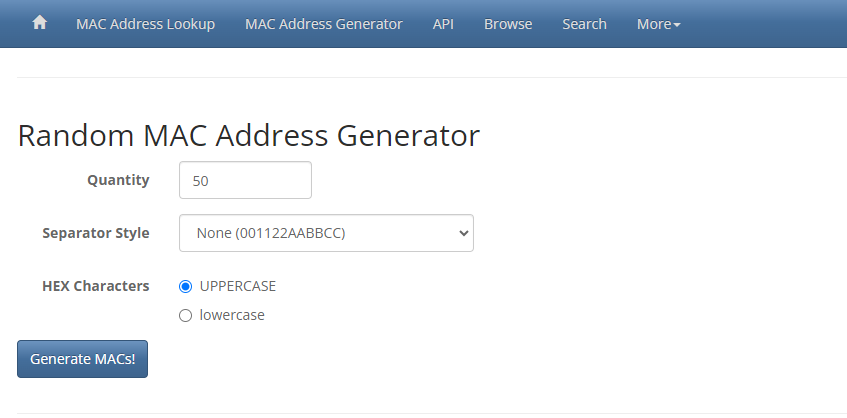
- Each extension/device requires a unique MAC address upon its creation. Since we do not use MAC addresses in the cloud, we can manually generate one via a third-party website like this one.
- Enter the quantity of MAC addresses that you want to be created, use “Separator Style” set to “none”, and “HEX Characters” on “UPPERCASE” and click “Generate MACs!”\
 \
\
\ -
- Enter the quantity of MAC addresses that you want to be created, use “Separator Style” set to “none”, and “HEX Characters” on “UPPERCASE” and click “Generate MACs!”\
Configuration Within CiscoWebEx
-
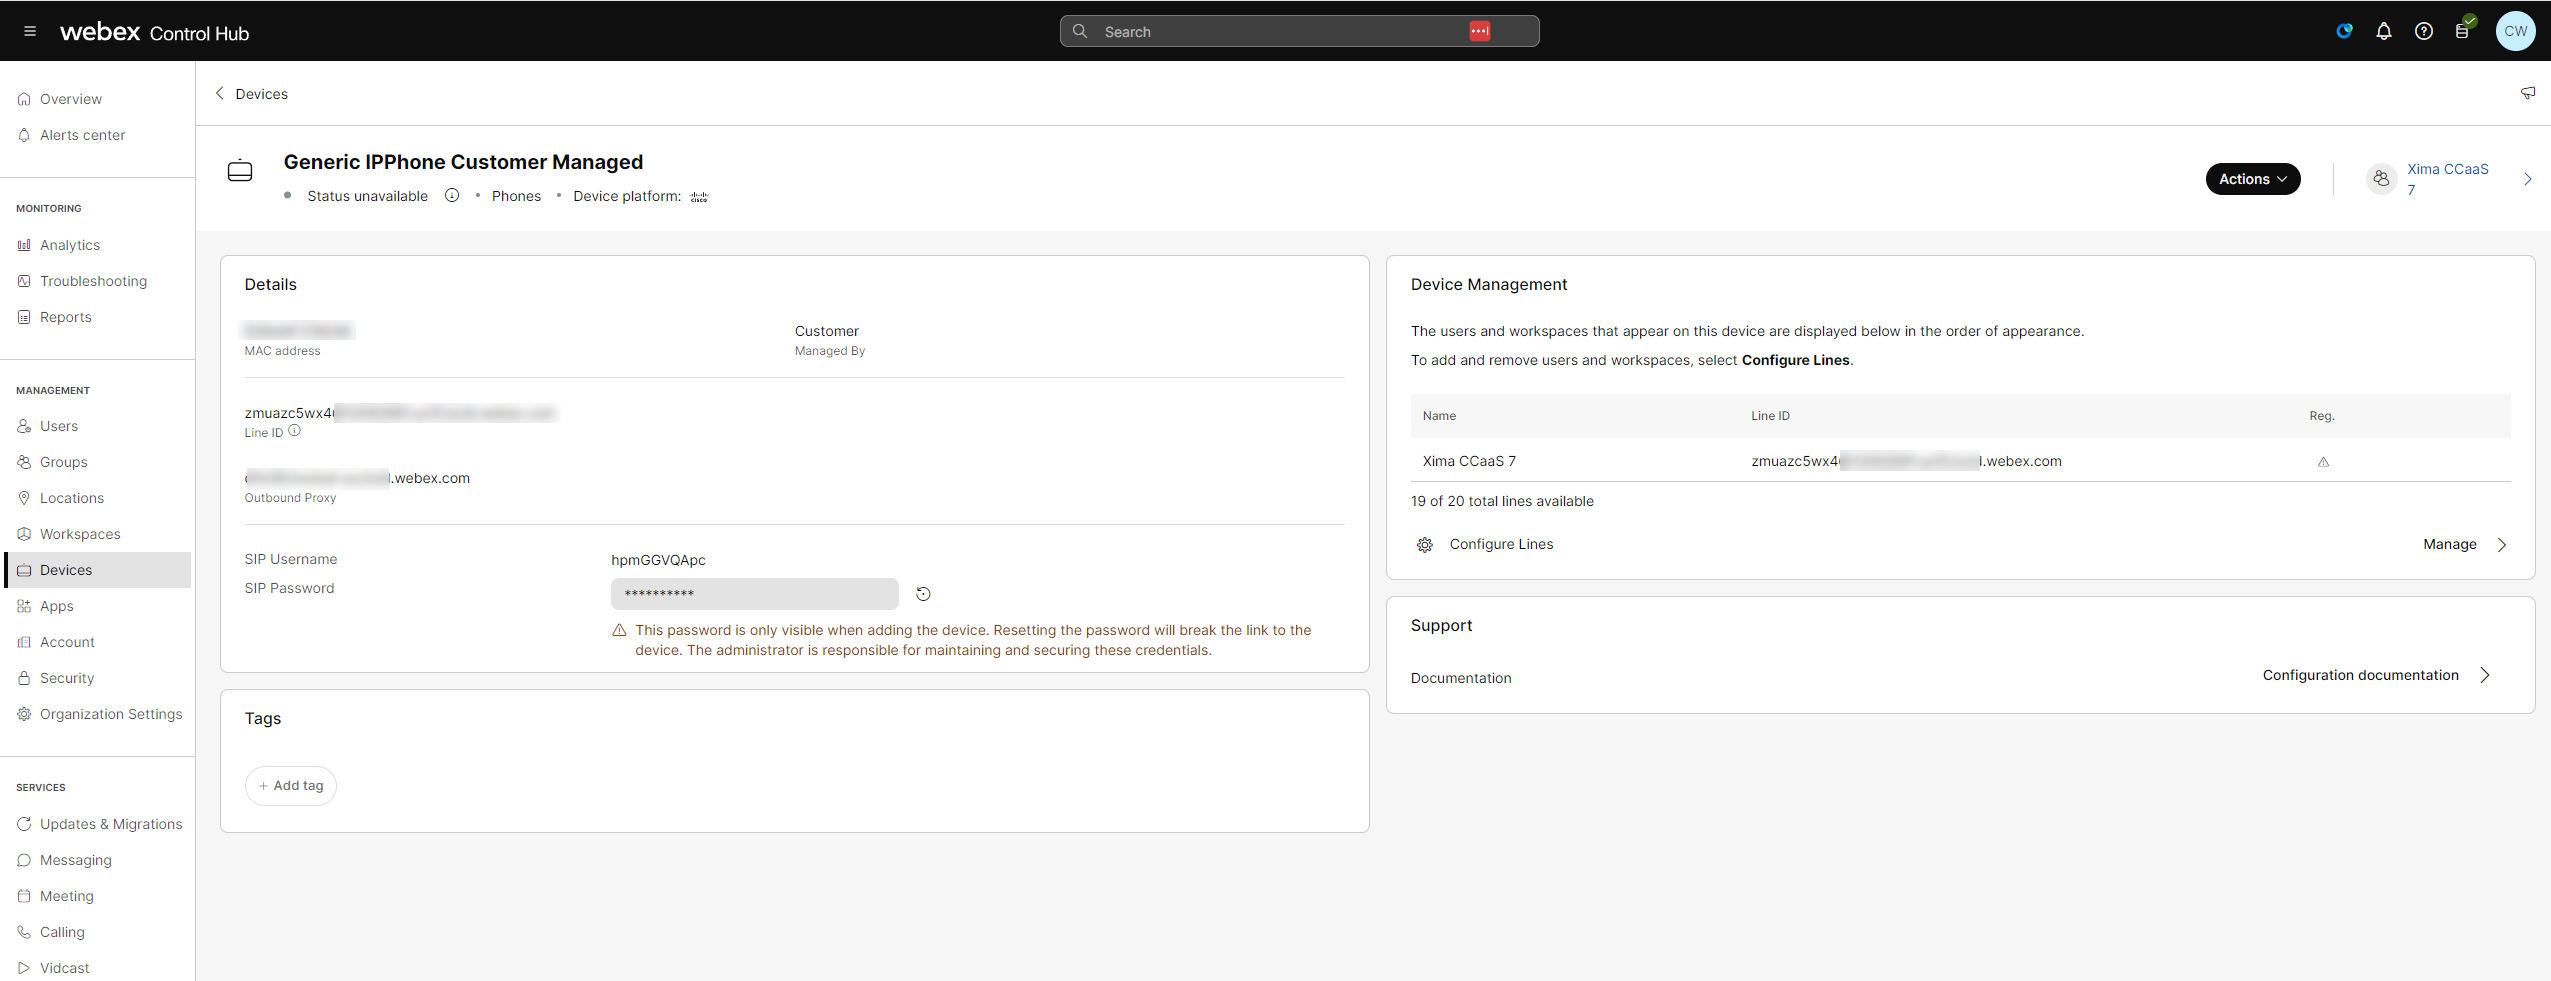
To find that user go to Devices - (Click the User)
-
NOTE: The password is redacted\
-
-
However, upon creation of this user/device, you’ll get these creds: (Make note of them or export the CSV file)\
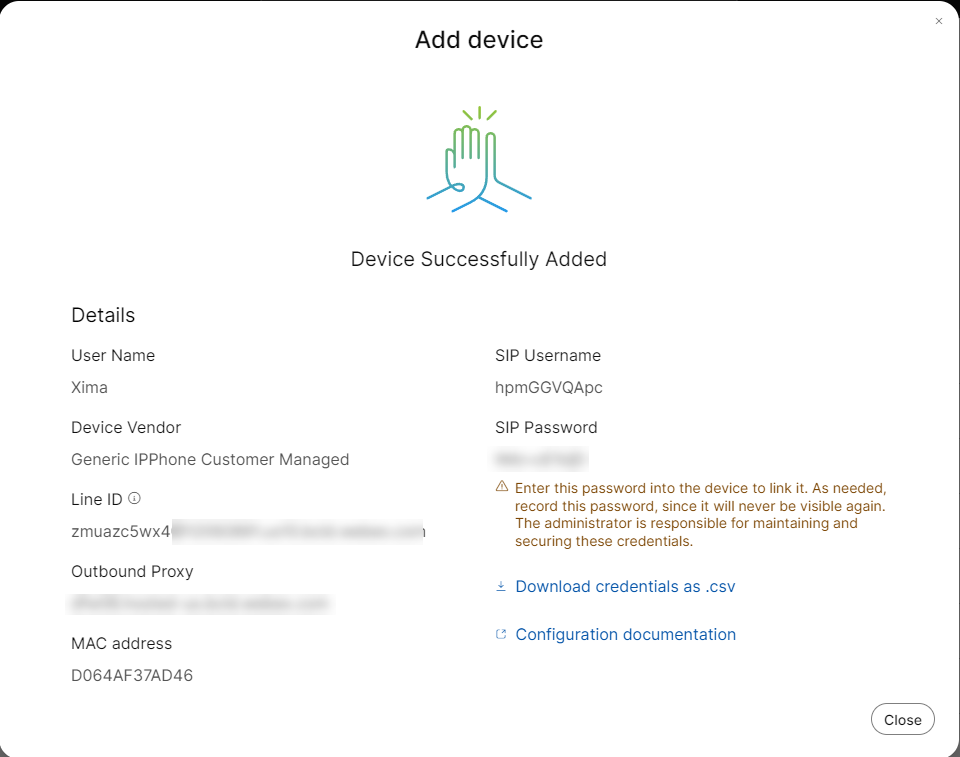
-
Outbound Call Traffic Settings
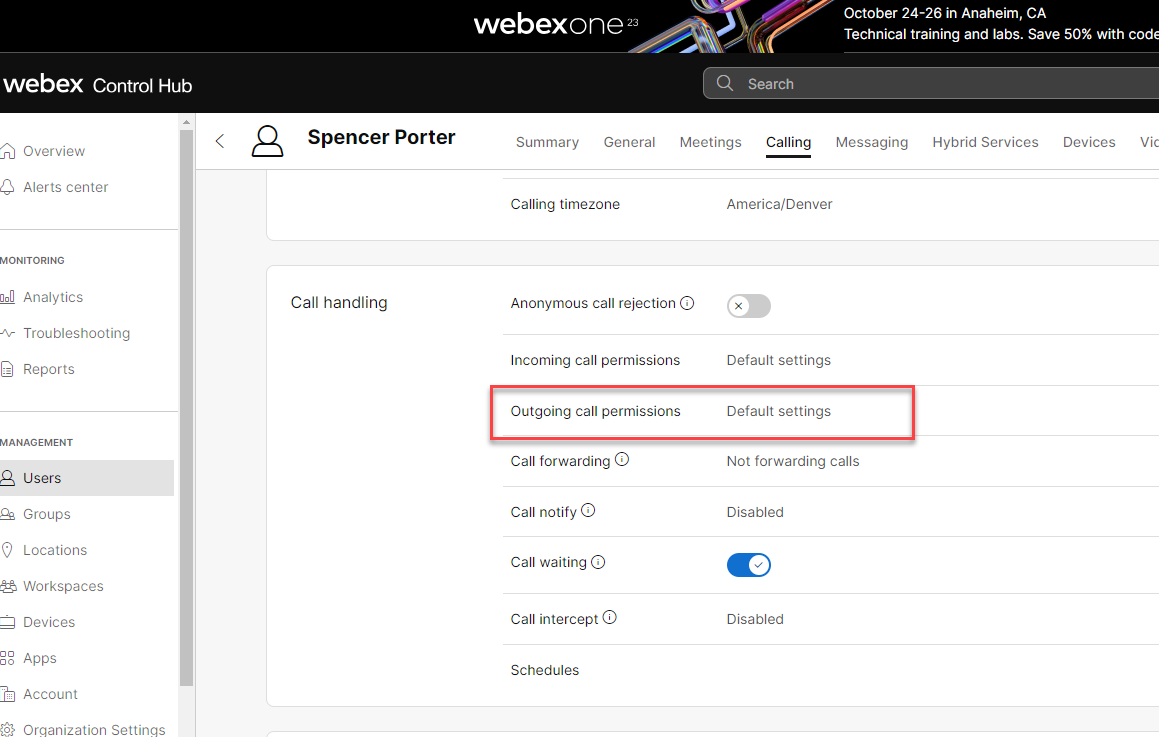
- Within CiscoWebEx, you need to make sure that outbound traffic is enabled. You check these settings and configure this on the platform here
- Since we are using their trunking and outbound codes, we need to know what they are for making outbound calls with WebRTC, and for Queued Callback calls
- Users - Calling (Check Permissions)\
 \
\
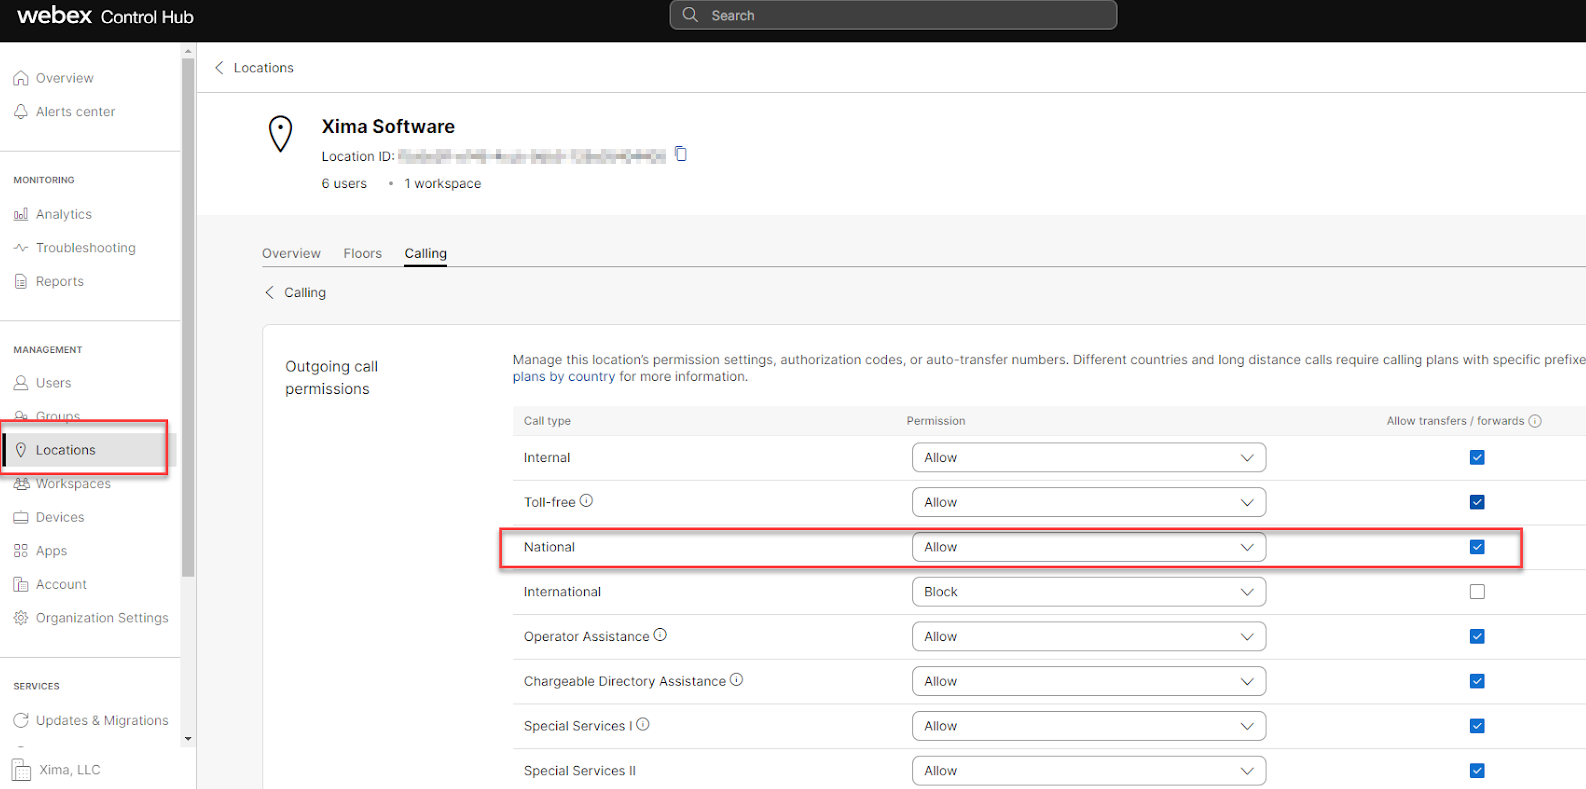
\ - Location > Calling > Call Handling > Outgoing Call Permissions\
 \
\
- Because we use the same infrastructure, any outbound call we make from WebRTC will have to cater to the rules as they’ve been configured within Cisco\
- Because we use the same infrastructure, any outbound call we make from WebRTC will have to cater to the rules as they’ve been configured within Cisco\
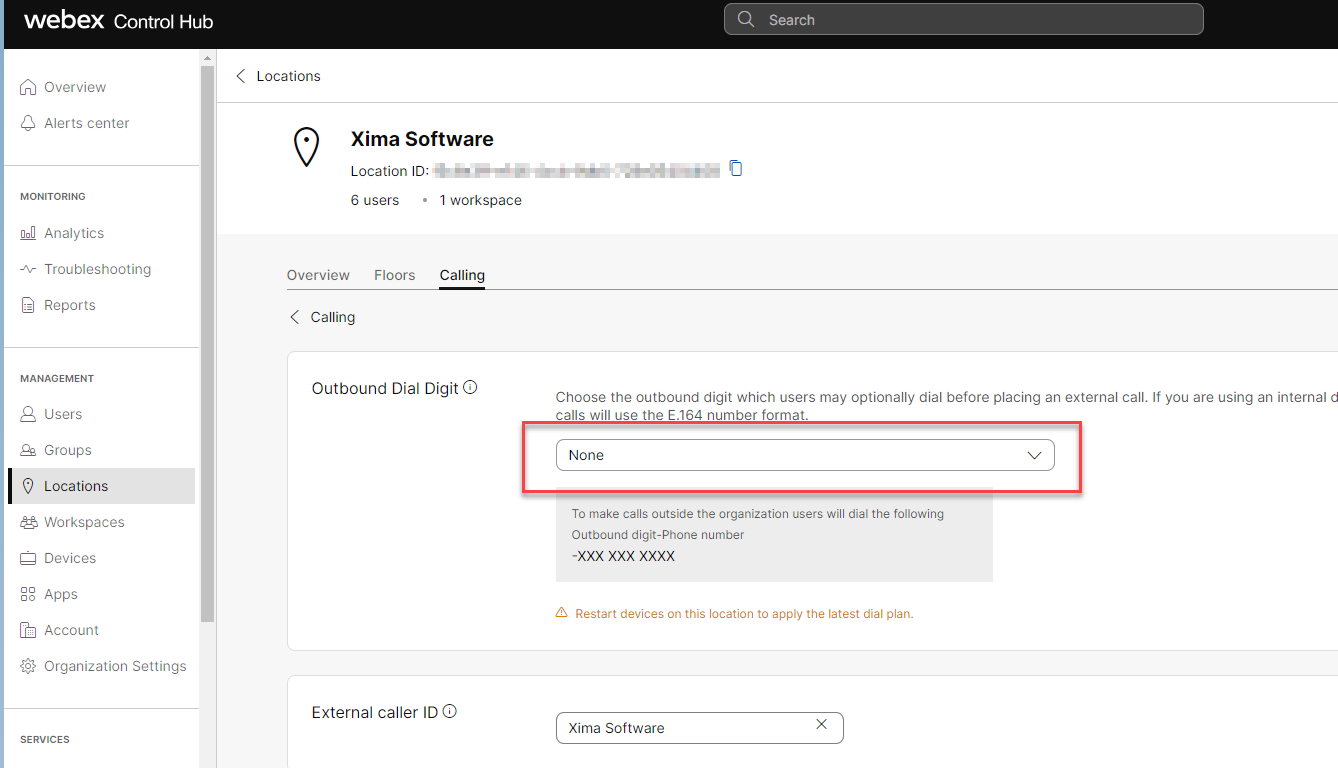
- Locations > Calling > External Dialing > Outbound Dial Digit**\
 \
\
\
-
Routing to Contact Center Skills
- When routing to Contact Center skills on CiscoWebEx, we are able to do so by using the “Diversion” header. This is produced by forcing a “forward” within the UC Queue itself to the Xima Integration Extension
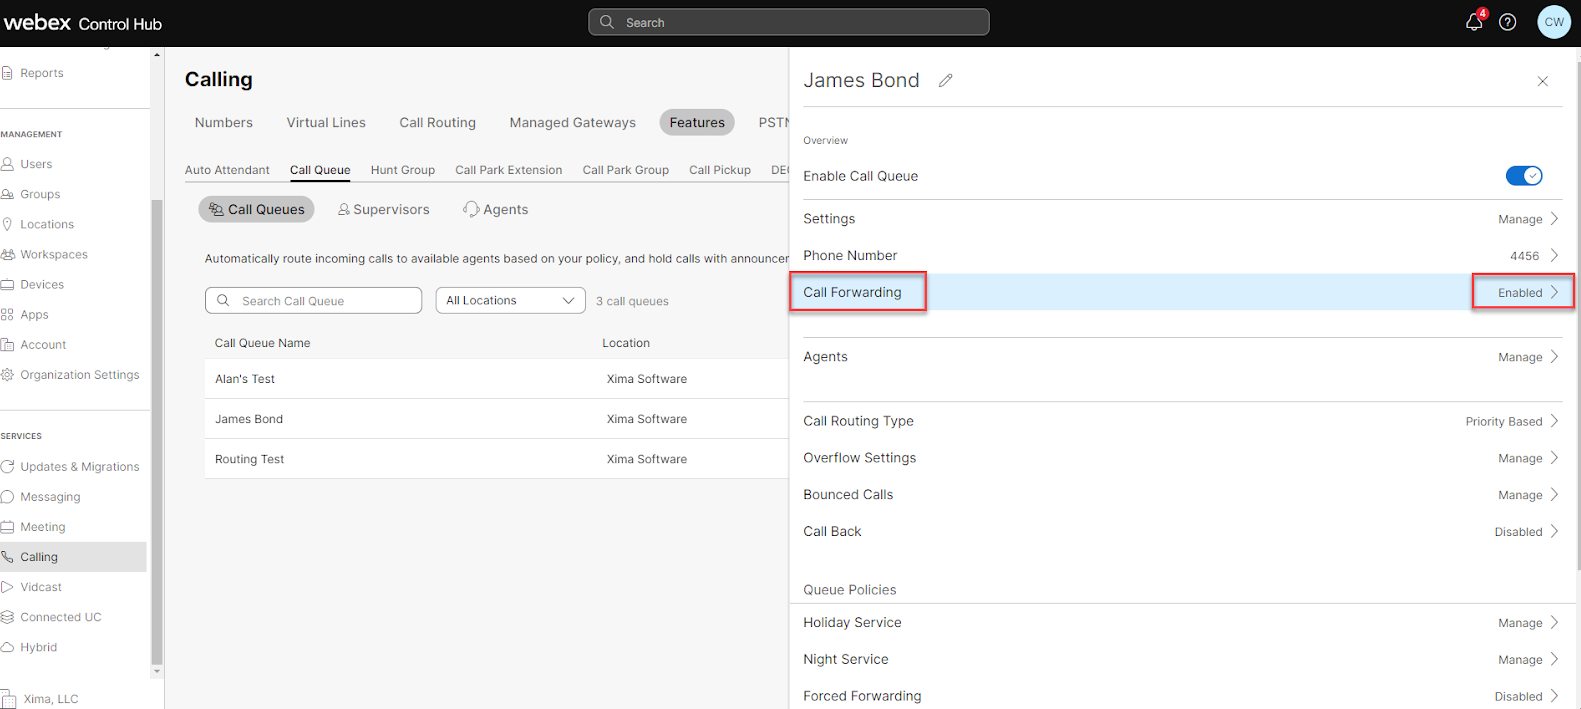
- For Example - Ques are located under Services > Calling > Features > Call Queue
- Within the Call Queue, you will find the Call Forwarding Setting\
 \
\
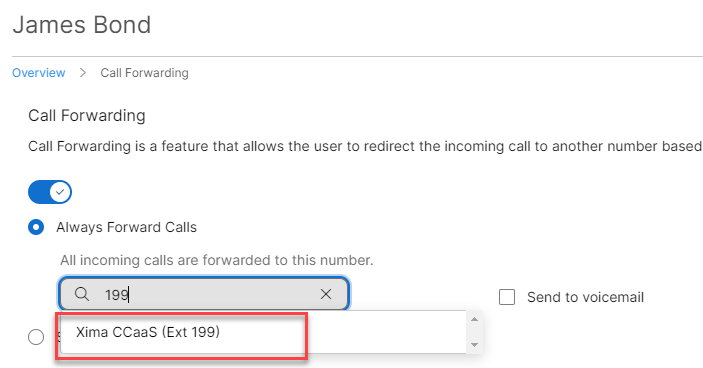
\ - Open it up and enable the call forwarding for the Xima Integration Extension, as shown below\
 \
\
\ - This forced forward will push the call queue name into the “Diversion” header which we can leverage as part of our call routing rules
- In this example, this call queue is called “James Bond”. Here is that messaging in the SIP Header\
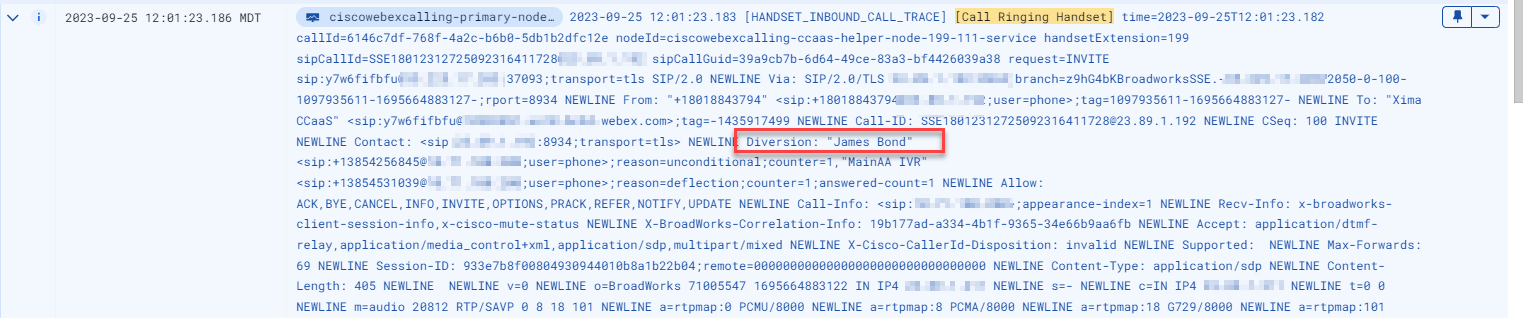 \
\
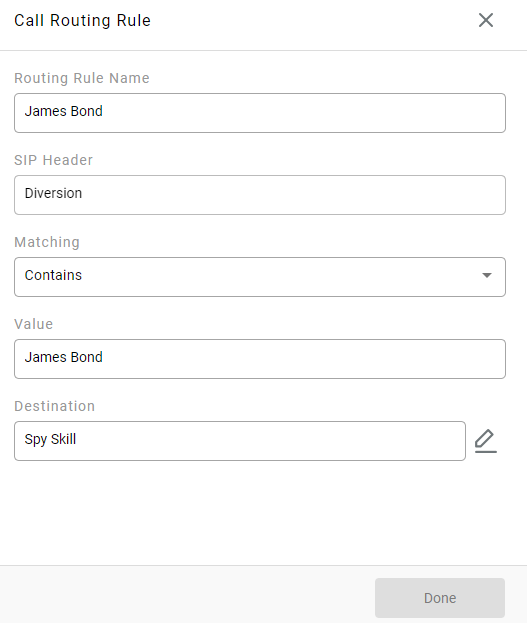
\ - Within Xima CCaaS for reference, here is the Call Routing configuration. We have specified the SIP header to look for when the call comes in as well as the value within that header. Once the rules match, it then will send the call to the “Spy Skill” in this instance\
 \
\
\ - Here is a successful call routing example on Xima's side in Cradle to Grave based on the rules established above\
 \
\
\ - Within CiscoWebEx, you can assign a DID directly to this Call Queue, or, you can setup a digit press within the Auto Attendant and route calls via digit press as well
- Auto Attendant is located here - Services > Calling > Features > Auto Attendant
- Open up the Auto Attendant and then navigate to Menu\
 \
\
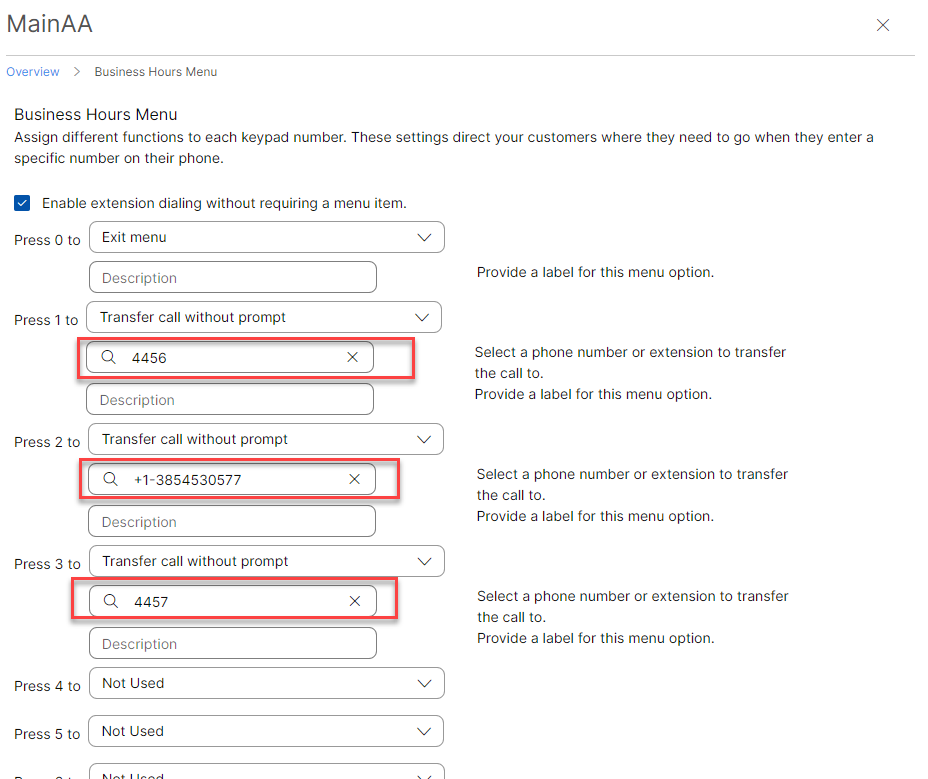
\ - In this example
- Digit press 1 goes to Call Queue 4456, which is the “James Bond” queue
- Digit press 2 goes to a Call Queue that has a DID assigned to it called “Routing Test”
- Digit press 3 goes to Call Queue 4457 called Alan’s Test
- However you mix and match this, be sure that it goes to a Call Queue, and that queue has a forced forward to the primary Xima Integration Handset as described above
- NOTE: With this if you were to call 13854530577 (as noted in digit press 2), it will also go directly to this skill, as specified in the rules, bypassing this Auto Attendant
Configuration Within Xima CCaaS
-
Target Platform Configuration\
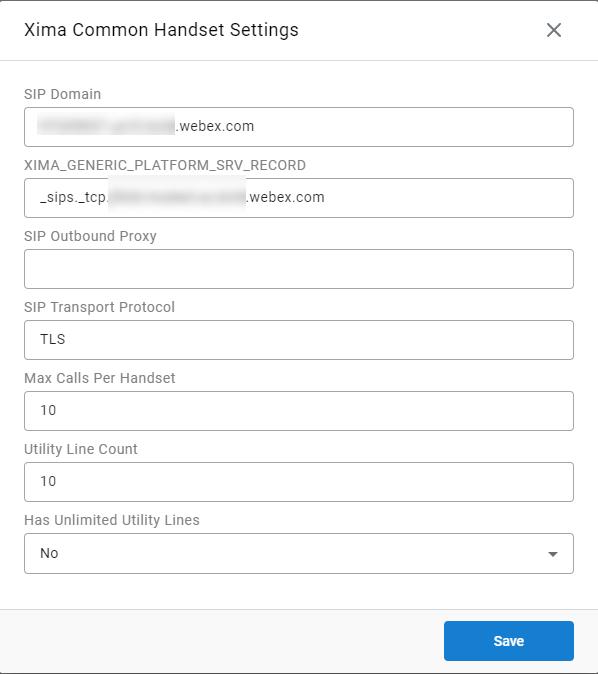
- NOTE: SRV Record is available, as such, you should prioritize that over the outbound proxy field. For more information on SRV records, review the SRV Record article here.https://guide.xima.cloud/docs/deploying-and-setting-up-srv-records-in-tpi-settings-for-ccaas . Pro tip, note that CiscoWebEx is slightly different with this than many of the other systems. "_sips._tcp" is how their SRV records start. Additionally, TLS is Required. Lastly, on this platform, the number of calls allowed per extension is 10. This is NOT unlimited.
-
SIP Integration Configuration
-
NOTE: The SIP username in CCaaS is the Cisco "line ID" and the SIP Authorization ID is the "Sip Username" in CiscoWebEx. (Review the "Add Device" screenshot above for more insight into these fields) When all is said and done, it should look something like this:\

-
Required Feature Toggles and Advanced Settings on Xima's Side (Enabled by Xima)
- CACHE_LOAD_BALANCER_RINGING_REQUEST- CiscoWebEx only allows for 10 calls per handset. Because of this, we have to have multiple extensions to handle a higher volume of calls. Due to limitations on how the SIP messaging is sent upon a blind transfer from the load balancer over to the other extensions registered in-line, it would kill the SIP headers. This caches and maintains those headers to allow us to route intelligently after being sent from the load balancer. NOTE: From there, we have to use something called "X-BroadWorks-Correlation-Info" which is a unique identifier (think session id/call id). Without this, we wouldn’t know which call goes to which call route. With that said, unless a system has something equivalent to this, this will be exclusive to CiscoWebEx
- PASS_THROUGH_CALLER_ID_ON_BLIND_TRANSFER - To prevent the removal of the external party information as the call traverses through the system, we encourage this to be enabled.
- PLAY_AUDIO_WHILE_WAITING_BEFORE_REFER- and SHORT_WAIT_BEFORE_REFER - These two toggles typically go together. CiscoWebEx doesn't like how quickly we answer the calls with our Integration Handset. Because of that, we insert a delay of 500 milliseconds then transfer. With the "Short Wait" toggle also enabled, it will insert an additional 200 milliseconds between the answer and the transfer.
- USE_ALAW_DEFAULT_CODEC- This will only apply to customers that are NOT in North America. This favors and will force the ALAW codec opposed to the ULAW codec. Regions like APAC and EMEA typically prioritize ALAW as their codec of choice. Some configurations allegedly support both, but, if you're in either of these regions and are having issues with audio, be sure this is enabled.
- [RESTART]ENABLE_TLS_TRUST - TLS is the only protocol that is used on this platform. It won’t register, or attempt to register unless this is enabled
- Hidden Advanced Settings - Hold shift and click "Advanced Settings"
- "WebRTC use same handset" - For CiscoWebEx assisted Transfers. If this isn't enabled and you attempt an assisted transfer, there will be no audio from either party on the second leg of the call once you click "complete transfer". What this setting does is keep the call on the same registered integration extension that the call was initiated on, as opposed to using another "less full" extension and bridging them together. This can increase the likelihood of the assisted transfer failing due to lack of available channels but will work assuming there are resources available within that registered extension.

Updated 8 months ago