
Connect Avaya IP Office to Xima CCaaS via SBC
This article demonstrates how to connect Avaya IP Office to Xima CCaaS.
Article #: 18
How To: Register and authenticate Xima CCaaS with Avaya IP Office
Similar questions: Connecting IPO to Xima CCaaS, linking IPO to Xima CCaaS, registering Xima CCaaS with IPO, authenticating Xima CCaaS with IPO, registering and authenticating Xima CCaaS with IPO
Purpose: To learn how to connect Avaya IP Office to Xima CCaaS using an SBC connection
NOTE: Xima Support will not set up or manage your IP Office or SBC. This document is only meant for demonstration purposes
Steps
Before you start with the steps below, there are a few prerequisites:
- You must be utilizing an SBC (Session Border Controller) with your instance of IP Office
Verify PBX Settings
Create a new User
- Open a connection to your IP Office via the Manager utility
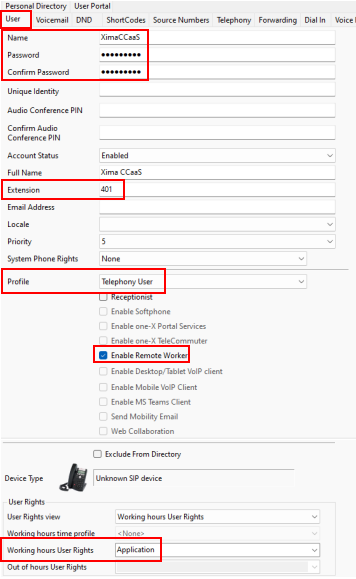
- Within the User menu, create a new user named XimaCCaaS
- Under the User tab, set up the following:
- Password
- Extension
- Profile
- Should be either "Basic" or "Telephony User"
- Select "Enable Remote Worker"
- In the "Working hours User Rights" dropdown, it should be set to Application
- Under the Voicemail tab set a "Voicemail Code"
- After you save your changes, IPO Manager will ask if you wish to create a new extension, select a new SIP Extension
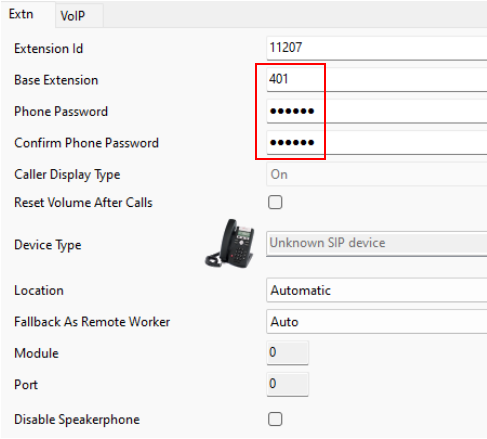
Set up your new SIP Extension
- Navigate to the new SIP extension
- Verify that the information looks correct under the Extn tab
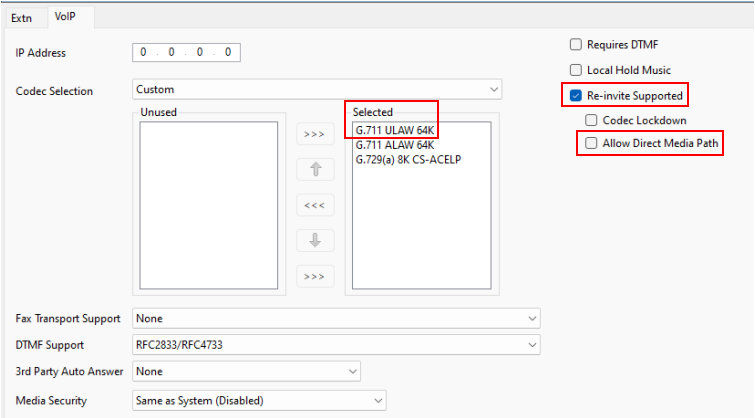
- Under the VoIP tab, in the Codec Selection section, verify that it displays "G.711 ULAW 64K" under Selected
- If it does not, change the Codec Selection dropdown to "Custom"
- Verify that "Re-invite Supported" is selected
- Verify that "Allow Direct Media Path" is NOT selected
Create a new Short Code
-
Open the Short Code menu within IP Office Manager
-
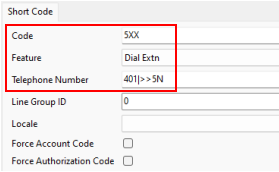
Under the Code section, set which range of calls you wish to forward to the new extension
- In the example below, we will be sending any 5xx to 401 and send tag with CDN
- In the example below, we will be sending any 5xx to 401 and send tag with CDN
-
Set Feature to "Dial Extension"
-
Under Telephone Number create your command to forward calls along to your new extension
- Save and make live your changes
Avaya SBC: Configure SBC Settings
Initial Requirements
- External public static IP Address that needs to be available on your Avaya SBCE
- An 'Advanced' Networking license on the Avaya SBCE
- A self-signed certification that is to be shared with Xima Software, if using TLS
SBCE Configuration Steps
- Add the new public IP Address to 'Ext_Media_Intl_Cogent'
- Navigate to System Management>Device Specific Settings>Media Interface\
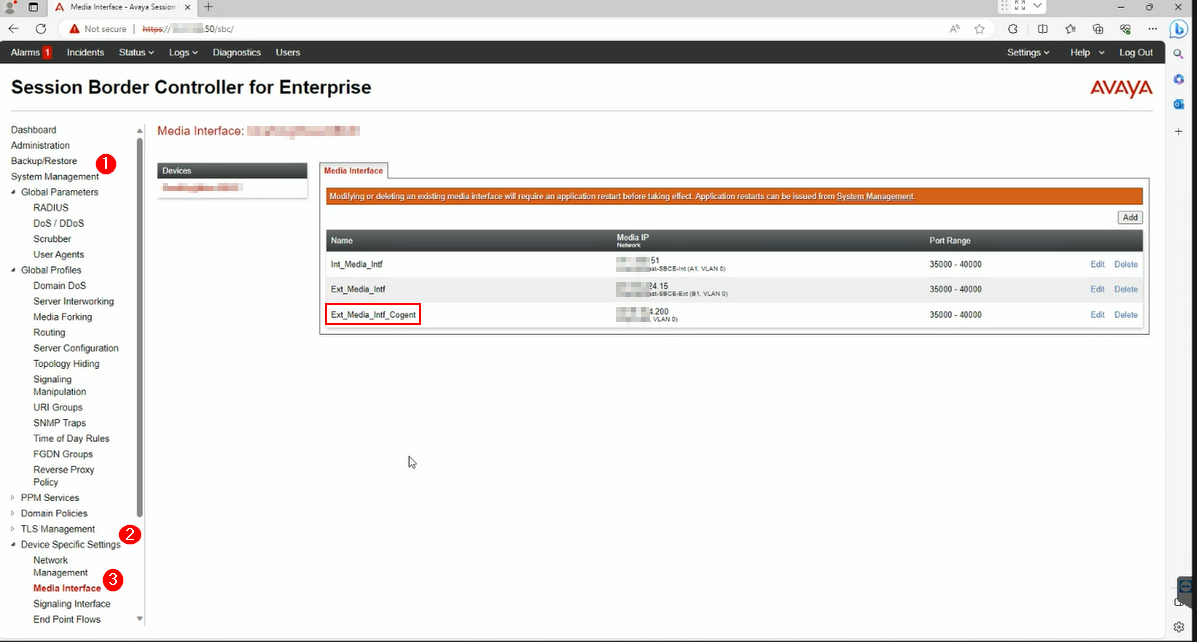 \
\ - Select 'Edit'
- Once the new menu appears, select 'Add'
- Add your new public IP to the list
- Example shown:
***.***.154.201\
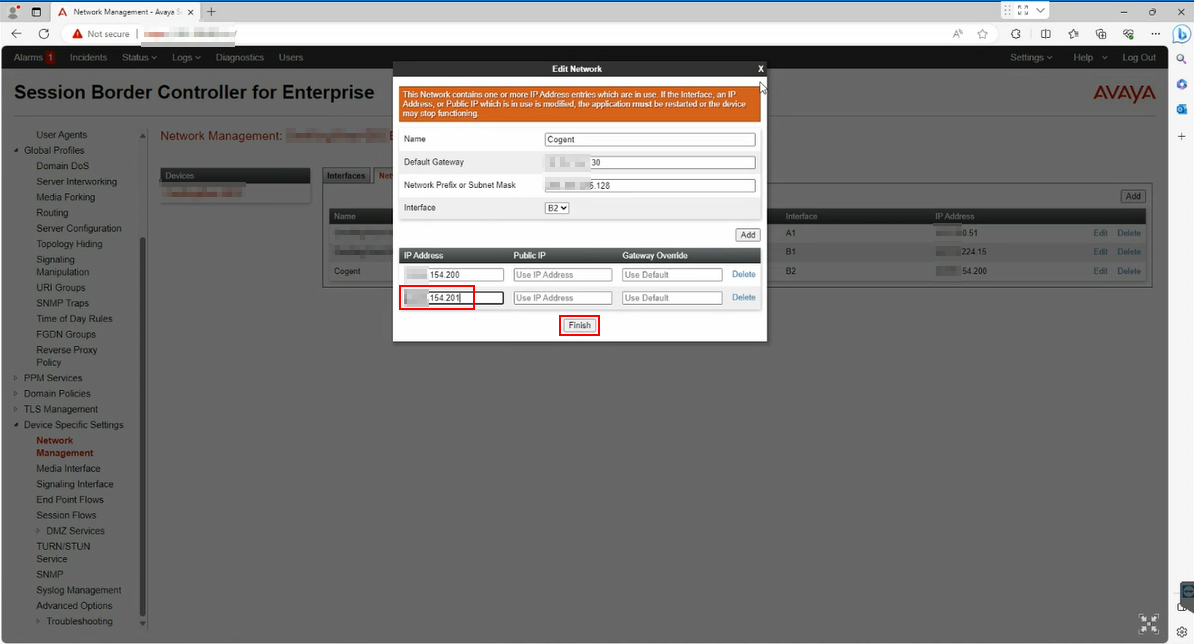 \
\
- Example shown:
- Select 'Finish' to Save
- Navigate to System Management>Device Specific Settings>Media Interface\
- Add the new Public IP as a new 'Signaling Interface'
- Navigate to System Management>Device Specific Settings>Media Interface
- Select 'Add' from the top right corner and a new menu will appear
- Give the new signaling interface a new name in the 'Name' field entry
- The name can be whatever you want, but you will need to remember it
- Select the new public IP Address from the drop-down
- NOTE: If you wish to do TLS (use port 5061), turn it on and provide the self-signed certificate to Xima\
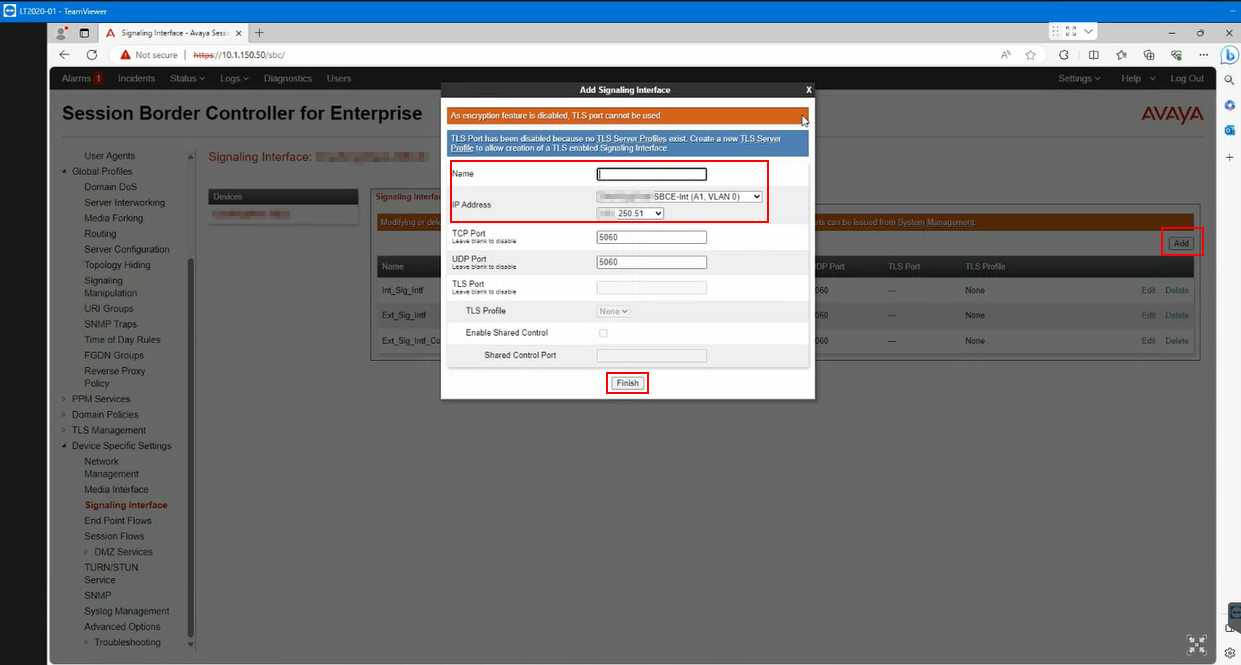 \
\
- NOTE: If you wish to do TLS (use port 5061), turn it on and provide the self-signed certificate to Xima\
- Click Finish to save
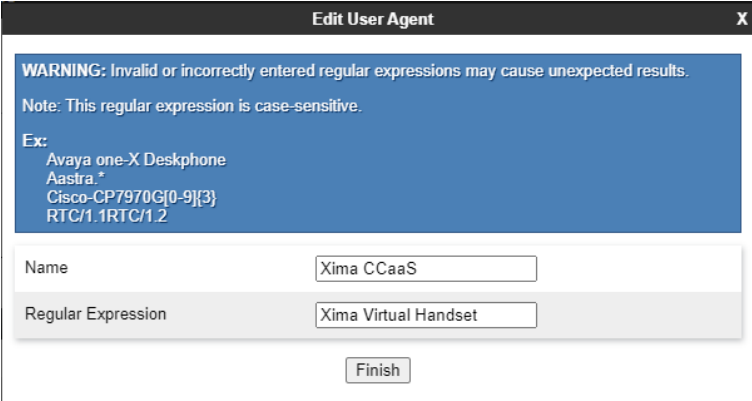
- Create a User Agent (found in Xima's installation guide)
- Navigate to System Parameters>User Agents
- Select 'Add' top right\
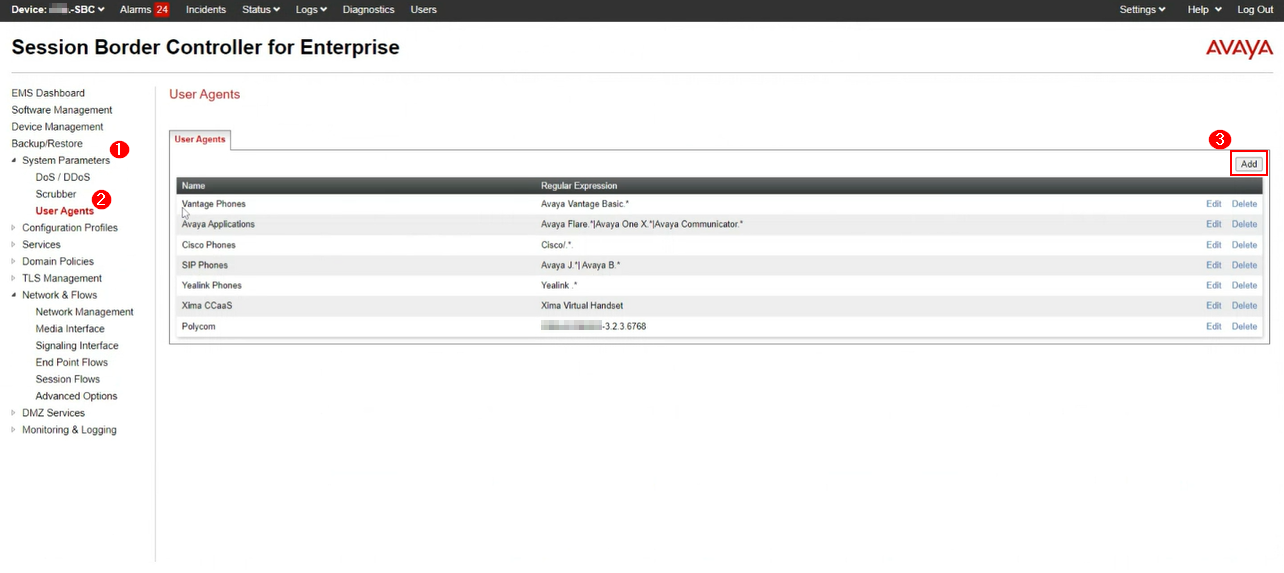 \
\ - A new menu will appear, enter 'Xima CCaaS' in the 'Name' entry field
- Enter 'Xima Virtual Handset' in the 'Regular Expression' entry field\
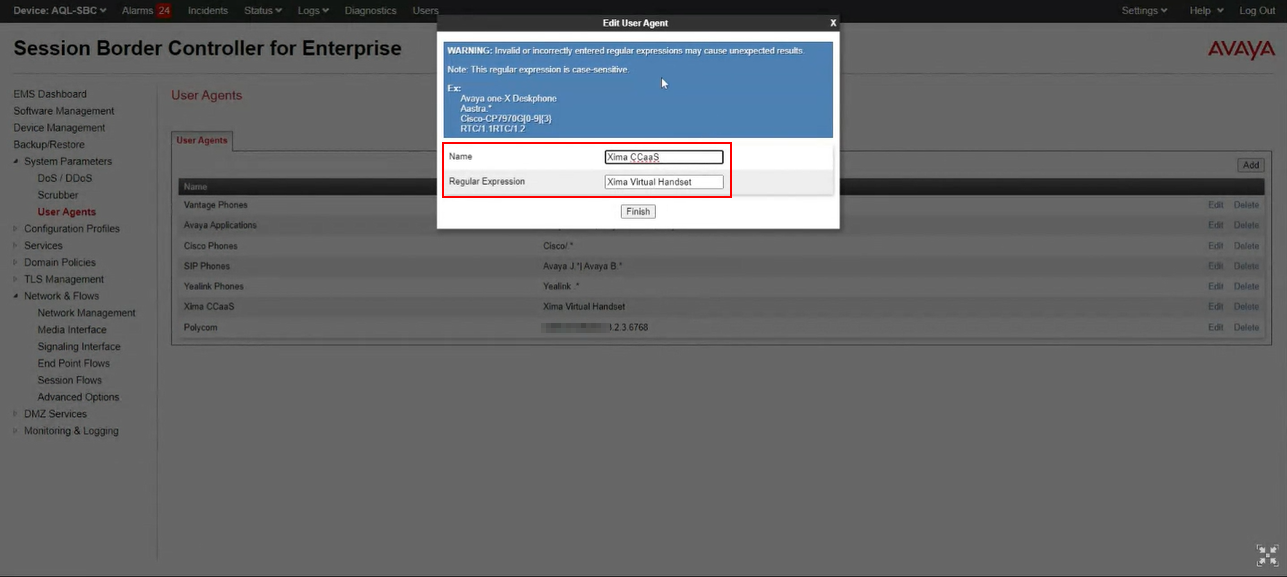 \
\ - Action: Click Finish to save
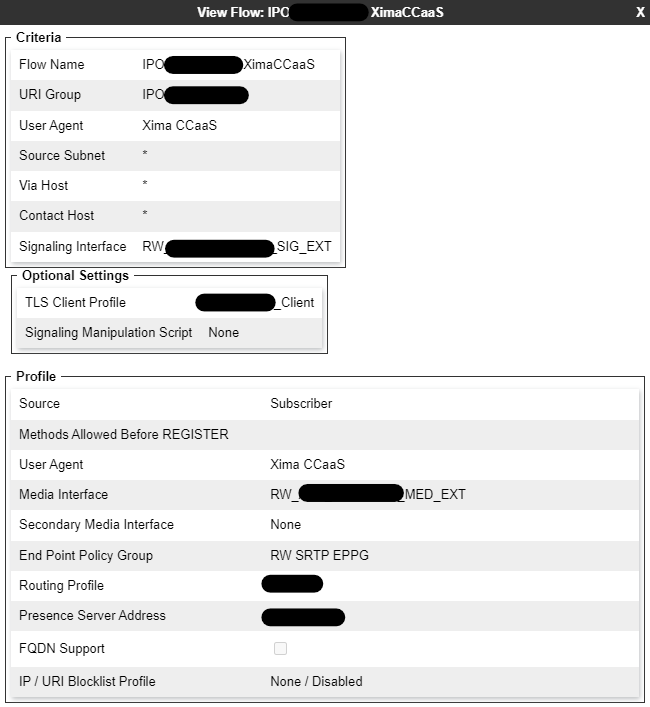
- Create a new Subscriber Flow
- Navigate to Network & Flows>End Point Flows>Subscriber Flows
- NOTE: The image below is shown for illustration purposes only
- Action: Click on 'Add' - top right corner - a new menu will appear\
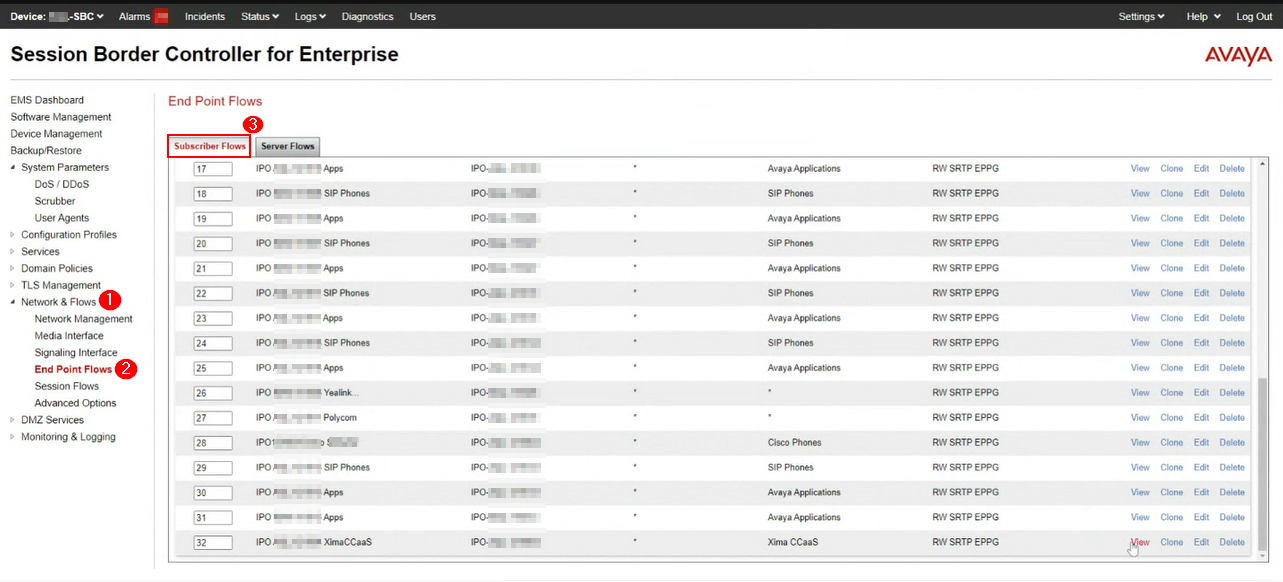 \
\ - Create a Flow Name
- The name can be whatever you want, but you will need to remember it
- Select the URI Group
- Select the "User Agent" from the User Agent field entry that you created in the steps above
- Ensure that your Signaling Interface is correct
- Ensure that your TLS Client Profile is correct\
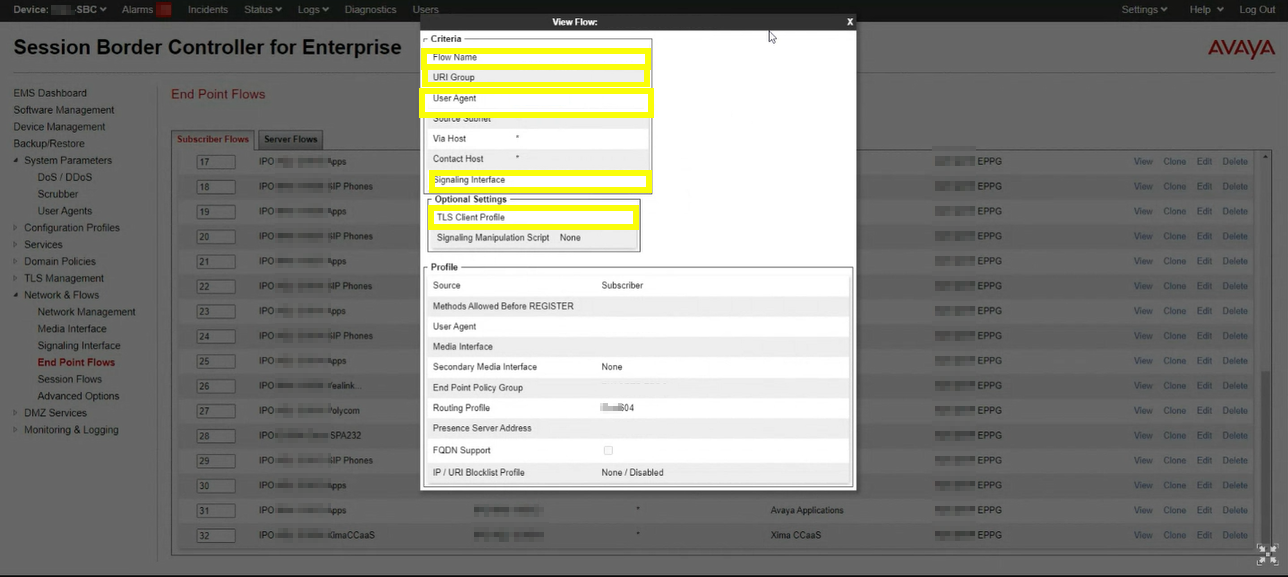 \
\ - Click Finish to save
- Navigate to Network & Flows>End Point Flows>Subscriber Flows
Alternate: Configure SBC Settings
- You will need to already have the SBC set for remote users but will be tying it to a particular User Agents
- Create a Xima CCaaS User Agent
- Create a new subscriber flow and add the Xima CCaaS user agent using the pre-assigned Signaling
& Media Interfaces and the TLS Client Profile- NOTE: Please also verify that the setting "Methods Allowed Before REGISTER" is completely blank\
- NOTE: Please also verify that the setting "Methods Allowed Before REGISTER" is completely blank\
- Save all of your changes
Xima CCaaS Config
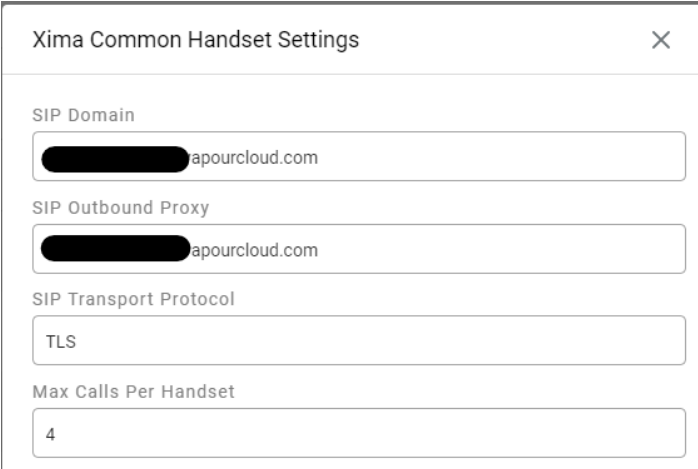
- Log into your Xima CCaaS instance via the web portal
- Highlight the settings cog and under “Target Platform” add the SIP Domain and SIP Outbound Proxy info for your SBC
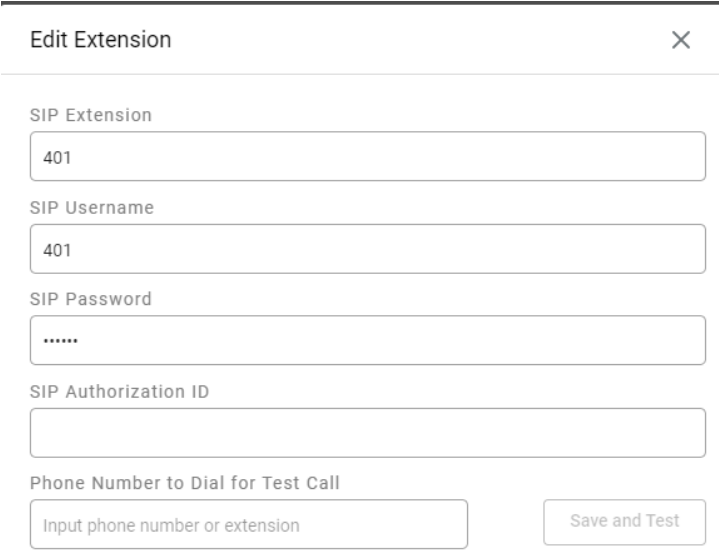
- Under the “SIP Extensions” enter the info for the SIP extension you created within IP Office
- Within the “Call Routing” menu create a new Call Route for each CDN, changing the Value to the required value from the Short Code dialed from the IPO
- In the example below, we are using 5XX to match our Short Code within the IPO
- In the example below, we are using 5XX to match our Short Code within the IPO
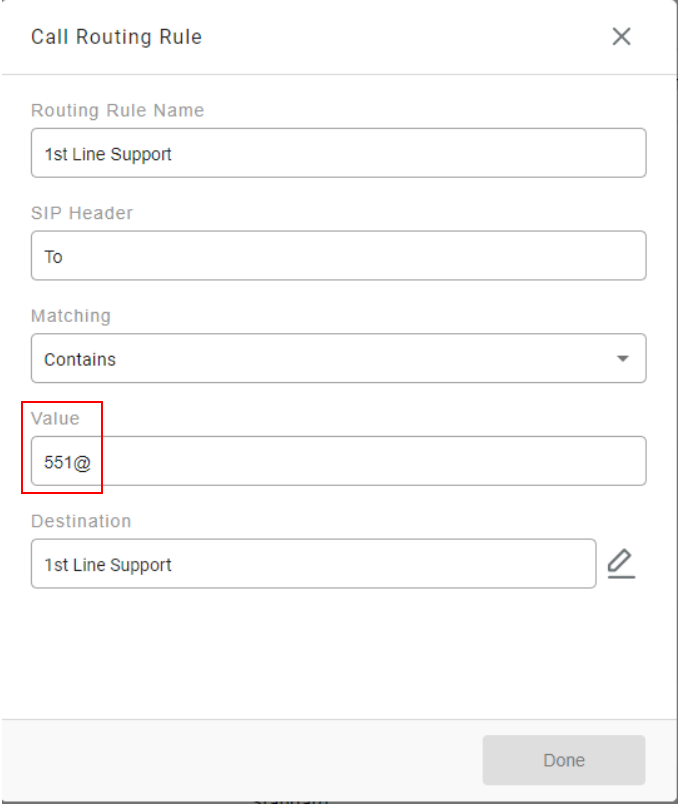
- Set the "Destination" to whichever Skill group you wish those calls to route to
Updated 2 days ago