
Authenticating with your Email Service
At the time of this article the supported email services for authentication include:
- Microsoft Outlook
- Google GMail
IMAP must be enabledTo support inbox sharing, your email service will need to have IMAP enabled for the given account.
Learn more about Microsoft IMAP settings here.
Though Xima CCaaS is a great solution for distributing emails among your team and reporting on their performance in handling your customers email requests, it is not the email service provider. However, we can authenticate with your email service to handle all emails sent to specific email addresses. In this article you will learn how to authenticate to each email address.
In this example, we'll pretend that we need all emails that are sent to the address of [email protected] to be routed to Xima CCaaS.
-
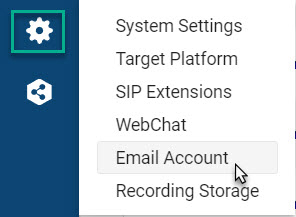
First, while logged into Xima CCaaS as an admin, navigate to Admin Settings►Email Account
-
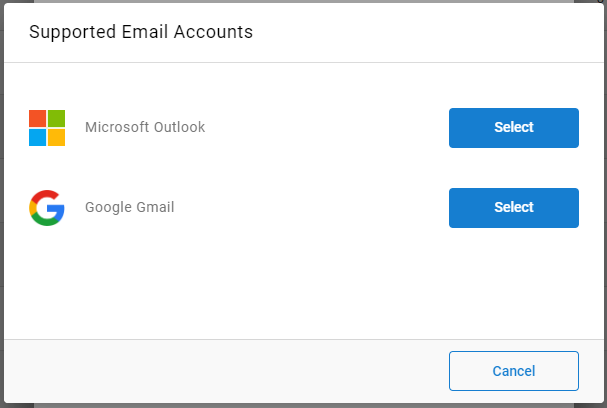
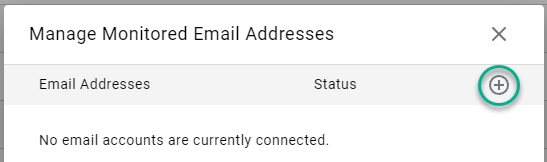
Next select "+" in the top right hand corner to add a new monitored email address.
-
Choose which email account type you'll be using (Microsoft or Google)
-
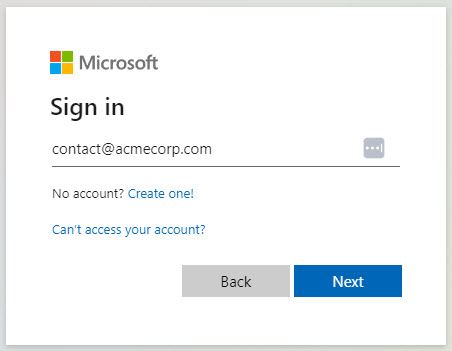
You'll immediately see an authentication modal from your selected email service. Enter the email address then password to access the desired account
-
You'll be prompted to approve a few different levels of integration. For the email channel to work successfully, please accept all suggested access levels. We do not request any access not needed.
Microsoft May Require ApprovalSome Microsoft suite accounts have been configured where manual consent is required from an administrator. When attempting step 5 above, you may be blocked with a "Approval Required" alert. To learn more, review the "Microsoft Secondary Approval" section below.
-
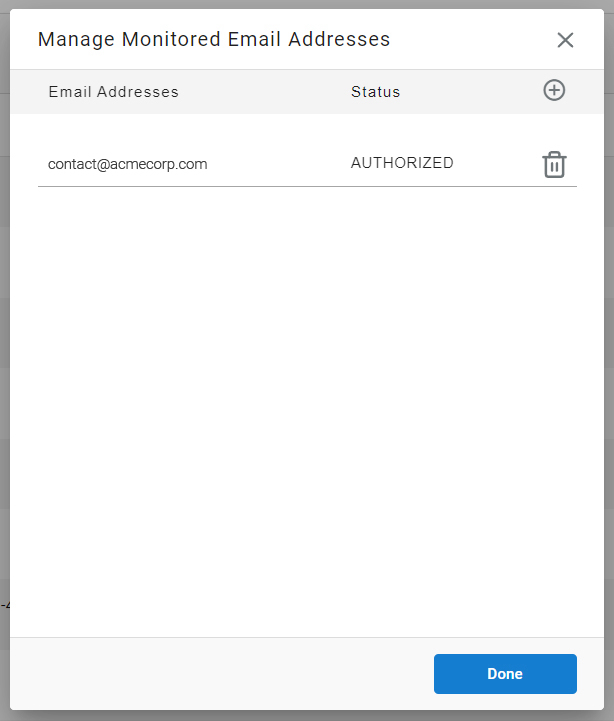
If successfully authorized, you'll now see your email account in list of monitored addresses
-
You may select "Done" if you've added all email addresses desired. If you'd like to add another address, simply select the "+" button in the top right for each.
NOTE: Each email can use additional routing rules defined later to target different skills. You do NOT need a unique email address for each skill but it is optional.
Microsoft Outlook Secondary Approval (When Applicable)
When attempting to authenticate Microsoft Outlook, you may get the following notice:
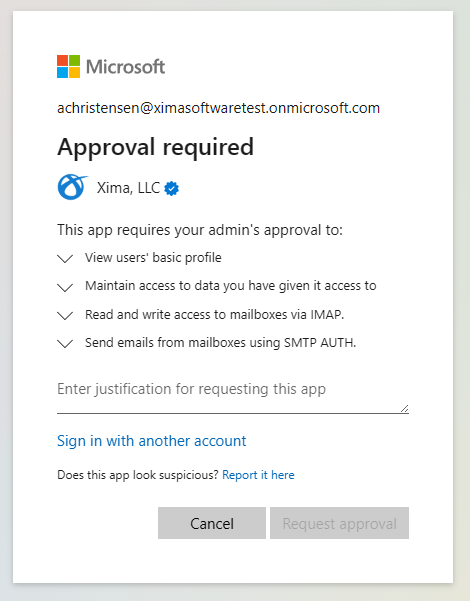
You'll need to fill out the "enter justification" section with why you're requesting approval for the integration. This approval request and justification message will be sent to your Microsoft suite administrator(s).
You will see the following screen and the authentication will not be complete:
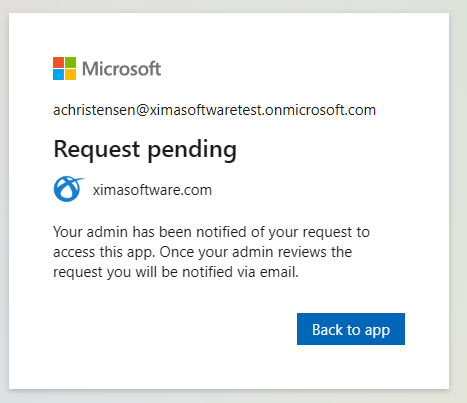
Please work with your administrator to ensure they complete the approval request in their email.
Once they've approved, the requesting email account will get an email notice but the process is not done yet.
After approval is given, you'll need to return to the configuration menu:
Select (+) account again:
This time, instead of selecting the "Select" button for Microsoft Outlook, select the "..." and then "Consent Received"
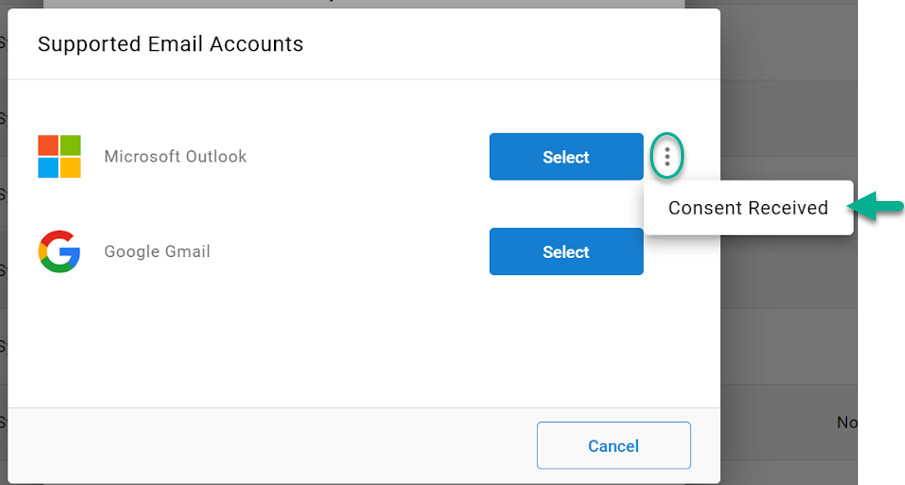
This will finalize the process of authentication when manual consent was needed.
Updated 10 days ago