
On-Prem EHR/EMR Integration - Installing the JumpAgent Client
For sites where the EHR/EMR is hosted on premises, a local client needs to be installed in order to securely access the demographics and appointment data. We estimate this installation should take between 5-15 minutes.
Preparations
To make sure this is a smooth and successful install, the IT specialist should ensure the following:
- Have access to one of the following:
- The database server of the EHR, or
- Another server within the same subdomain of the EHR's database server.
- The server will need to have web access to successfully run the installer.
- Installation users should have installation rights to the target server.
- Have Read-only Credentials to the EHR / PM database.
Once the connecting practice has the required information and you have generated the license, you're ready to begin.
Phase 1: Web Form
-
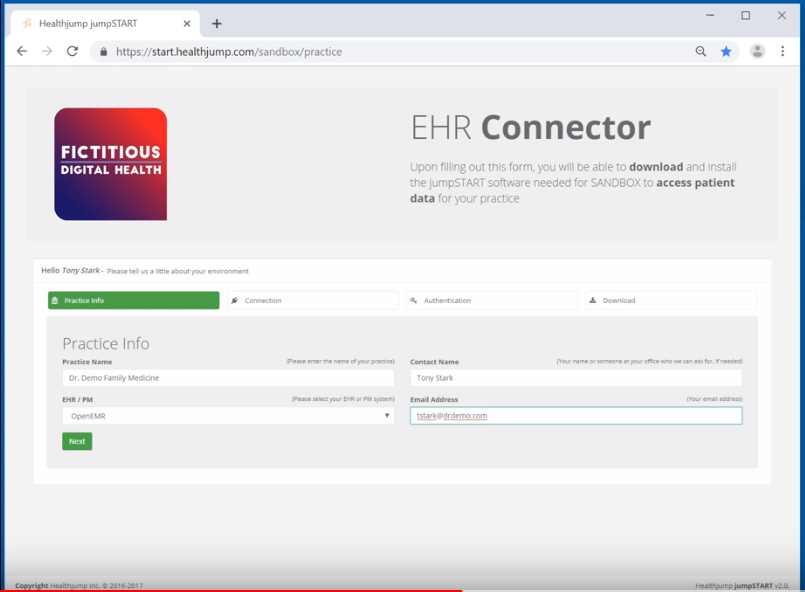
Open the custom start.healthjump.com URL provided by Xima/Healthjump on the server that will be hosting the JumpAgent.
-
In the web form enter the Practice name, EHR, contact name, and e-mail address.
Note: the contact should be the person or team of people who will have the ability to restart the JumpAgent in the event that it becomes unresponsive and Healthjump is unable to restart it remotely.
-
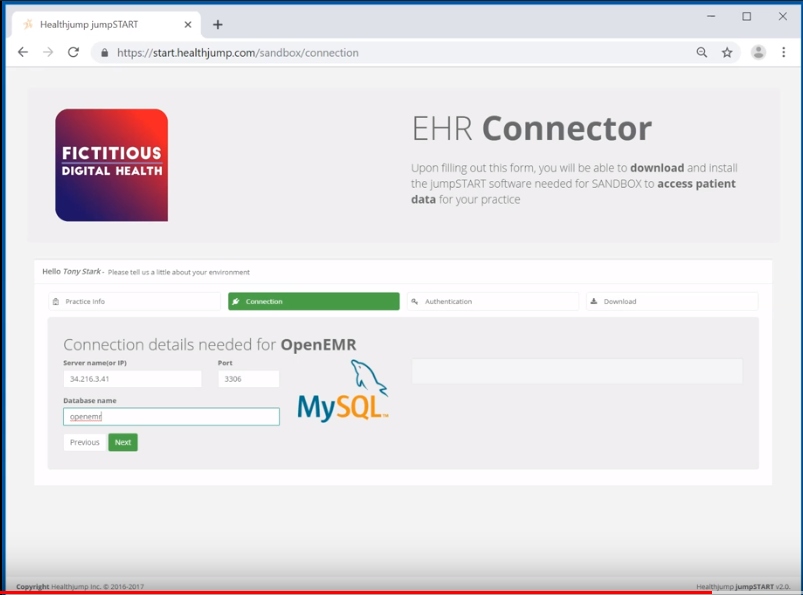
Proceed to the next screen and enter the connection details. In some instances, this page will be pre-populated for you already. If it is not, the only information that needs to be entered on this page is the server name, port number or IP Address, and database name.
Note: The database name should include the EHR that the vendor typically uses. If your database name is different we can easily overwrite this later.
-
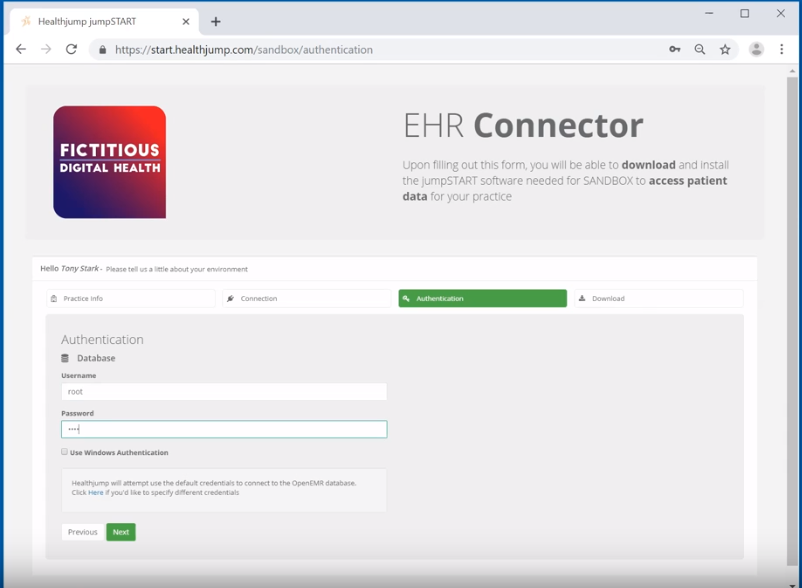
Continue to the next page and enter the credentials (username and password) for the database. Depending on the database, either direct database credentials or Windows authentication will have to be entered.
Note: Those with Windows authentication for DB access will have to complete an extra step once the installation is complete.
-
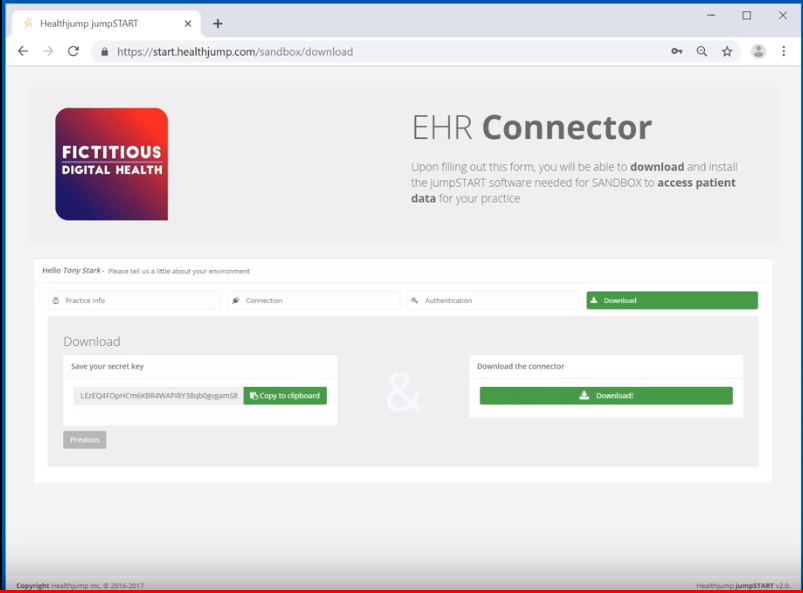
In the final part of the web form, Healthjump will generate a secret connection key unique to you. This key is needed for Healthjump to ensure secure communication with the EHR database. The key should be stored someplace safe as it will be needed for the next part of the installation. Once the key has been stored you can proceed with the JumpAgent download.
Phase 2: Installation
-
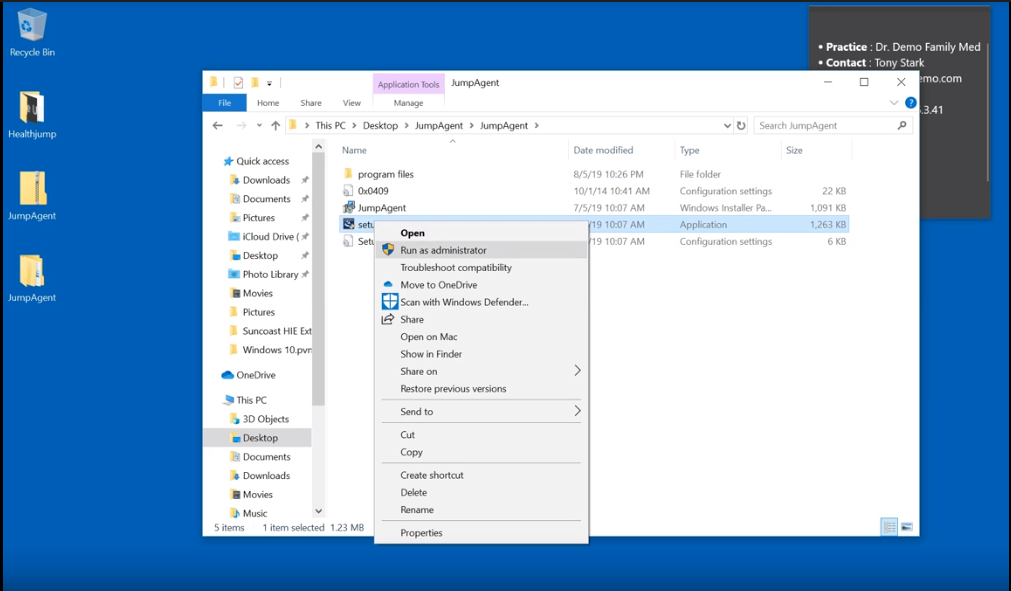
Once JumpAgent is downloaded it can be unzipped. In the folder of the unzipped installer, the IT specialist should right-click on the setup executable file (setup.exe) and select Run as administrator. The installer should initiate and the JumpAgent application should be downloaded in the Program Files (x86) folder.
-
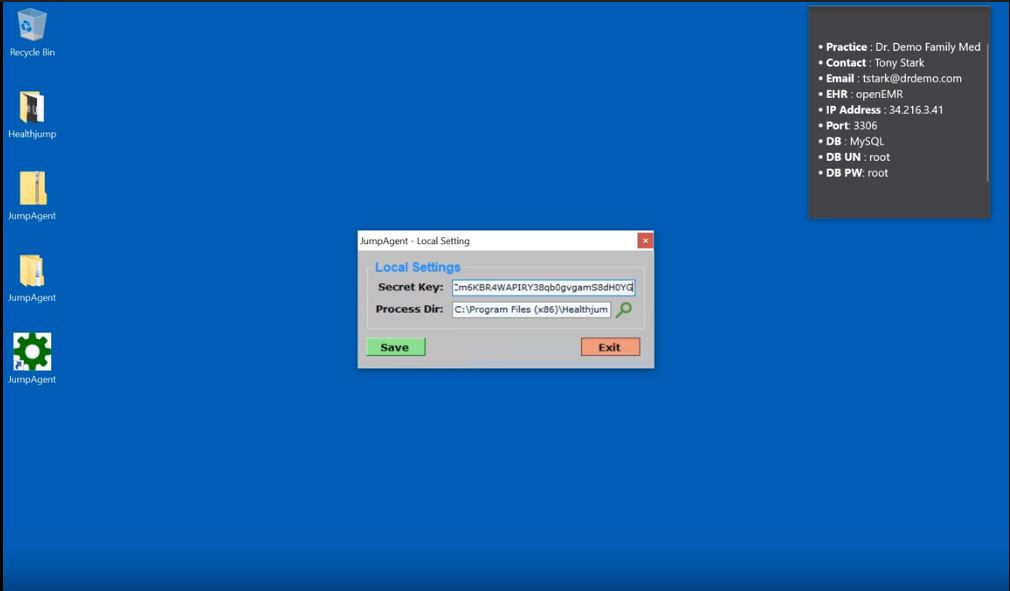
Double-click on the cogwheel icon on the server desktop when the installation finishes. Double-clicking on the icon should bring up an interface where you can enter the secret key from the final page of the web form. If the key entered is correct and you have the proper permissions to the program folder, your server will be able to communicate back to the Healthjump servers and the JumpAgent app will open.
-
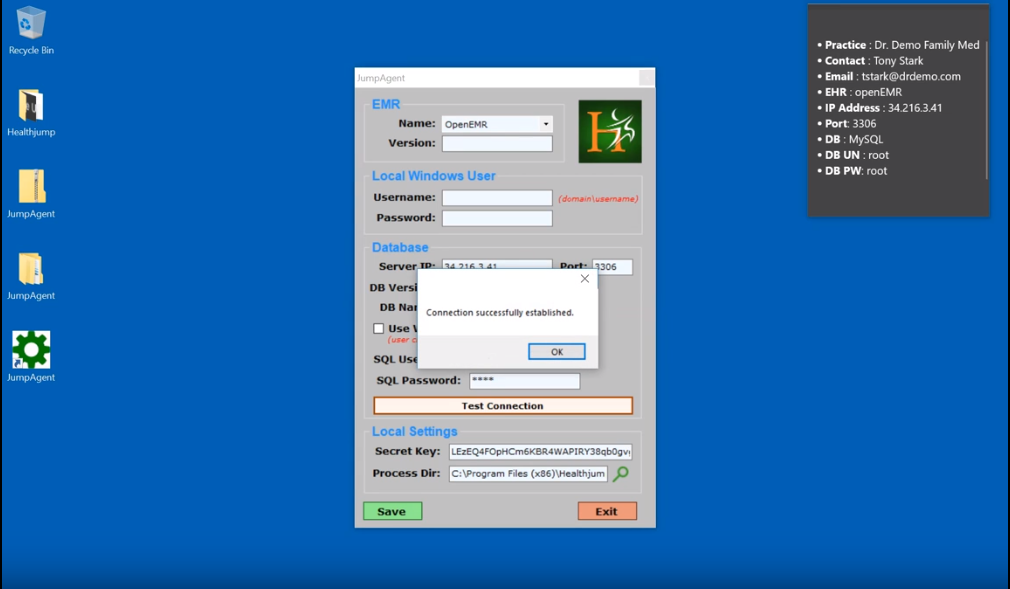
All of the information entered in the previous web should be pre-populated for you. If everything looks good you can press the Test connection button. If all is good the connection will be successful.
If the connection fails there are a couple of common issues you can change to fix this:
-
Wrong IP Address/Server Name: This can often be solved by replacing the Server Name with the IP Address or vice versa.
-
Wrong Database Credentials: Credentials should be tested prior to installation to ensure connectivity to the specified database.
-
If the failed connection error persists despite these changes, please contact a Healthjump support technician for further assistance. Once you have a successful connection you have officially completed the install phase and are ready to move to the final phase: starting the Agent.
Phase 3: JumpAgent Services
To start the JumpAgent service open services (services.msc) and then scroll down until you find JumpAgent. Along with JumpAgent, you should see two other services, JumpAgentMonitor and JumpAgentRestart. JumpAgentMonitor & JumpAgentRestart should already be running. The JumpAgentMonitor is monitoring the behavior of the JumpAgent service and JumpAgentRestart is used by Healthjump to restart and upgrade the JumpAgent service remotely. JumpAgent.exe should be started.

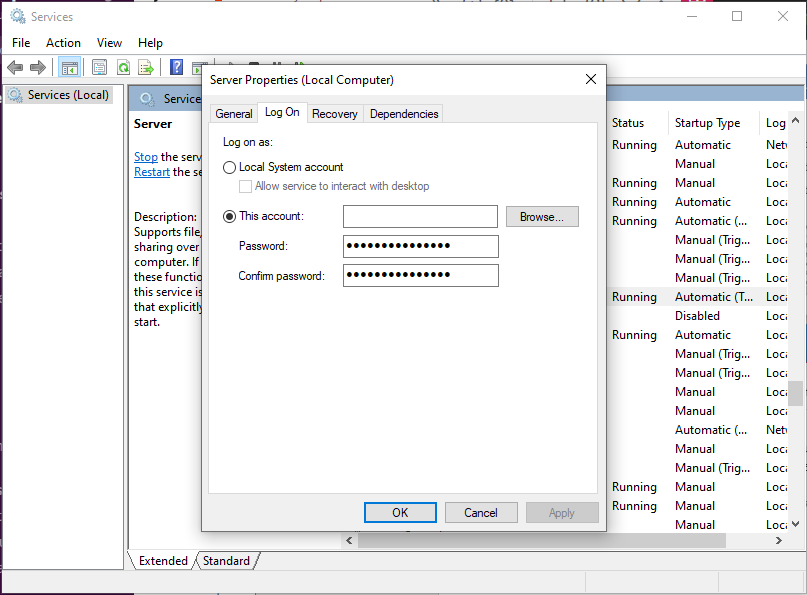
Note: As previously mentioned, if you chose to utilize Windows authentication for the database credentials during the web form process, you will need to update the service credentials to use those same credentials provided for access to the database. In the services window right click on the JumpAgent service, then open the properties. Under the Log On tab, select This account and browse for the Windows user entered in the JumpAgent, then enter the password and apply.
When this is complete, the service can be started. If the customer is planning on utilizing the JumpConnect data platform, the digital health vendor or Xima/Healthjump installation technician needs to collect a time that agent scripts can be executed each evening.
This completes the JumpAgent installation process.
Updated 8 months ago