
Xima UCaaS - DID/Phone Number Routing
This article covers setting up DID or Phone Number Routing inside of Xima UCaaS
Steps
- Log into the Xima UCaaS administrator interface, and select Inventory to find a list of your phone numbers or DIDs assigned to your phone system\
 \
\
\ - To edit a DID or phone number select the blue Phone Number from the available numbers below, or the Pencil icon to edit your selected route\
 \
\
\ - Select your desired options as covered below
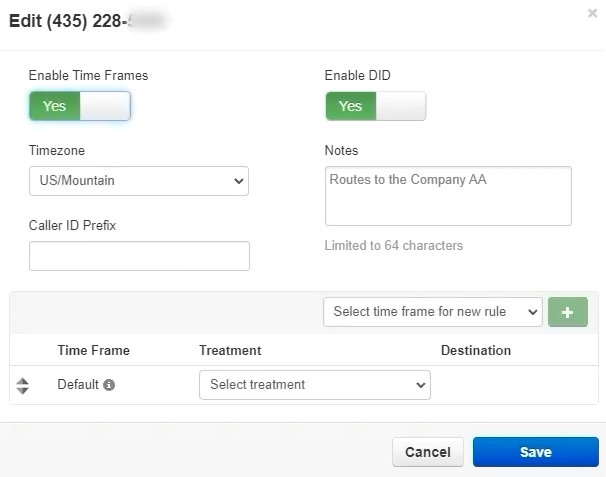
- Enable Time Frames - If you select Yes you will see the options below to determine what times calls will route to various departments to service your customers\
 \
\
\
- Timezone - This is a great tool as it allows you to define various routing options depending on where your customers are being serviced
- Caller ID Prefix - Still available as an option, but you define the route below
- Notes - Still available as an option, but you define the route below as shown here\
 \
\
\
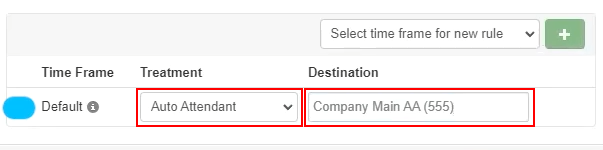
- First, Define a Default Time Frame - A good practice is to have the default destination as your main group or auto attendant, wherever you would like the call to route during business hours\
 \
\
\
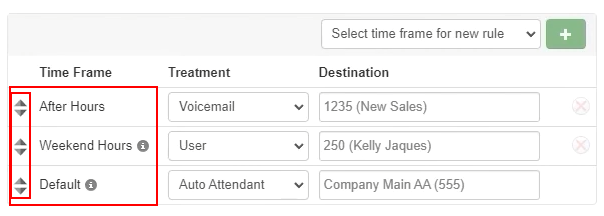
- Here for example we have defined the Auto Attendant for Treatment with the Destination of Company Main AA (555) for our specific phone system as an example\
- Here for example we have defined the Auto Attendant for Treatment with the Destination of Company Main AA (555) for our specific phone system as an example\
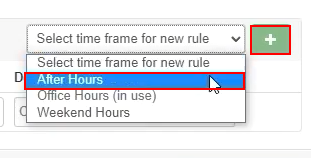
- Here, we have already configured an After Hours time frame per the steps here, and we can select that time frame and then click the + sign to add it below\
 \
\
\ - For our After Hours time frame, we have selected Voicemail for the Treatment, and 1235 (New Sales) for the voicemail destination that we have available as another example
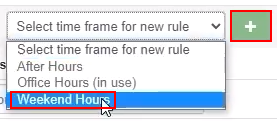
- You can also configure Weekend Hours by selecting it from your created time frames by selecting it from the drop-down and then clicking the + sign to add it as shown below\
 \
\
\
- Here, we have selected a User that works the weekends for Treatment, and that Users Extension for the destination\
- Here, we have selected a User that works the weekends for Treatment, and that Users Extension for the destination\
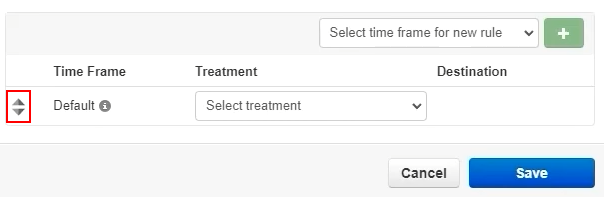
- Before saving, we need to reorder these time frame rules in the order we want to be referenced for a new inbound call
- We will put Default hours at the bottom so it checks for After Hours and Weekend Hours first before routing a call to the default time frame when the preceding rules do not apply\
 \
\
\
- We will put Default hours at the bottom so it checks for After Hours and Weekend Hours first before routing a call to the default time frame when the preceding rules do not apply\
- Select Save when done\
- First, Define a Default Time Frame - A good practice is to have the default destination as your main group or auto attendant, wherever you would like the call to route during business hours\
- Enable DID - Enabled by default, and you have the number to disable a phone number or DID route without losing the settings that are applied. This allows you to enable it later without losing the configuration
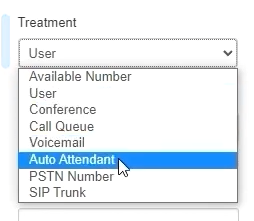
- Treatment - This configures a destination for the phone path, with the available options listed below. Once you select one a new box will open up letting you select a destination for your selected option\
 \
\
\
- Available Number
- User
- Conference
- Call Queue
- Voicemail
- Auto Attendant
- PSTN Number
- SIP Trunk\
- Enable Enhanced Voicemail - Available if you are not using a Timeframe
- Caller ID Prefix - This is optional, and gives the ability to append information to the incoming phone number to follow the call as it routes through the phone system
- Notes - Enter general notes to help identify what this route is used for future reference
- Enable Time Frames - If you select Yes you will see the options below to determine what times calls will route to various departments to service your customers\
Updated 8 months ago