
Applying Xima Contact Center Licenses to Agents
In order to track and apply Xima CCaaS features to agents, they will need to be licensed accordingly. This article covers how to apply available licenses to the agents.
Xima Contact Center licenses may be applied to users on most Unified Communications (UC) systems using WebRTC (an embedded softphone in the Xima Agent Client). They do not need to exist in the UC system and must be built manually in Xima CCaaS. Refer to the Agent Licensing in Xima CCaaS section below.
Xima Contact Center licenses may also be applied to existing agents who are using the following UC systems:
- Avaya Cloud Office
- Ring Central
- Netsapiens
- Metaswitch
These agents can be pulled from the UC directory and would be licensed using the Phone User Licensing in Xima CCaaS section of this article.
Phone User Licensing in Xima CCaaS
- Log in to Xima CCaaS
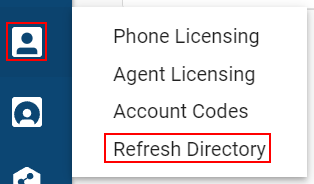
- Along the left-hand side in the navigation pane, hover over the agent icon and select Refresh Directory
- This reaches out to the UC directory and updates Xima CCaaS to match all the users as seen in the UC directory
- This reaches out to the UC directory and updates Xima CCaaS to match all the users as seen in the UC directory
- You will now be able to add licenses to any new agents
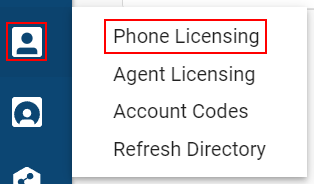
- Select the agent icon and select Phone Licensing
- You will then be presented with the licensing window
- This window will display which licenses you've purchased (including Voice and/or Chat) as well as how many licenses you have available to assign
- Note: Contact Center Web Chat requires the purchase of the Contact Center Web Chat channel.
- Select the appropriate license button for each agent
- This is done by navigating to the agents in the list and checking the corresponding boxes to assign them the desired licenses

- This is done by navigating to the agents in the list and checking the corresponding boxes to assign them the desired licenses
- If an agent will not be utilizing a Xima CCaaS license, leave their buttons unchecked
- As you select the licenses to assign to the agents, the count of licenses assigned/available will reflect appropriately.
- Click Save when you are done
Agent Licensing in Xima CCaaS (WebRTC users)
- Log in to Xima CCaaS
- Along the left-hand side in the navigation pane, hover over the agent icon and select Refresh Directory
- This reaches out to the UC directory and updates Xima CCaaS to match all the users as seen in the UC directory
- You will now be able to add licenses to any new agents
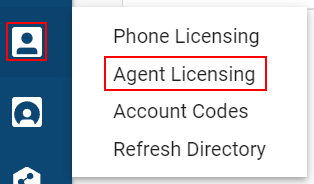
- Select the agent icon and select Agent Licensing
- If the desired agent has not yet been configured in Xima CCaas, select Add Agent in the bottom left corner
- Add the agent information to the Agent Profile window:
-
Name: Agent's Full Name
Email Address: The agent's email address to be used to authenticate and set a password. Must be Unique from the email address assigned to the agent's UC extension (If they have one)
Extension: A unique extension number
Preferred Name: How the agent's name will appear to customers engaged in WebChat
Recording Mode: If Xima is being utilized to record agents, what rule will be assigned for this agent
-

Best Practice for Extension AssignmentIt is best to assign WebRTC agents to their own extension range that is separate from any existing extensions on the UC platform. For example, if agents on you UC system are assigned in the 2000-2999 range and Groups are in the 3000-3999 range, consider setting up Xima WebRTC agents in the 4000-4999 range.
Also, as WebRTC emails need to be unique, adding something like +cc or +WebRTC would get things set. For example, this would make the UC login for the Contact Center Agent Client as [email protected] and the WebRTC login as [email protected]
- Select "Save" in the Agent Profile window
- Select the appropriate license button for the new agent
- This is done by checking the corresponding boxes.
Updated about 1 month ago