
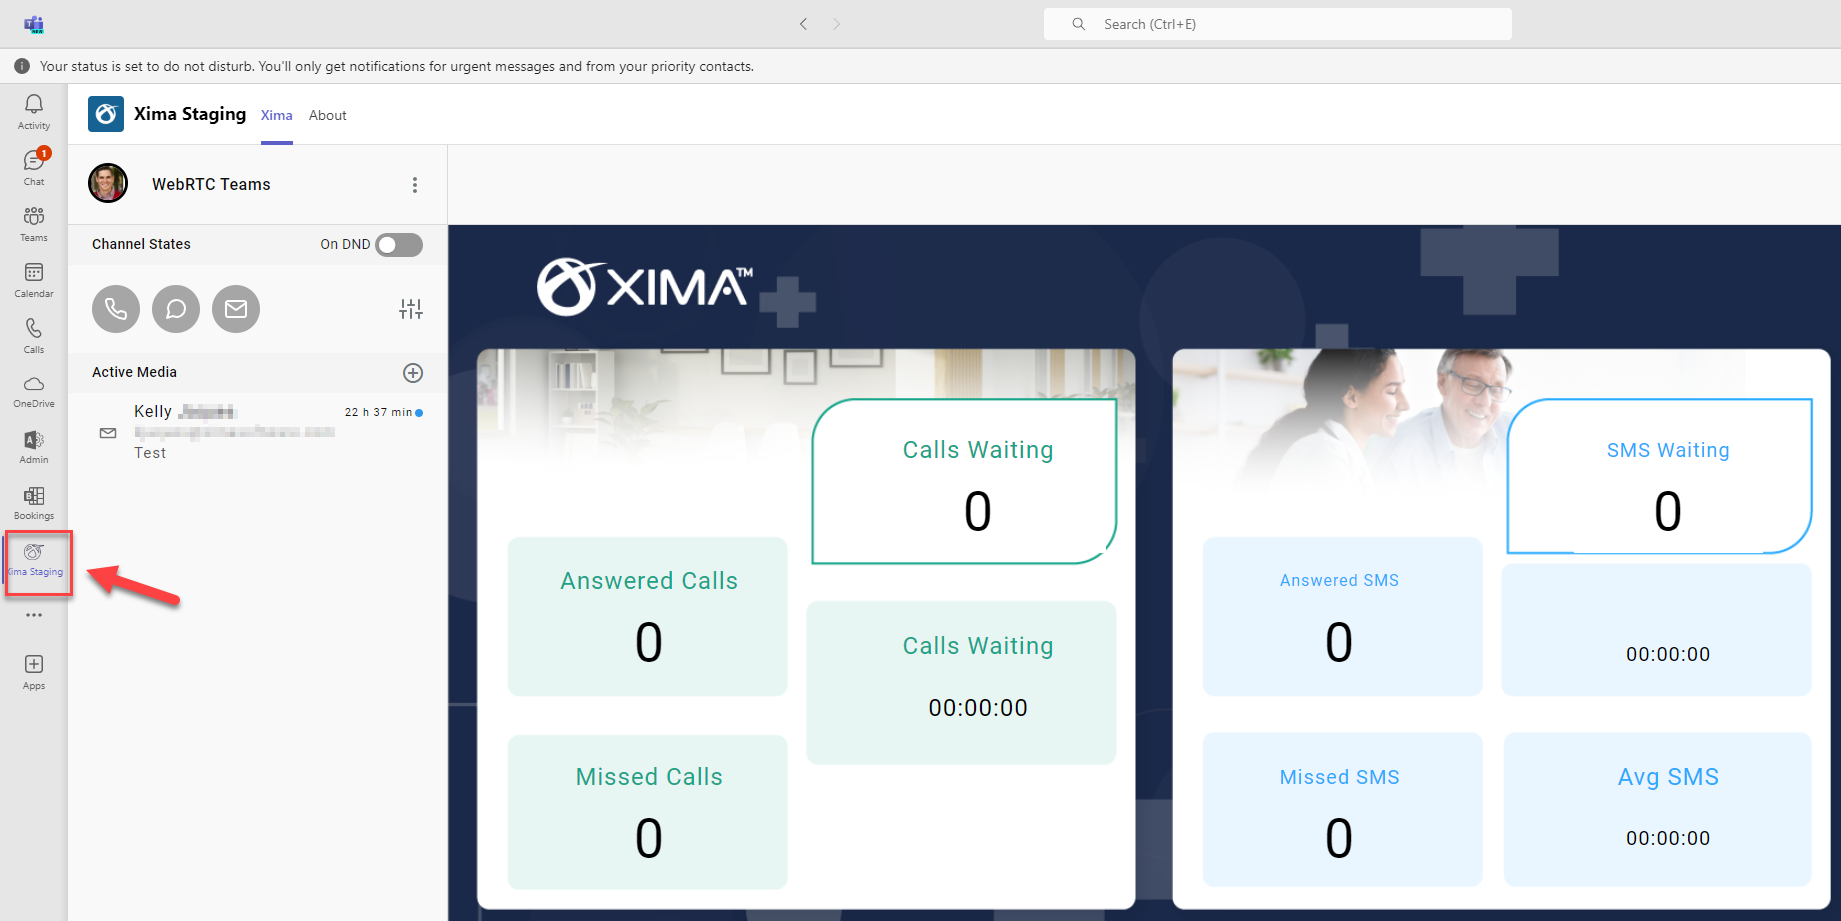
Linking Xima CCaaS To Microsoft Teams
Once the steps below are completed, the Xima CCaaS Agent Client will be available within the Microsoft Teams interface
Steps to import Agent Client to Teams
-
Download the application's ZIP folder
-
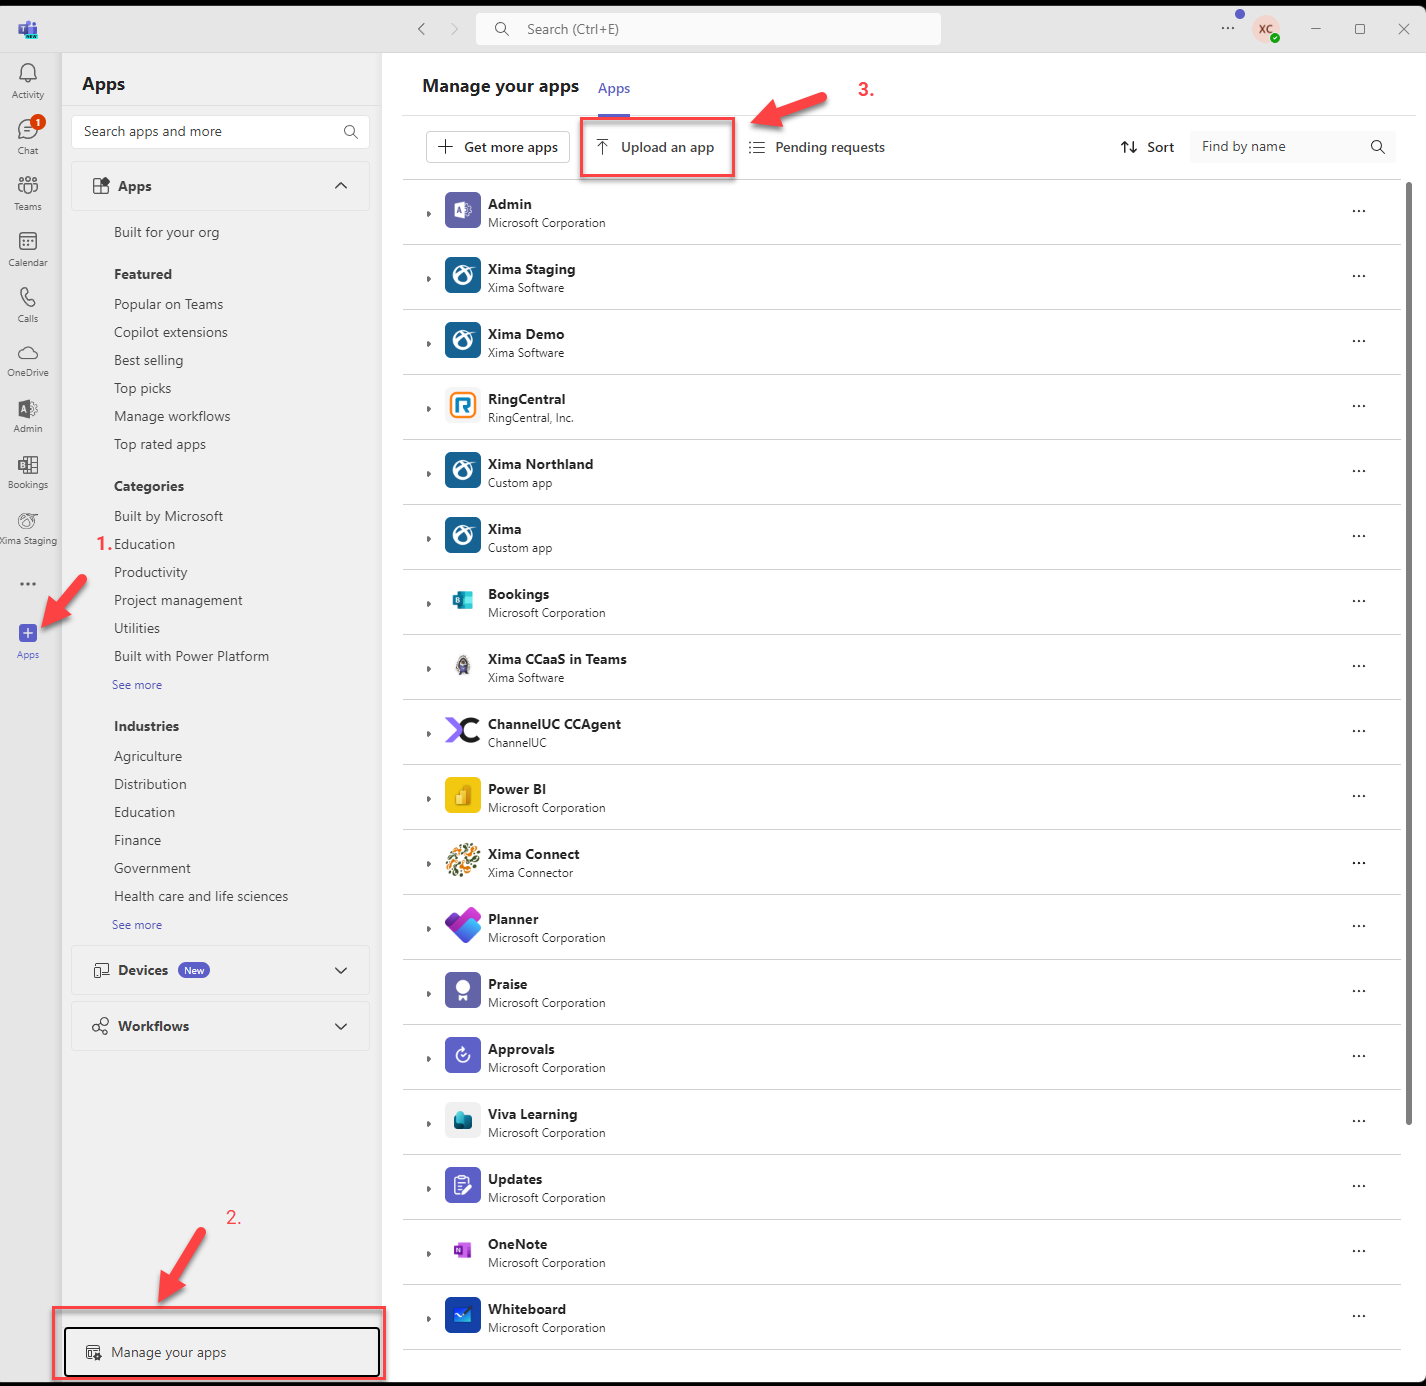
As a Global Teams Admin, please navigate to Apps > Manage Apps > Upload an App
-
Depending upon your permissions level, you'll be provided with these options:
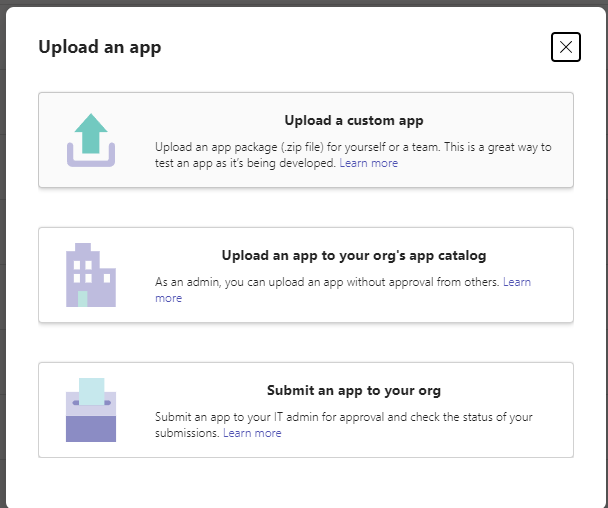
- Any of them should ultimately work, but if your only option is "Submit an app to your org", you'll have to get it approved as an IT admin.
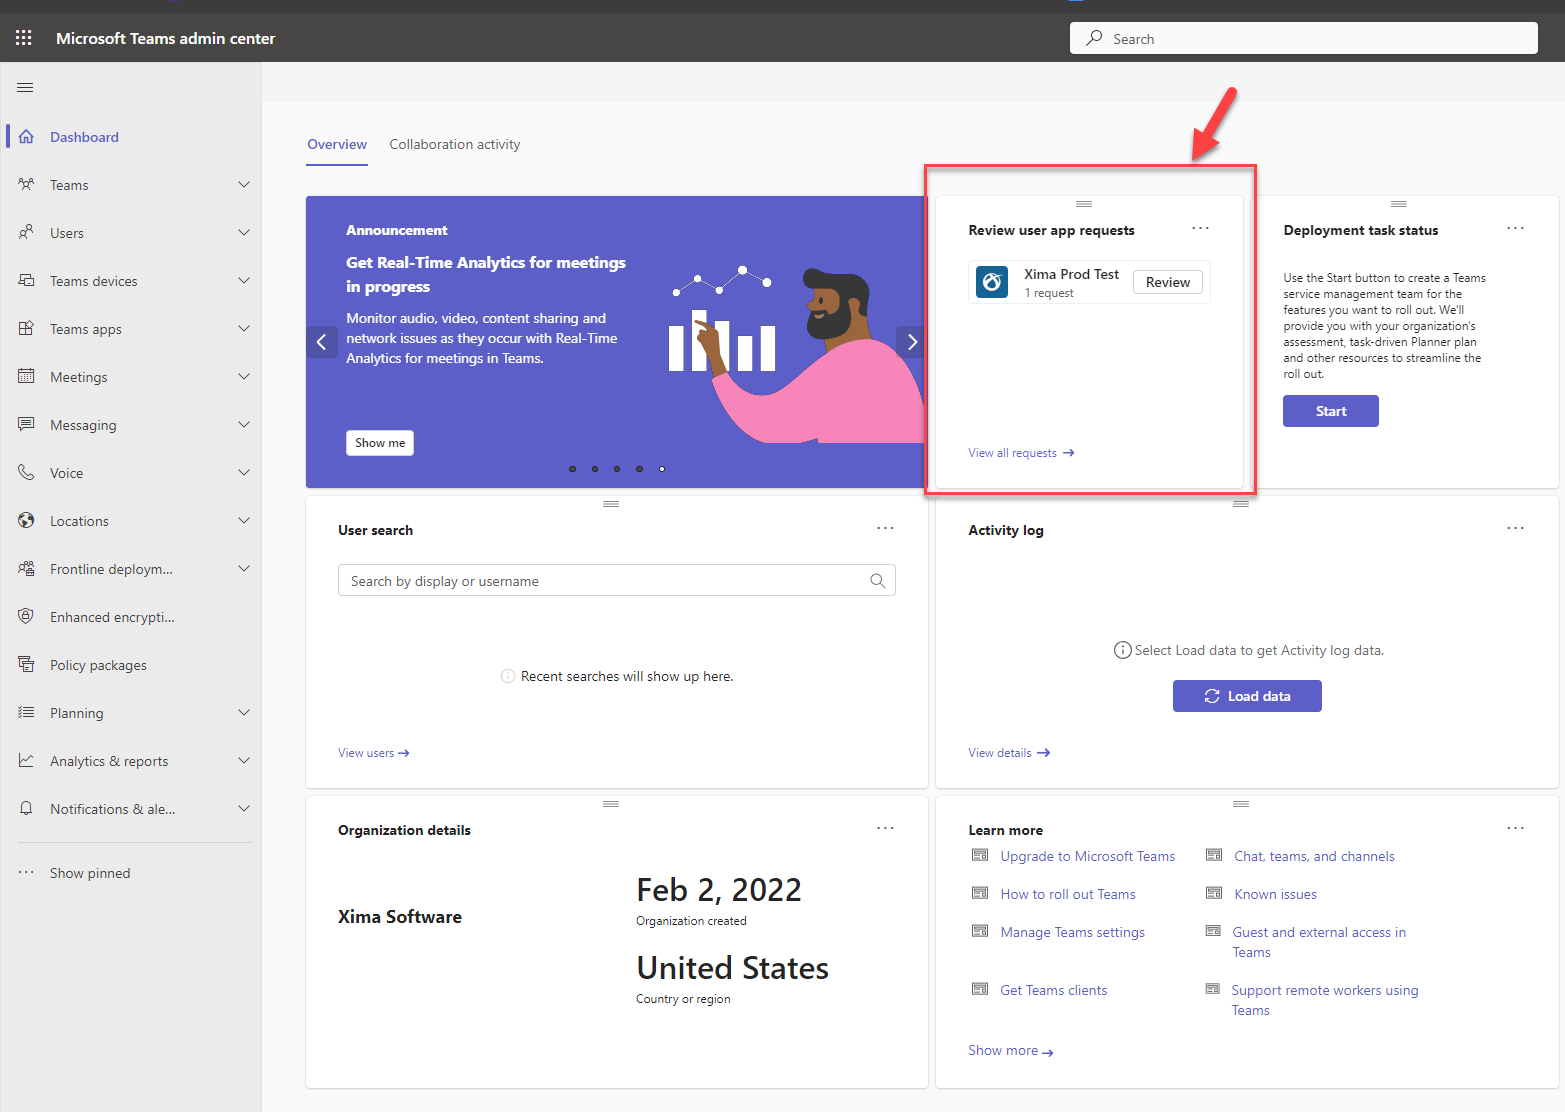
- That is done by going here - https://admin.teams.microsoft.com/dashboard
- Any of them should ultimately work, but if your only option is "Submit an app to your org", you'll have to get it approved as an IT admin.
-
You should now have a pending "app request" or something similar in your admin center
-
Click on the Review option, if the pending app is showing
-
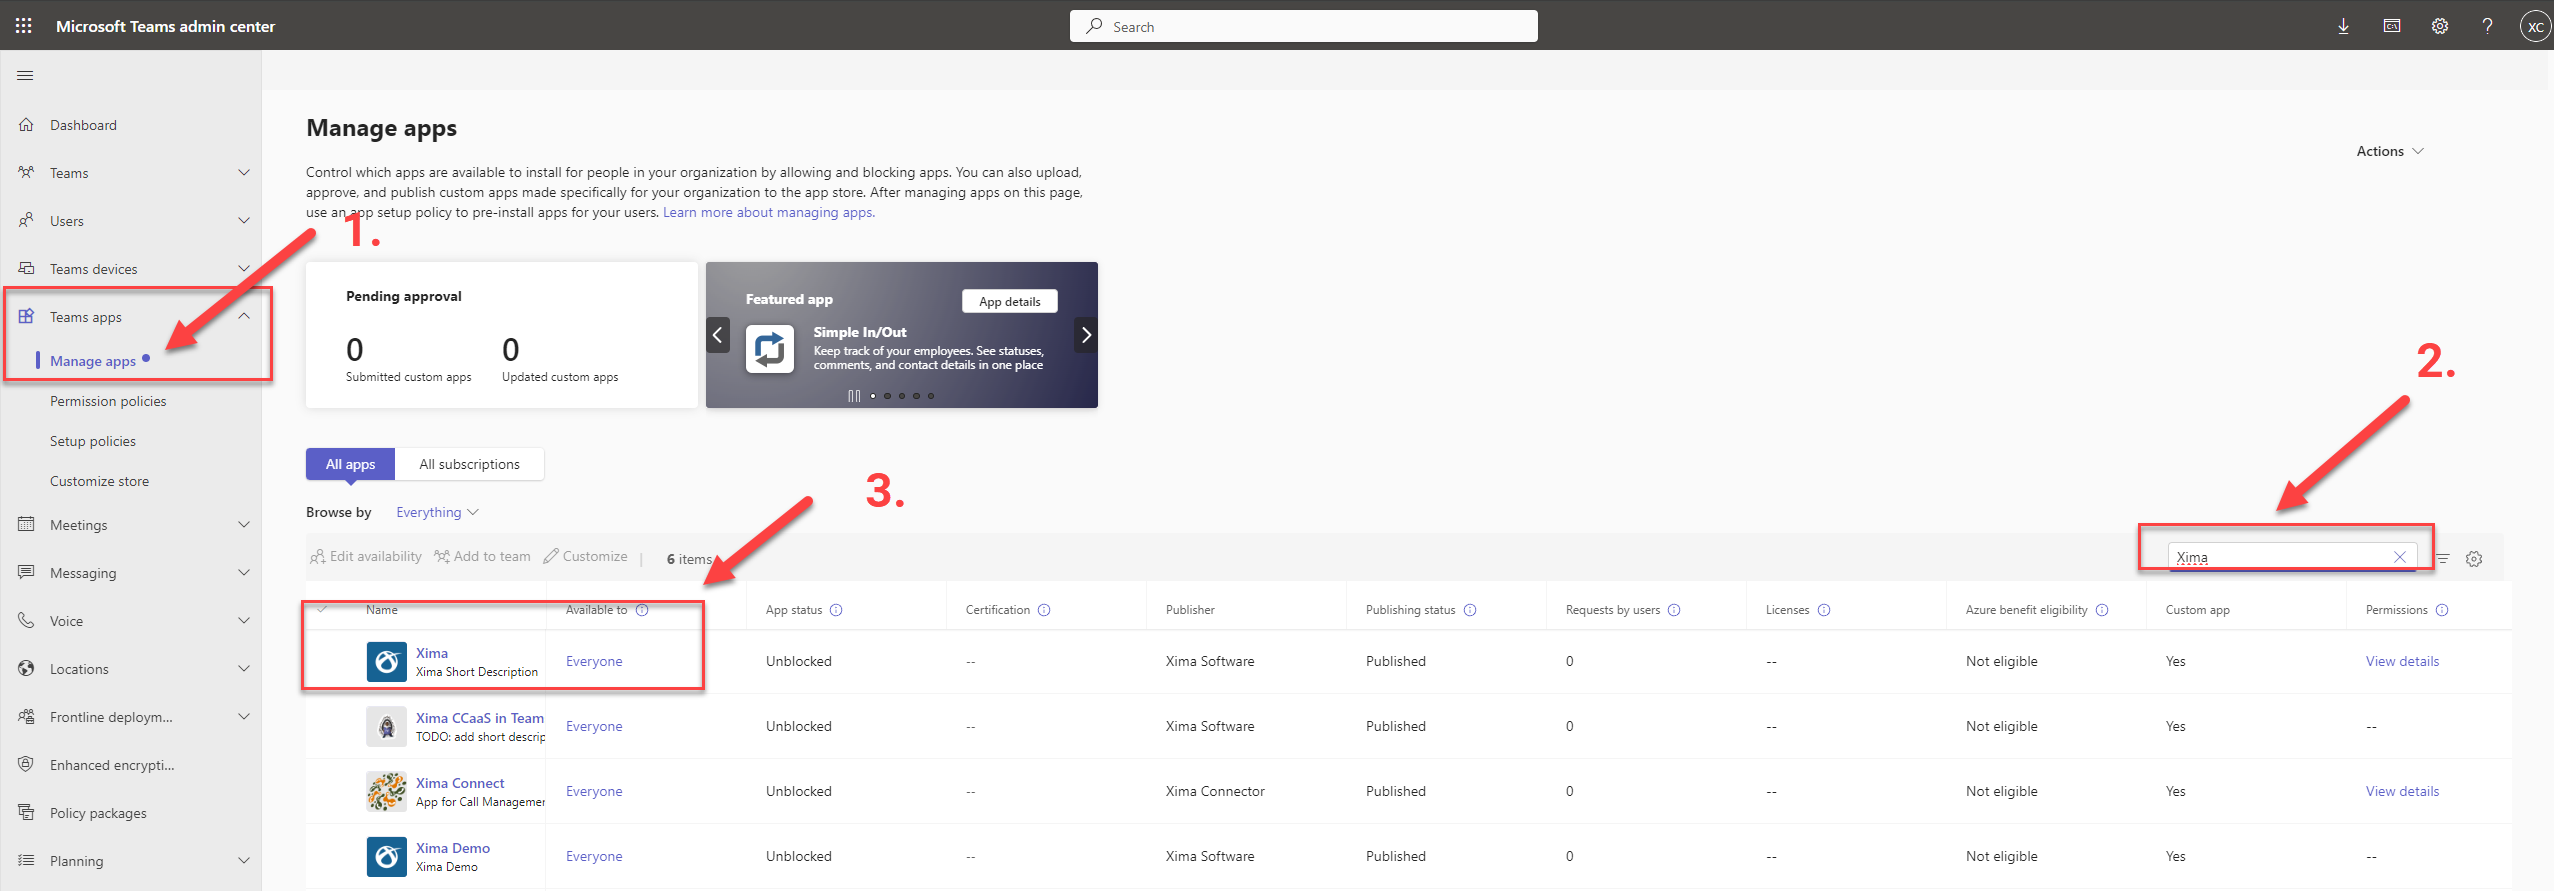
Alternatively, navigate to Teams Apps > Manage Apps and type in the word "Xima" in the search bar
-
Select the "Xima" app
-
-
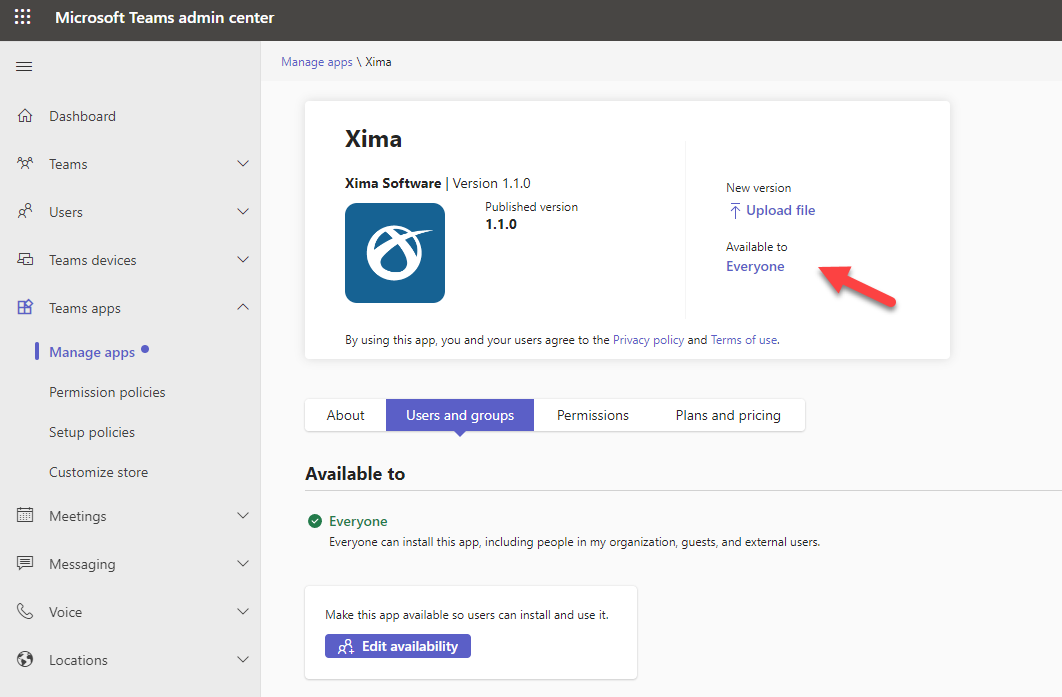
Entering the main app page, you'll likely have a Publish option. Go ahead and publish the app
- In the example below, the app has already been published and approved for "Everyone" in the organization
-
If you'd like to apply this app to only certain users, you can click on Users and Groups > Edit Availability

-
Once this app is published, it should take a few hours before it becomes available in your organization's app library
- It likely won't be available immediately, so please be patient
Updated 10 days ago