
Data Dip - Configuring a Profile and Adding to an IVR
Use Cases
- Change the call routing behavior based on data pulled from your database about the calling party
- Display data from your databe base to agents while taking the call and/or logging the data in historical report
- Referencing your database for the assigned representative tied to the calling party and routing the call directly to that agent/team.
Web Service RequiredIn order for Xima CCaaS' IVR to perform a data dip, there must be a web service provided by your database, CRM, or other data service. Xima will reach out with your provided web service URL, a bearer token, and a JSON payload. Your web service must be able to authenticate our request and reply with a customized JSON payload.
Pro-services are available for assistance. Your database and web service cannot be managed by our traditional support channel.
Your Web Service Must Be Configured FirstConfiguring a data dip requires an API token. This must be obtained from your web service
To learn more about how the web service should be configured, review this article.
Building a Data Dip Profile
-
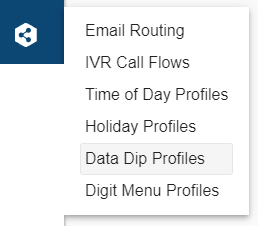
A new data dip profile can be started by clicking "Data Dip Profiles" in the following menu or by selecting "Manage Data Dip Profiles" when adding a Data Dip Action to an IVR:
-
If this is your first data dip profile, the new profile template will be loaded on screen. If you're adding an additional profile, you'll need to select "+ Add New Profile"
-
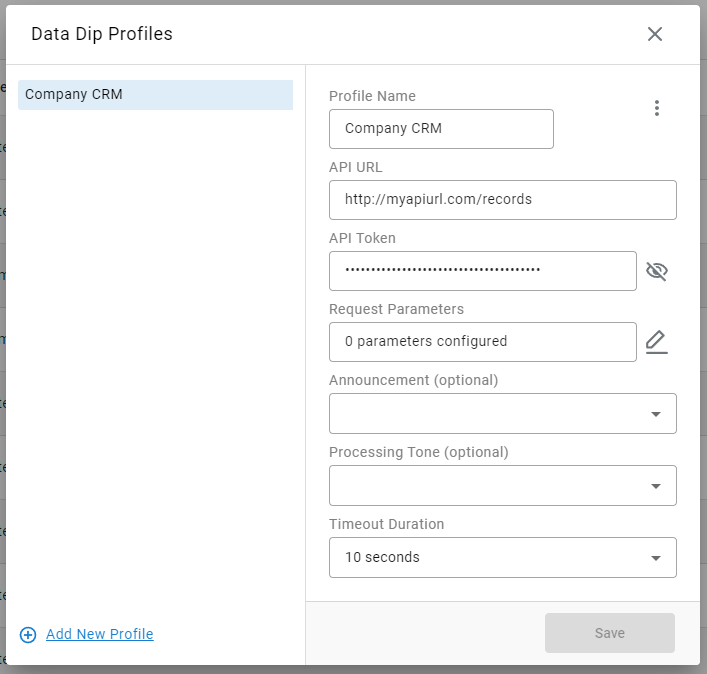
Fill out the fields to properly connect to your data web service.
- Profile Name - Give the profile a recognizable name. This may include what data source you're connecting to.
- API URL - The URL that Xima should send request to for your hosted data web service.
- API Token - The authentication token as provided from your web service that Xima should use to authenticate our requests
- Request Parameters - A request parameter is the value(s) that will be included in Xima's request to help find the correct contact record in your data.
- For example. the external party's phone number or their account number as collected earlier in the IVR.
- Request Parameters will be better outlined lower in this article.
- Announcement - This is an optional field. If you'd like the caller to hear a specific announcement prior to the data dip, this will be heard in its entirety.
- Processing Tone - This is an optional field. If you find that the web service is delayed in getting Xima the requested details, it may cause an extended wait for the caller.
- With this field, you may choose to have a tone or music to be heard while the data is processing.
- Timeout Duration - This is the amount of time the data dip will attempt to collect the caller's data from the web service before giving up and moving onto the next step in the IVR.
- If your data web service is frequently delayed, you may need to increase this timeout.
-
Save your profile before exiting.
Request Parameters
A database request should include at least one key and value to be used to find the correct contact record using your webservice.
When selecting the "Request Parameters" edit icon in the menu above, you'll be prompted to complete the following fields:
- Select "+ Add Request Parameter" if you're adding your first query parameter. Or select the existing parameter to edit.
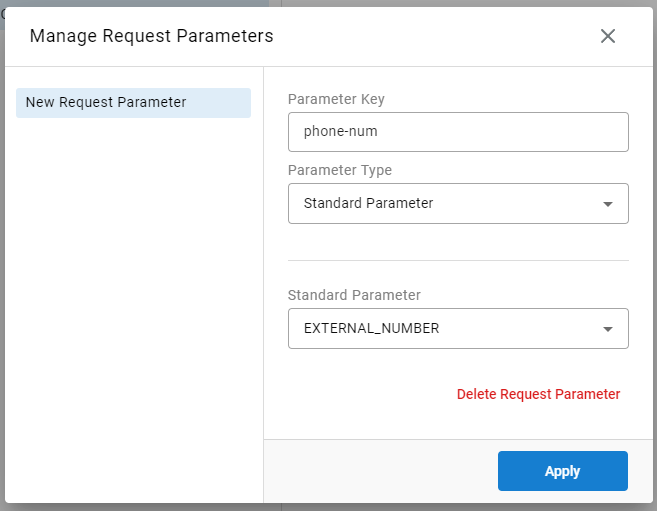
- Parameter Key - This should be populated with the exact key name that your database uses for the applicable value.
- Parameter Type - Here you'll select what type of parameter with Xima should be used. This could be a SIP Header, Standard Parameter, Session Parameter, or Static Parameter
- The resulting fields will vary depending on the type selected.
- SIP Header - Select or enter the SIP Header that should be included in the search query
*This will include the entirety of the selected header value - Standard Parameter - Select the provided External Number or Tag option.
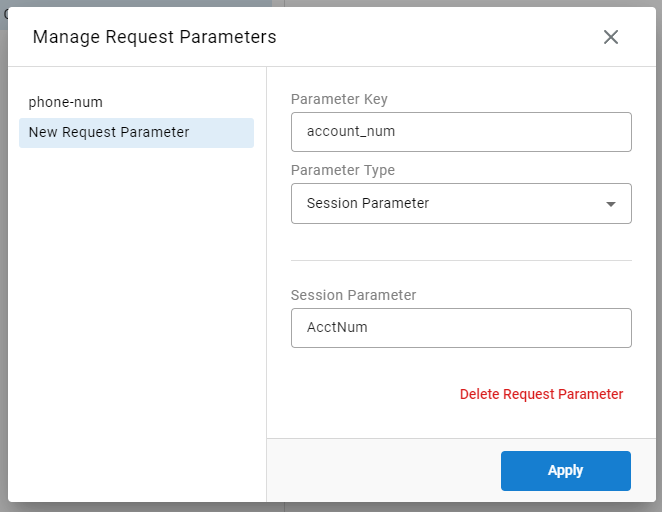
- Session Parameter - Use the open text field to enter the exact name of the Session Parameter as previously defined in the Xima IVR call flow.
- Static Parameter - Enter custom text that will be the statically included value for the key every time.
- SIP Header - Select or enter the SIP Header that should be included in the search query
- The resulting fields will vary depending on the type selected.
- Apply your changes
The example above uses a Standard Parameter to push the caller's phone number as the search query field to compare to your database's "phone-num" column..
Here is an example of a Session Parameter request that is using an account number that was collected earlier in the IVR flow:
Adding a Data Dip Action to an IVR
-
While configuring a new IVR Call Flow (or editing an existing one), select the "+" box to add a new condition/action

-
Select "Data Dip (action)" from the dropdown list
-
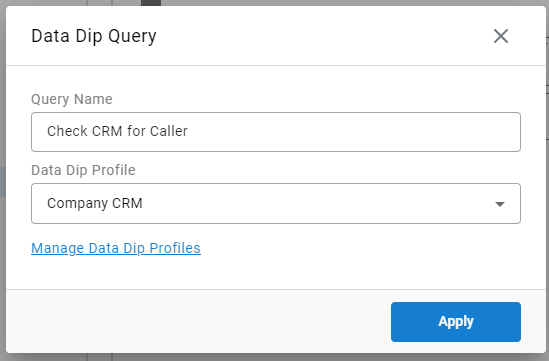
In the "Data Dip Query" menu:
-
Give your query a name. This will be how the data dip is displayed in the IVR flow and in Cradle to Grave
-
Select your preferred profile from the "Data Dip Profile" drop-down menu.
-
You may re-enter the data dip profile builder menu by selecting "Manage Data Dip Profile" to edit an existing profile or build a new one.
-
Adding a Transfer Action to an existing condition as a sub-action
-
In the event you only want to do a data dip if a defined condition is met, simply hover over the bottom edge of the condition until an indented "+" box appears. Then select the "+" option:

-
Select "Data Dip- Action" from the resulting dropdown menu and follow all steps as outlined above.
What Happens After a Successful Data Dip?
When a data dip has succeeded, the data that YOUR web service is configured to return will be added to the call as Session Parameters. Each "Key" will be a session parameter and it's accompanying value will be the session parameter value.
These session parameters can now be used for routing and caller experience decisions using Parameter Conditions.
The data may or may not be displayed to agents and/or in Cradle to Grave and reports. The payload returned from the web service will dictate who each value is shared with and how it is displayed.
Updated about 1 month ago