
UC Multicast Paging
Creates a paging bridge in the Xima UCaaS Admin Portal for unidirectional communication from the device that initiated the page to multiple devices in the paging group.
Multicast Paging is a device feature and not a Xima UC product. Configuration is largely independent of Xima UC. This method is recommended for paging needs for devices within the same Layer 2 network. Because multicast is a Layer 2 function, WAN (internet access) is not technically required for communication to flow, making it a resilient option.
No Xima UC Logging of Multicast PagingBe aware that there will be no Xima UC call history record for multicast paging.
Multicast Paging Configuration
The multicast paging feature is largely independent of Xima UC. It is a device feature.
Refer to your device's manual to learn whether your device is capable of multicast paging.
Below are example resources for configuring it.
How to Enable Multicast Paging
-
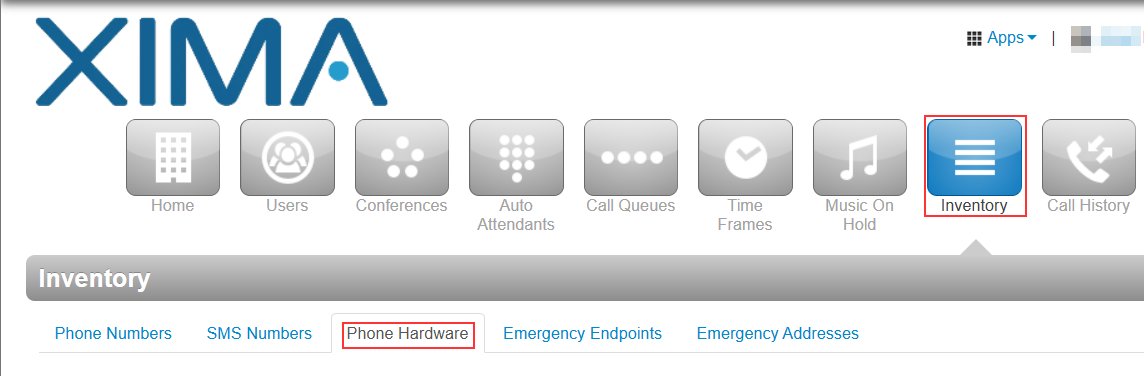
Log in to the Manager portal and navigate to the Inventory
-
Click on Phone Hardware
-
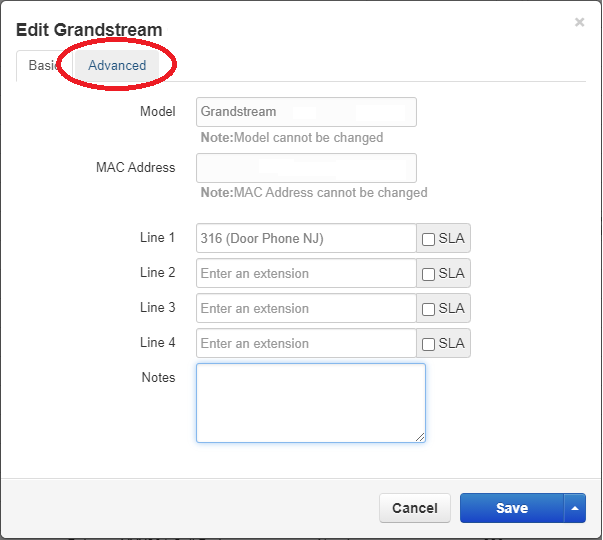
Find the device you would like to enable multicast paging on and click on the pencil icon

-
A pop-up window will appear to make configuration changes on the device. Click the Advanced tab
-
Under the Overrides section, paste the codes below, depending on your phone manufacturer
-
Once everything is set, press the little arrow pointing up from the Save button to Save and Resync
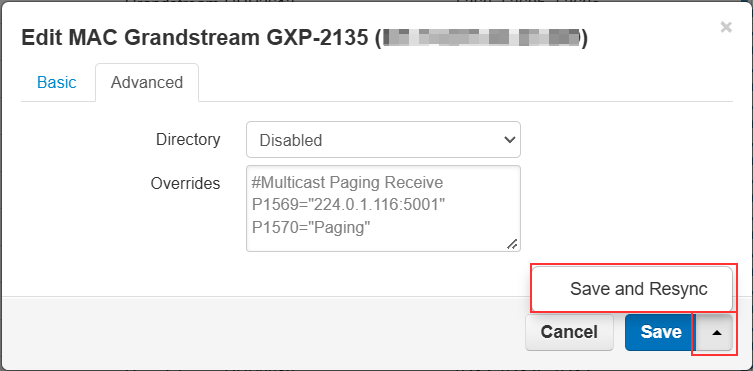
- This will reboot the device, and it should come back up with the "Test Page" on softkey button 3
Grandstream
Sending Multicast Page
- Paste the following into the Overrides section of the phone:
-
Multicast Paging
-
P1367="23"
-
P1368="0"
-
P1469="Test Page"
-
P1470="224.0.1.116:5001"
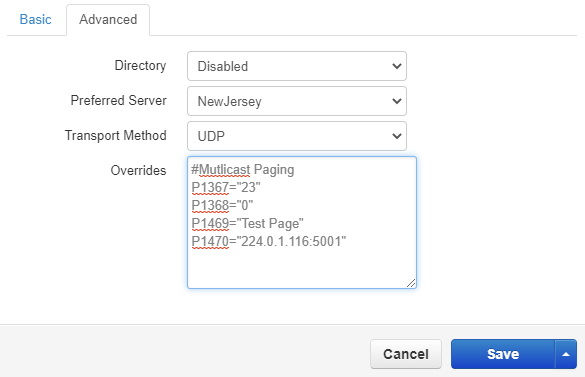
- You can change the label by replacing the text "Test Page" with a different label
-
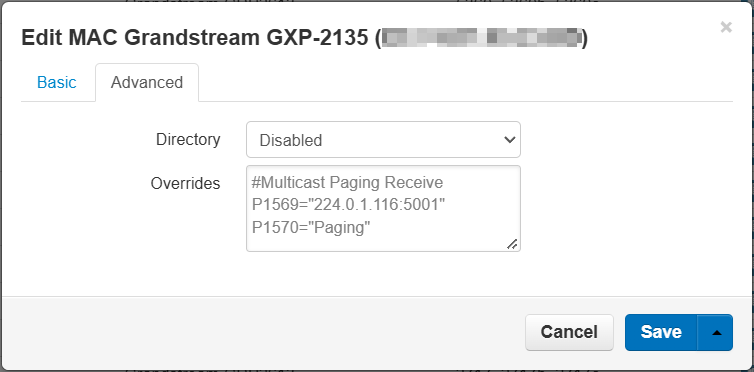
Receiving Multicast Page
- Paste the following into the Overrides section of the phone:
-
P1569="224.0.1.116:5001"
-
P1570="Test Page"
-
Yealink
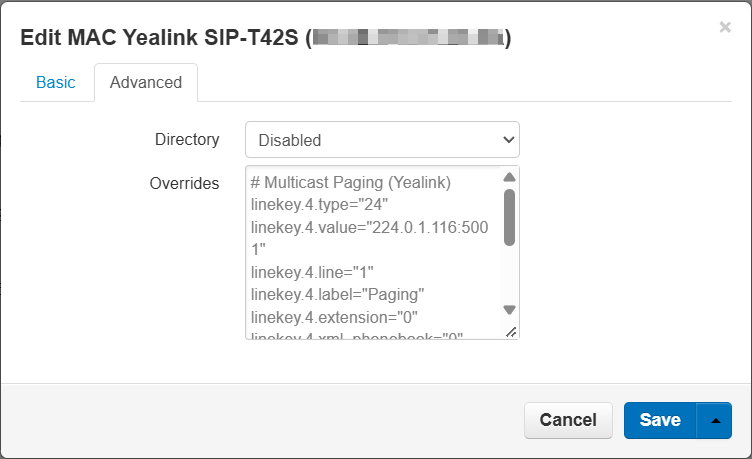
Sending Multicast Page
- Paste the following into the Overrides section of the phone, replacing X with the softkey line number:
-
linekey.X.type="24"
-
linekey.X.value="224.0.1.116:5001"
-
linekey.X.line="1"
-
linekey.X.label="Paging"
-
linekey.X.extension="0"
-
linekey.X.xml_phonebook="0"
-
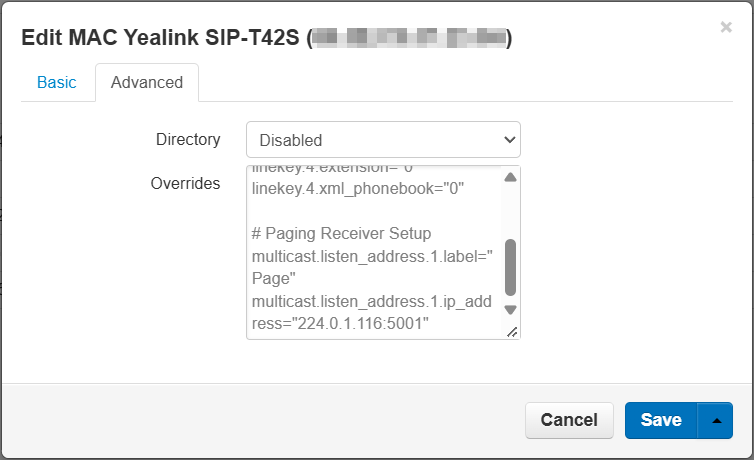
Receiving Multicast Page
- Paste the following into the Overrides section of the phone:
-
multicast.listen_address.1.label="Page"
-
multicast.listen_address.1.ip_address="224.0.1.116:5001"
-
Updated 20 days ago