
Teams — Direct Routing Configuration
Direct Routing connects CCaaS to a Microsoft Teams organization through an SBC, routing PSTN calls through Teams' existing phone infrastructure rather than the embedded app.
Direct Routing pairs a Microsoft 365 tenant with Xima's SBC (session border controller) infrastructure so that PSTN calls route through Teams into CCaaS. This is a distinct calling path from the embedded app covered in Teams Integration — Direct Routing carries the voice traffic itself, while Teams Integration handles the agent client and presence sync.
Prerequisite LicensingOne of the following Microsoft license combinations is required:
- Business Basic, Business Standard, or Business Premium + Teams Phone Standard
- Office 365 E1, E3, or Microsoft 365 E1, E3 + Teams Phone Standard
- Office 365 E5 or Microsoft 365 E5
Microsoft's admin menus change periodically. If a step below doesn't match the current Teams Admin Center layout, contact Microsoft support to confirm the current path.
Registering a Subdomain in the Tenant
An SBC FQDN (fully qualified domain name) is provided by Xima Software and must be registered and verified as a domain in the Microsoft 365 tenant before it can be used for Direct Routing. The FQDN typically follows a pattern such as customername.teams.channeluc.com.
-
In the Teams Admin Center (
admin.microsoft.com/Adminportal), navigate toSettings > Domains > Add Domainand enter the FQDN provided by Xima Software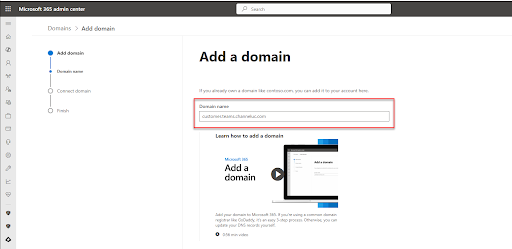
-
Select
Use this Domain, thenVerify you own your domain -
Leave
Add a TXT record to the domain's DNS recordsselected (the default) and continue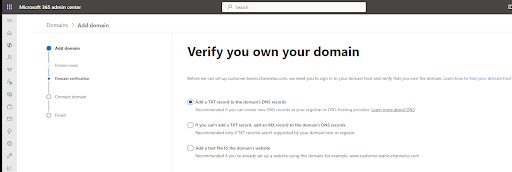
-
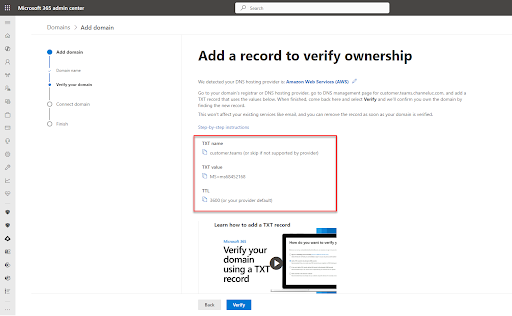
Note the three fields generated to verify the domain
-
Email the TXT value to [email protected] and wait for confirmation that it has been added to the SBC (the Enablr platform) on Xima's side
Do Not Select Verify EarlySelecting
Verifybefore receiving confirmation that the TXT value has been added will cause verification to fail. Wait for confirmation, then return to the domain to continue.
Creating a Temporary User to Activate the Subdomain
A temporary user in the new domain is required to register and activate the subdomain.
-
Navigate to
Users > Active Users > Add a user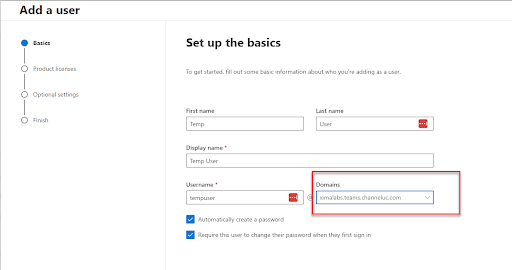
-
Assign the new domain to this user — the user must be created within the new domain
-
Assign a temporary paid license
-
Enable
Admin Center AccessandGlobal Administratorfor this user -
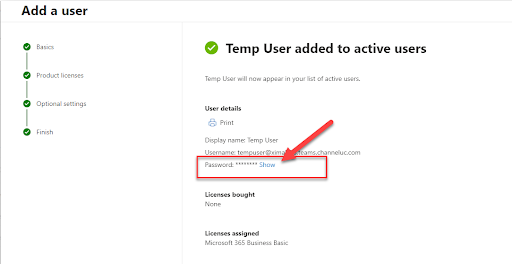
Finish creating the user and note its email address and password
-
Open an incognito browser window and log in as this user — this initiates the subdomain
-
Once complete, the FQDN can be added as an SBC in the Teams Admin Center
Connecting the SBC to Microsoft Teams
With the subdomain verified and activated, the SBC itself is registered in Teams.
-
In the Teams Admin Center, navigate to
Voice > Direct Routing -
Select
Addto create a new SBC -
Enter the SBC FQDN provided by Xima Software and a description
-
Toggle
Enabledon and enter the signaling port provided by Xima Software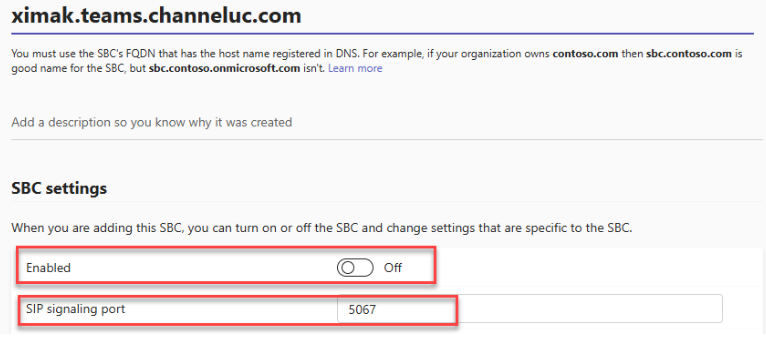
-
Leave the remaining settings at their defaults, unless configuring a failover or multiple SBCs
-
Save — the new SBC appears under
Voice > Direct Routing > Settings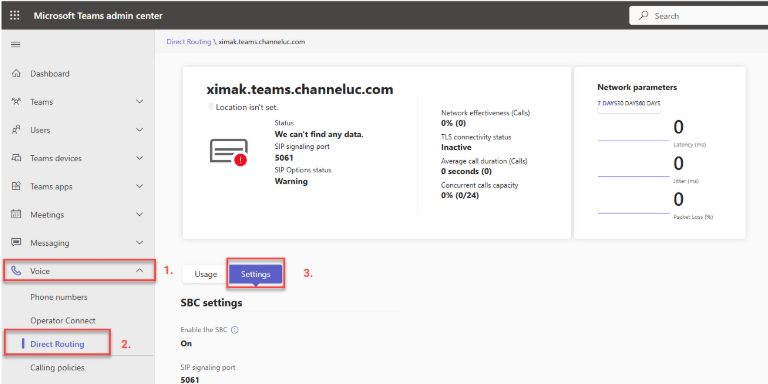
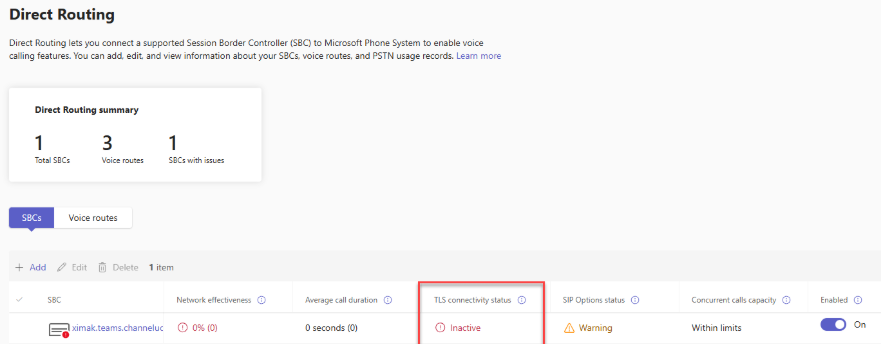
TLS Connectivity Status Starts as InactiveA newly created SBC shows a
TLS Connectivity StatusofInactiveand a blankSIP Options Status. This is expected — the status updates once call traffic starts flowing through the SBC.
Configuring Voice Routes
A PSTN usage rule and a voice route policy are both required before calls can be placed.
-
On the
Direct Routingpage, selectVoice Routes > + Add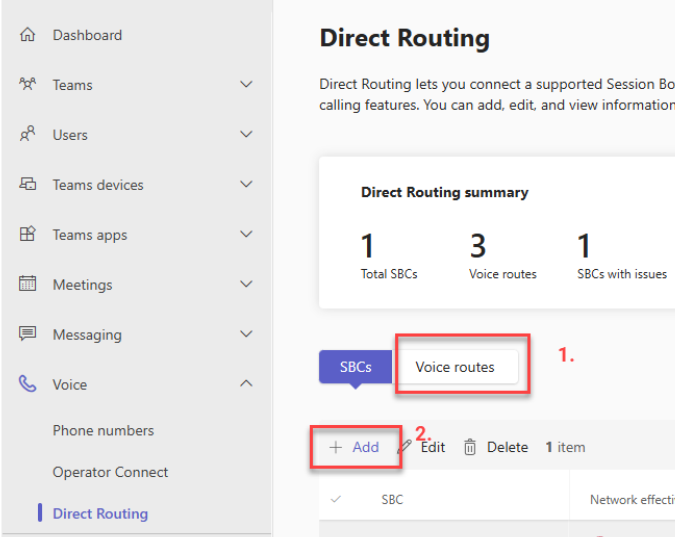
-
Name the route (e.g.,
LocalRoute) and optionally add a description -
Set a
Priority— Teams evaluates routes in priority order (1 first) and uses the first one whose dialed number pattern matches
-
Set the
Dialed Number Pattern— a wildcard (.*) matches all traffic through this SBC -
Under
SBCs enrolled, selectAdd SBCs, choose the configured SBC, and selectApply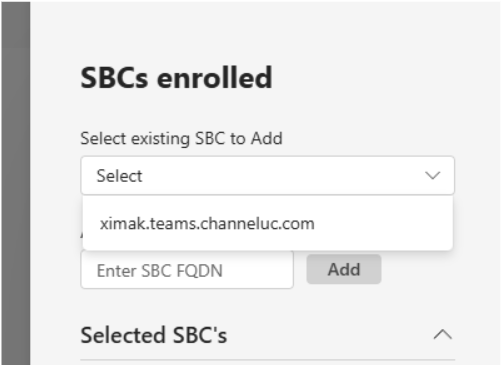
Prioritizing Multiple RoutesA wildcard route matches everything, so it should carry the lowest priority (highest number) among multiple routes. More specific routes — such as an international-dialing pattern — need a higher priority (lower number) so Teams matches them before falling through to the wildcard.
Configuring Dial Plans
Short-number dialing through CCaaS requires a normalization rule on the Teams dial plan.
-
In the Teams Admin Center, navigate to
Voice > Dial plans > Manage Policies -
Select the
Global (Org-wide default)policy -
If no normalization rules exist, select
+ Add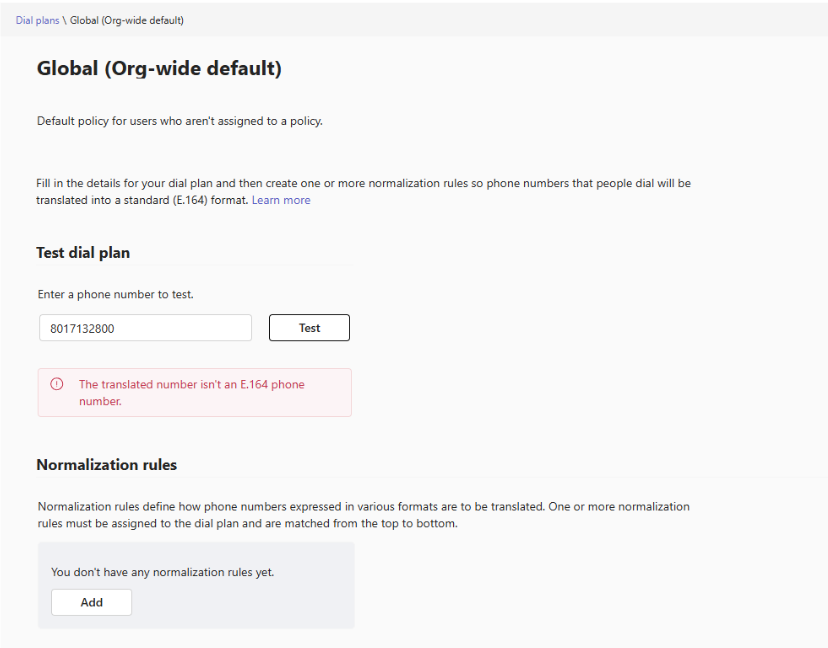
-
Name the rule and select the
Advancedoption -
Under the
IFcondition, setThe number dialed matches this regular expressionto:^([0-9*#+]{1,10})$ -
Under
Then do this > Translate the number based on..., enter$1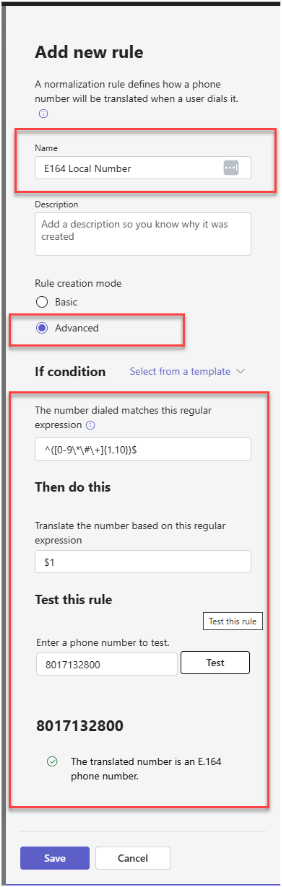
-
Test the rule with a sample phone number using
Test, then selectSave
This completes the basic Direct Routing setup between Microsoft Teams and CCaaS.
Updated 3 months ago