
Linking CCaaS App to Microsoft Teams
Uploading, approving, and publishing the embedded CCaaS Agent Client app in the Microsoft Teams Admin Center.
Once the steps below are complete, the CCaaS Agent Client is available within the Microsoft Teams interface. This covers the admin-side upload, approval, and publishing flow in the Teams Admin Center — see Teams Integration for completing installation as an agent afterward.
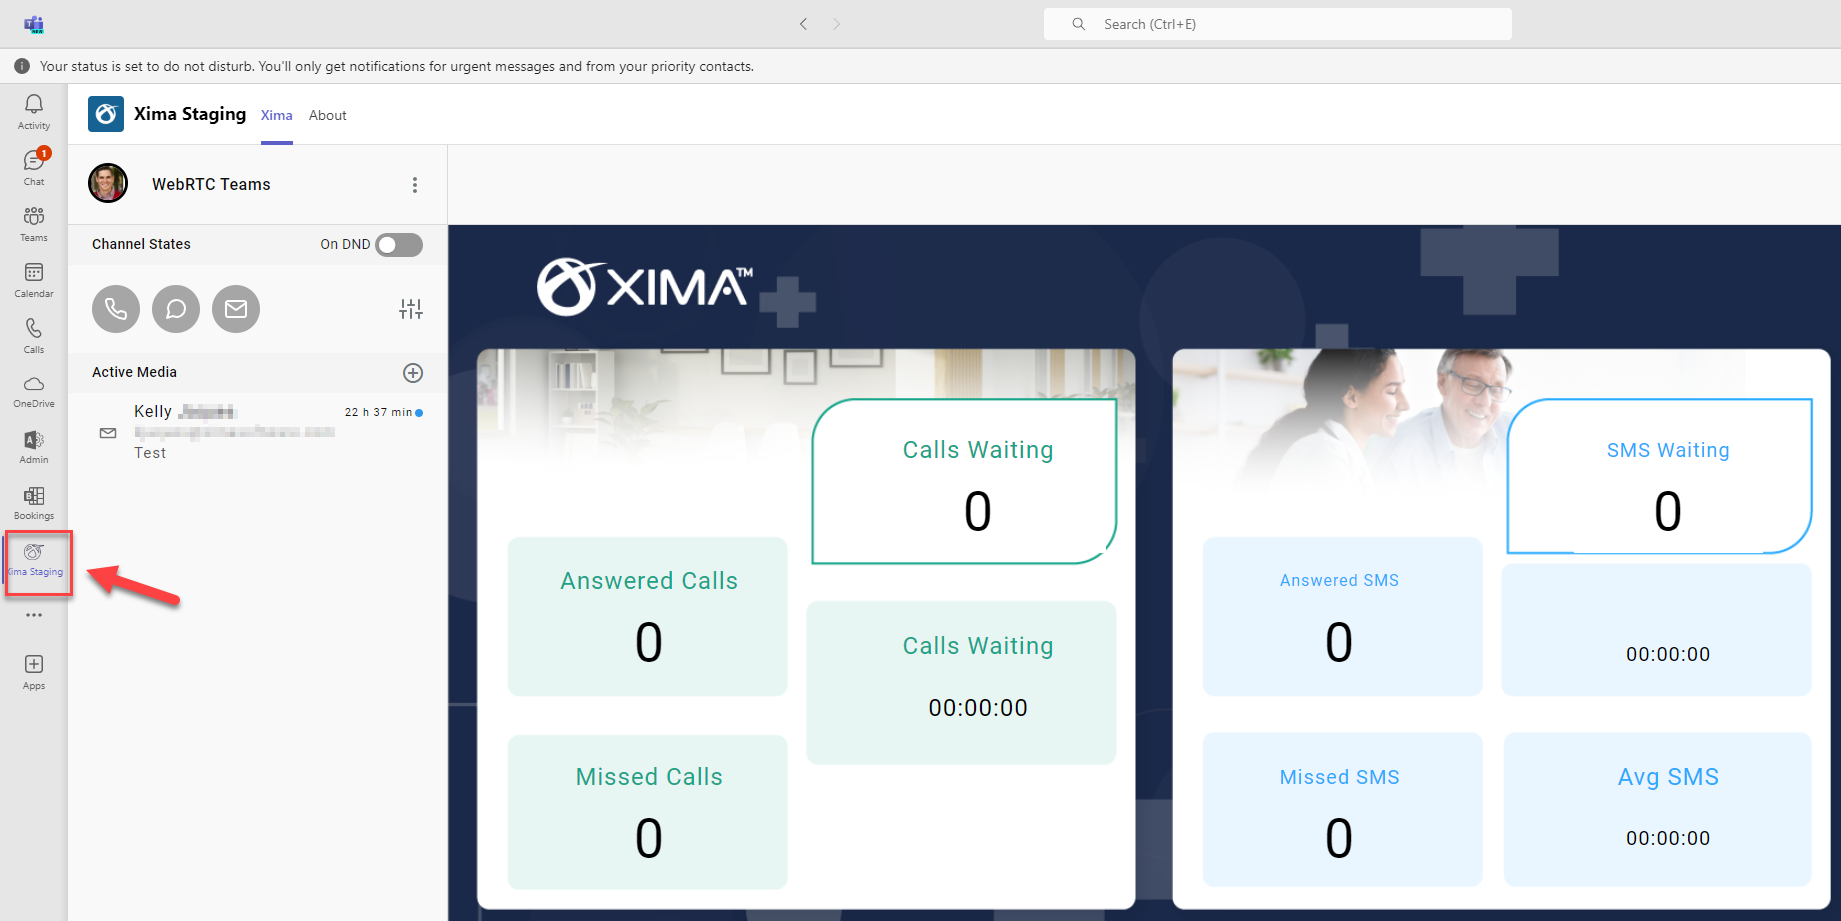
Uploading the App
-
Download the application ZIP:
-
As a Global Teams Admin, navigate to
Apps > Manage Apps > Upload an App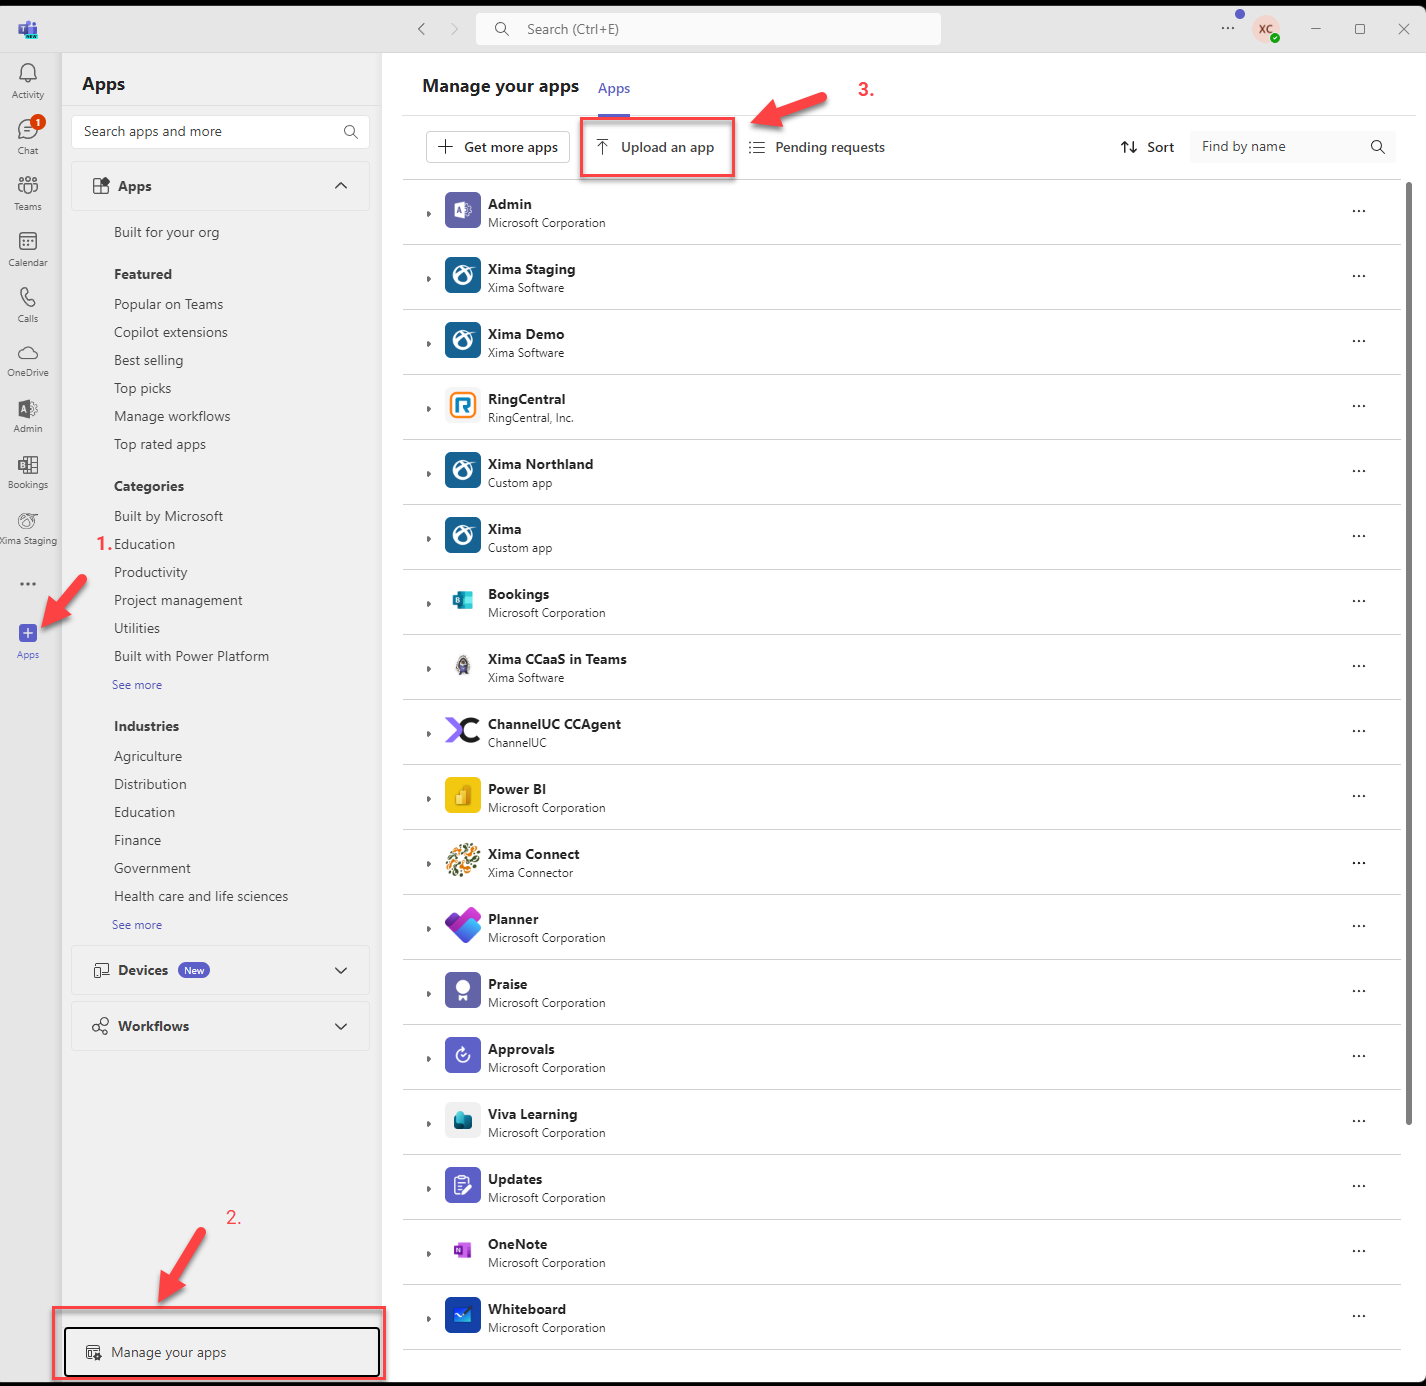
-
Select an upload option based on the account's permission level — any option works, but if
Submit an app to your orgis the only one available, the app must be approved by an IT admin before it's usable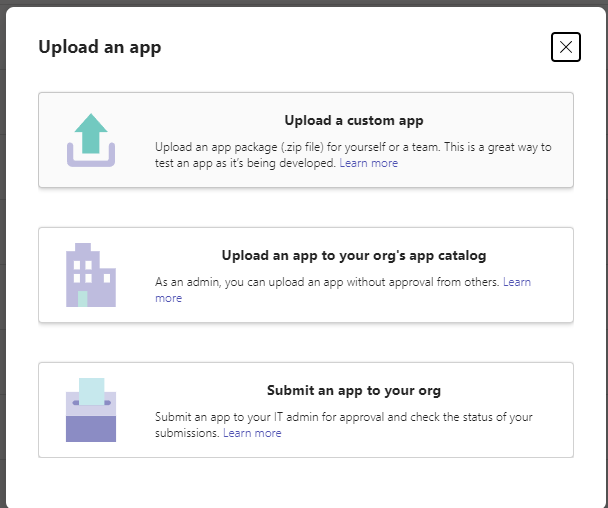
Approving the App as an IT Admin
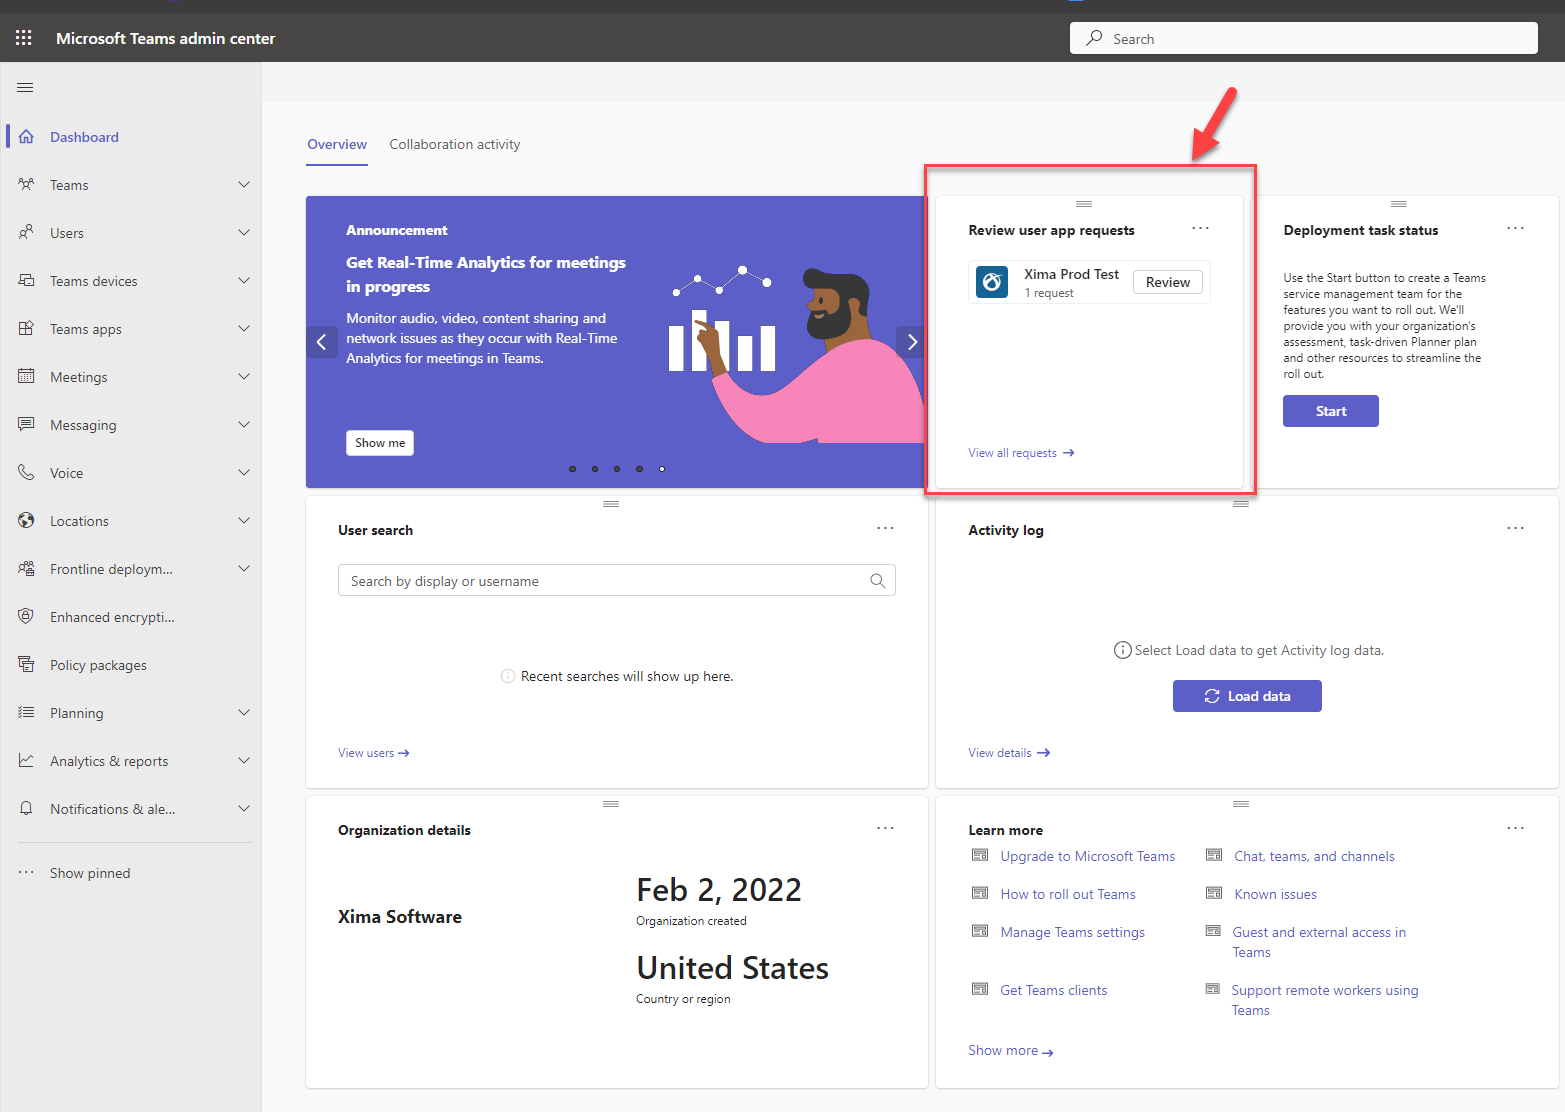
If the app was submitted for org-wide approval rather than uploaded directly, a pending app request appears in the Teams Admin Center.
-
Navigate to admin.teams.microsoft.com
-
A pending app request should appear
-
Select
Reviewif the pending app is showing — otherwise, navigate toTeams Apps > Manage Appsand search forXima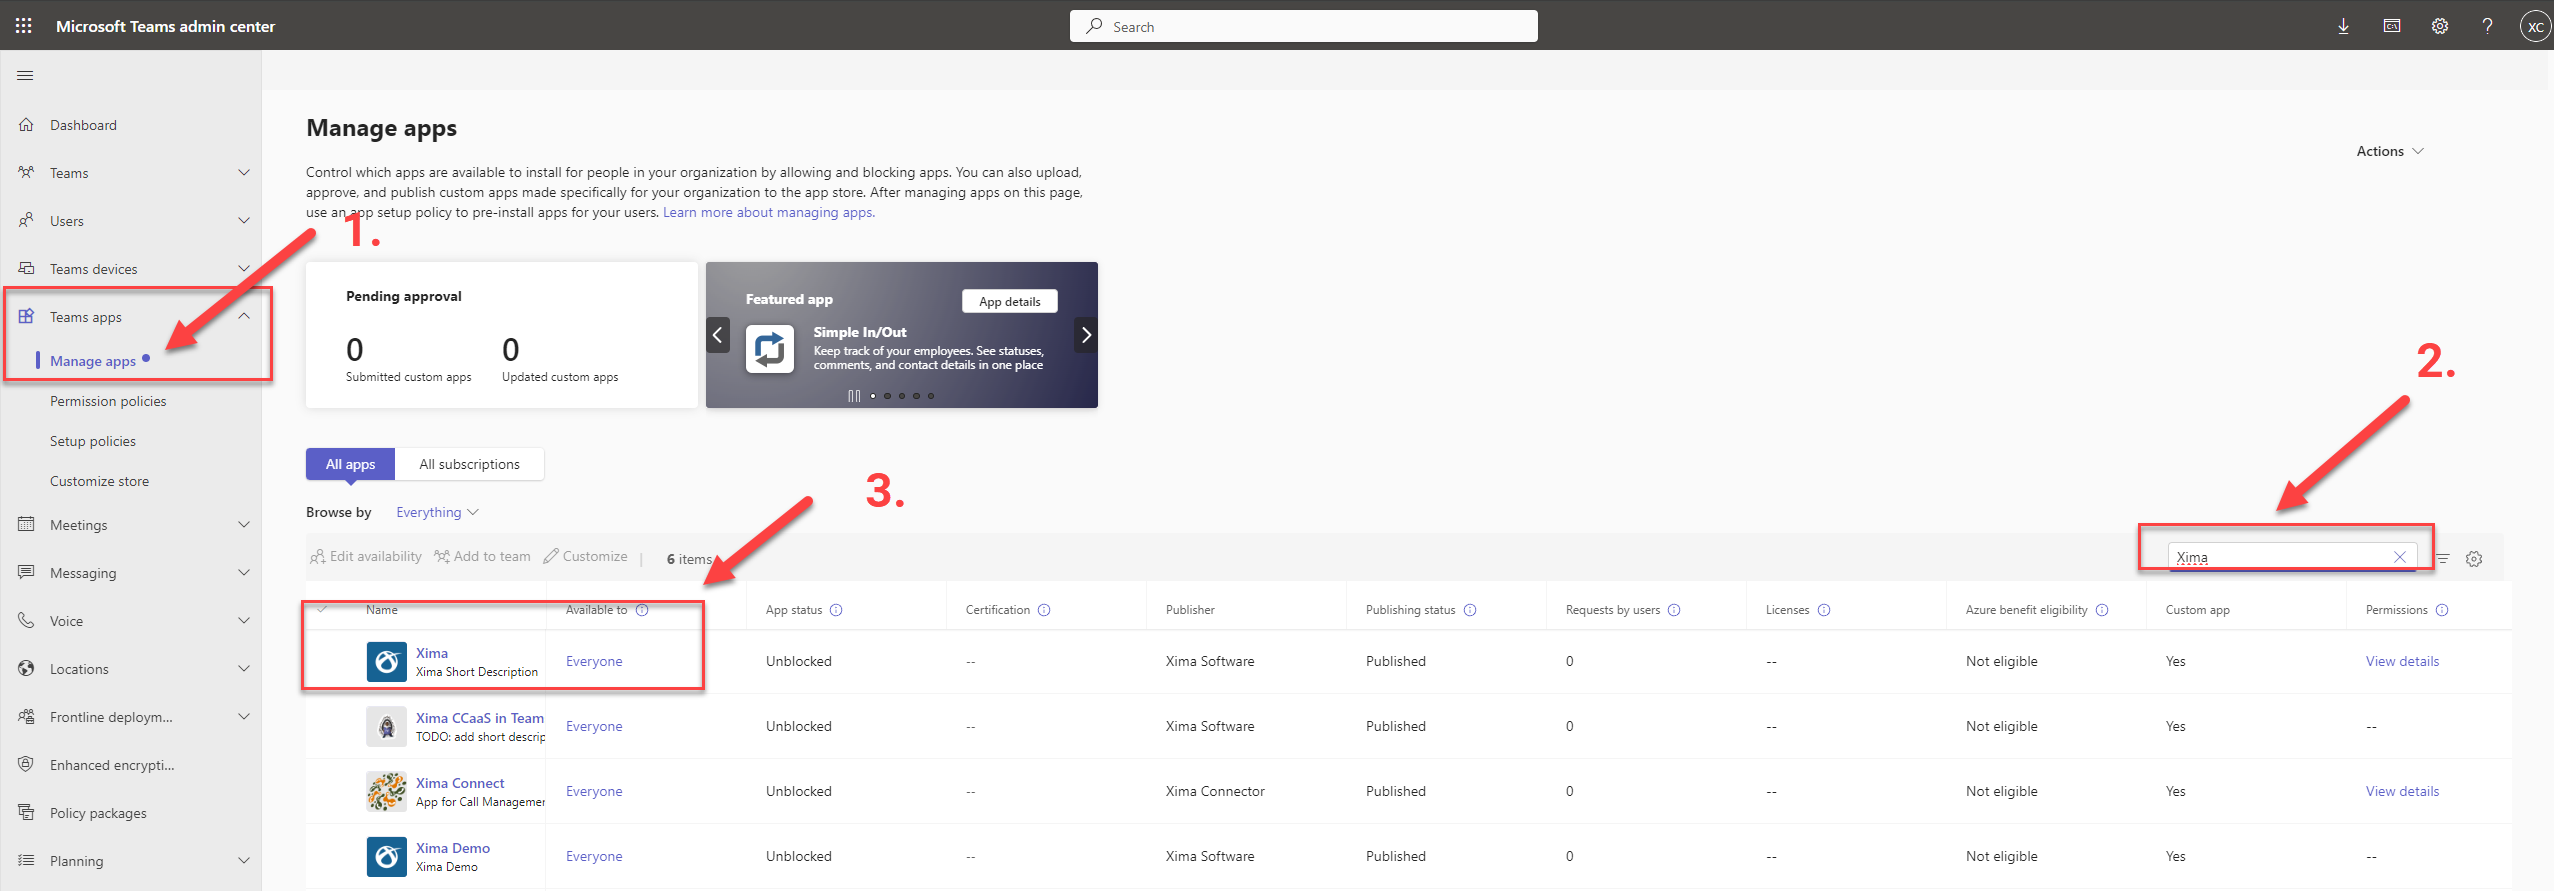
-
Open the
Ximaapp's main page and selectPublish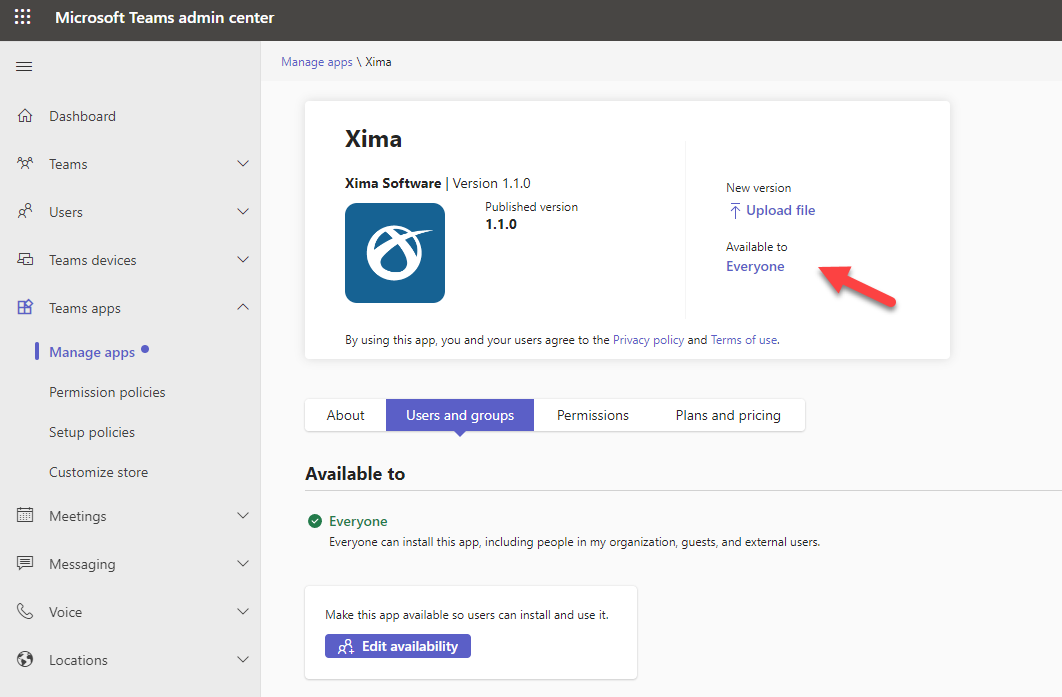
-
To restrict the app to specific users instead of the whole organization, use
Users and Groups > Edit Availability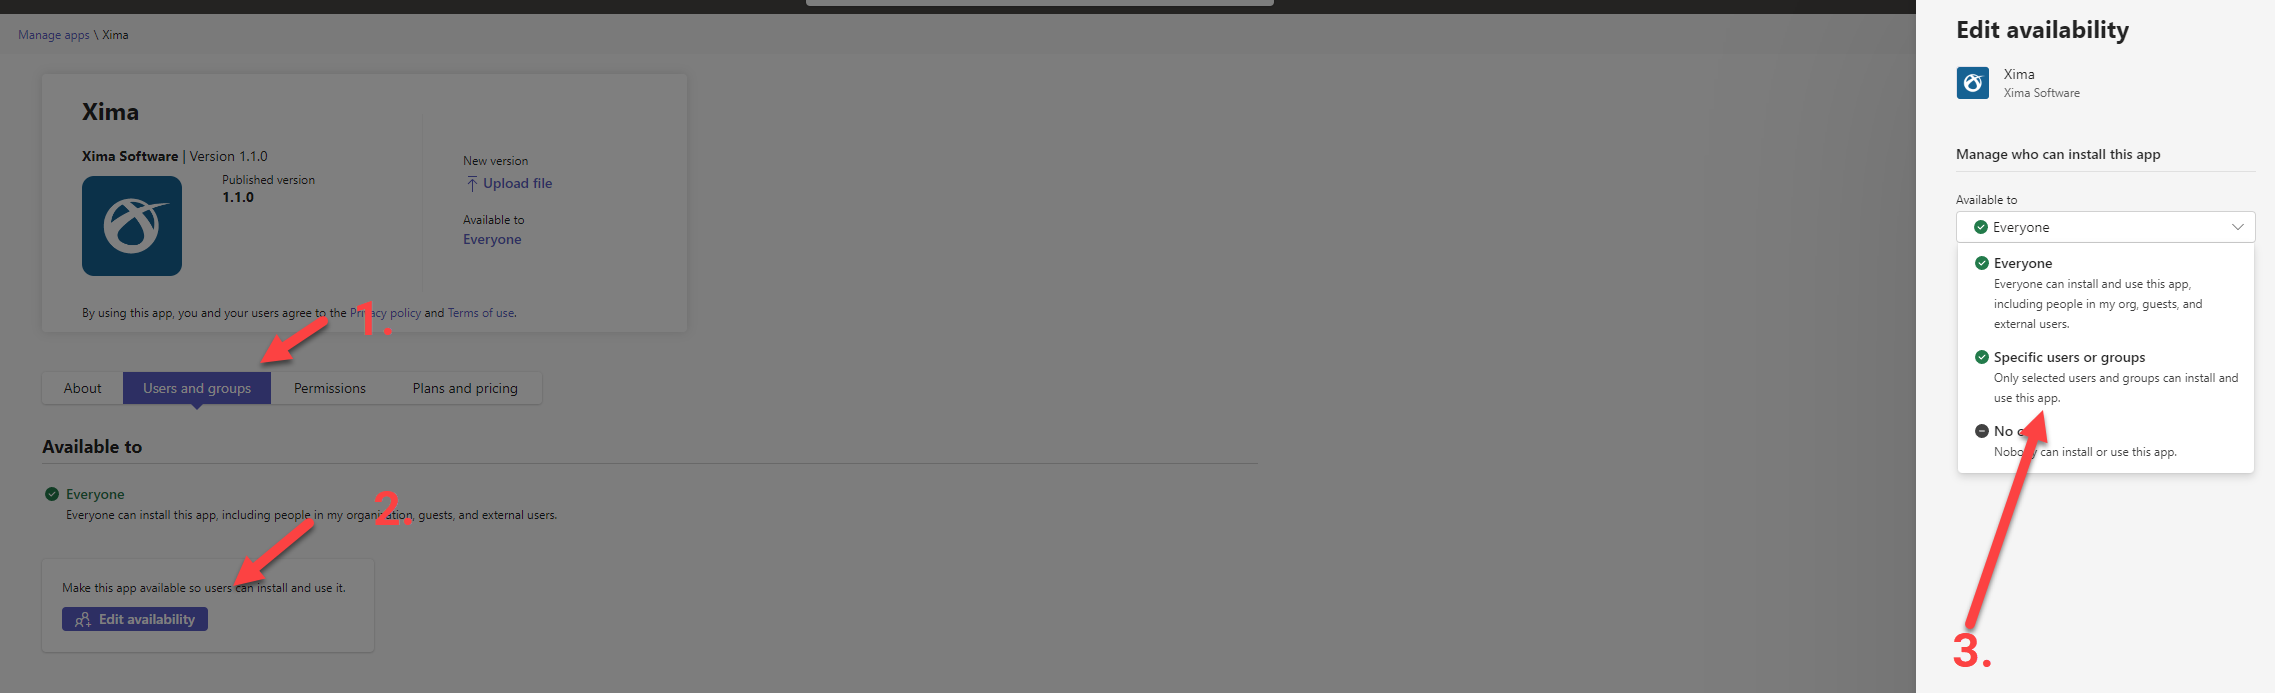
Propagation TimeOnce published, the app can take anywhere from a few hours up to 24 hours before it becomes available in the organization's app library.
Updated 3 months ago