
Teams Integration
Teams Integration connects CCaaS to a Microsoft Teams organization, enabling bi-directional presence sync and an embedded agent client experience within the Teams interface.
Microsoft Teams Integration links CCaaS to an organization's Microsoft 365 tenant via the Microsoft Graph API. Once enabled, agents can use CCaaS directly within Teams through an embedded app, and presence status — such as Do Not Disturb — synchronizes between both platforms in real time.
The email address used to log into Teams must match the agent's user account in CCaaS for presence sync and SSO to function correctly.
Enabling Teams Integration in CCaaS
-
Log into CCaaS as an administrator
-
Select the
Gearicon and navigate toTeams Integration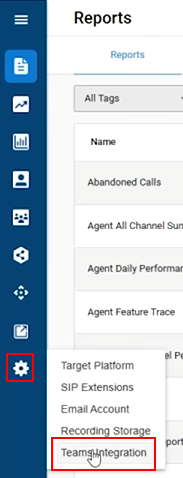
-
Select
Log in with Microsoftand sign in with aMicrosoft Global Administratoraccount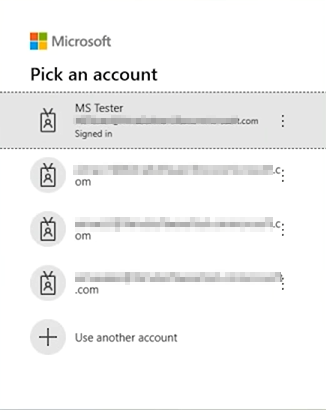
-
Review and select
Acceptfor the requested permissions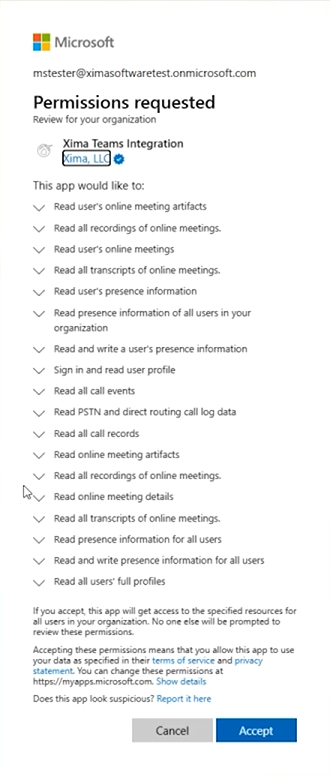
-
Verify that the connection status shows as connected under
Teams Integration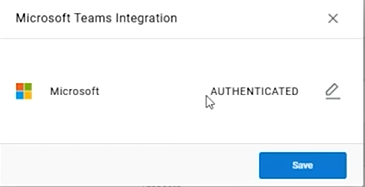
If using Direct Routing to route calls through Teams into CCaaS, the agent's licensing must match their Teams login email. This also enables SSO when navigating the embedded app. See Direct Routing Configuration for setting up the SBC connection itself.
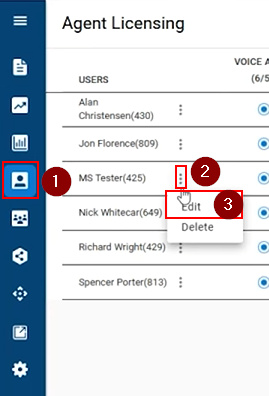
Installing the Embedded CCaaS App in Teams
The CCaaS Agent Client can be embedded directly into the Microsoft Teams interface. Installation requires a Global Teams Admin and may take up to 24 hours to propagate to all users in the organization.
Download and Upload the App
-
Download the application ZIP:
-
Log into Teams as a Global Administrator
-
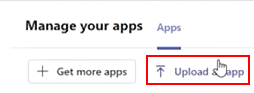
Navigate to Apps > Manage Apps > Upload an App
-
Select the appropriate upload method based on permission level:
- Upload directly if permissions allow
- Select Submit an app to your org if direct upload is not available — this requires IT admin approval
-
If submitted for approval, the IT admin navigates to admin.teams.microsoft.com, locates the Xima app under Manage Apps, and publishes it
-
Optionally, restrict availability to specific users or groups via Users and Groups > Edit Availability
-
Once published, the app becomes searchable in the Teams Apps library (allow up to 24 hours)
Completing Installation as an Agent
-
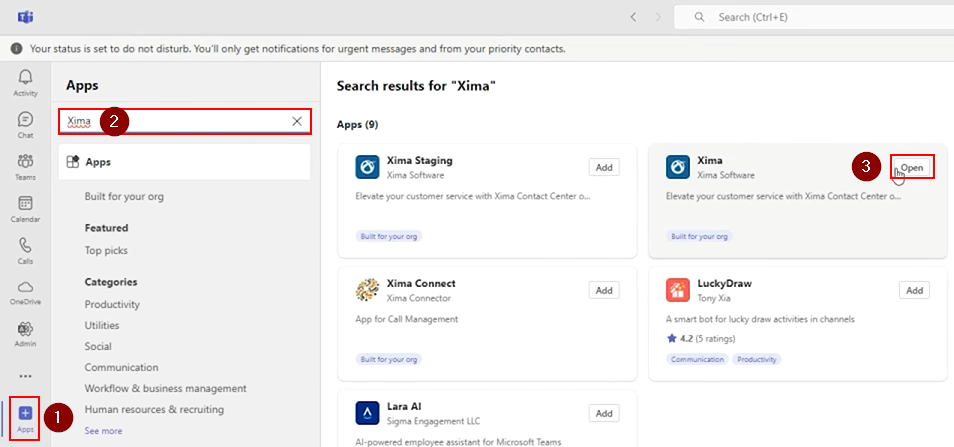
Open Teams and navigate to Apps, then search for Xima
-
Select Open and then Install when prompted
-
Run the Xima Voice Agent application that downloads — this keeps the connection active within Teams
-
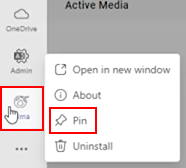
Right-click the Xima icon in the Teams sidebar and select Pin for easy access
-
Click away from the Xima icon and back to refresh, then log into CCaaS
Grant microphone and speaker permissions when prompted — these are required for handling phone calls.
Bi-Directional Presence Sync
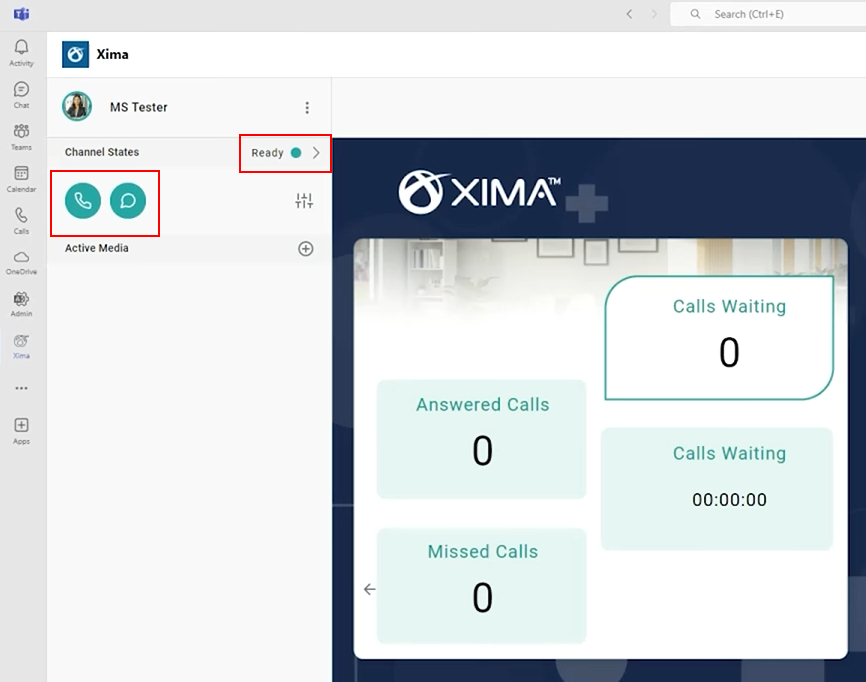
Once connected, presence changes in either platform automatically sync to the other:
-
Going Ready in CCaaS also sets status in Teams
-
Setting Do Not Disturb (DND) in Teams toggles DND in the CCaaS Agent Client, and vice versa
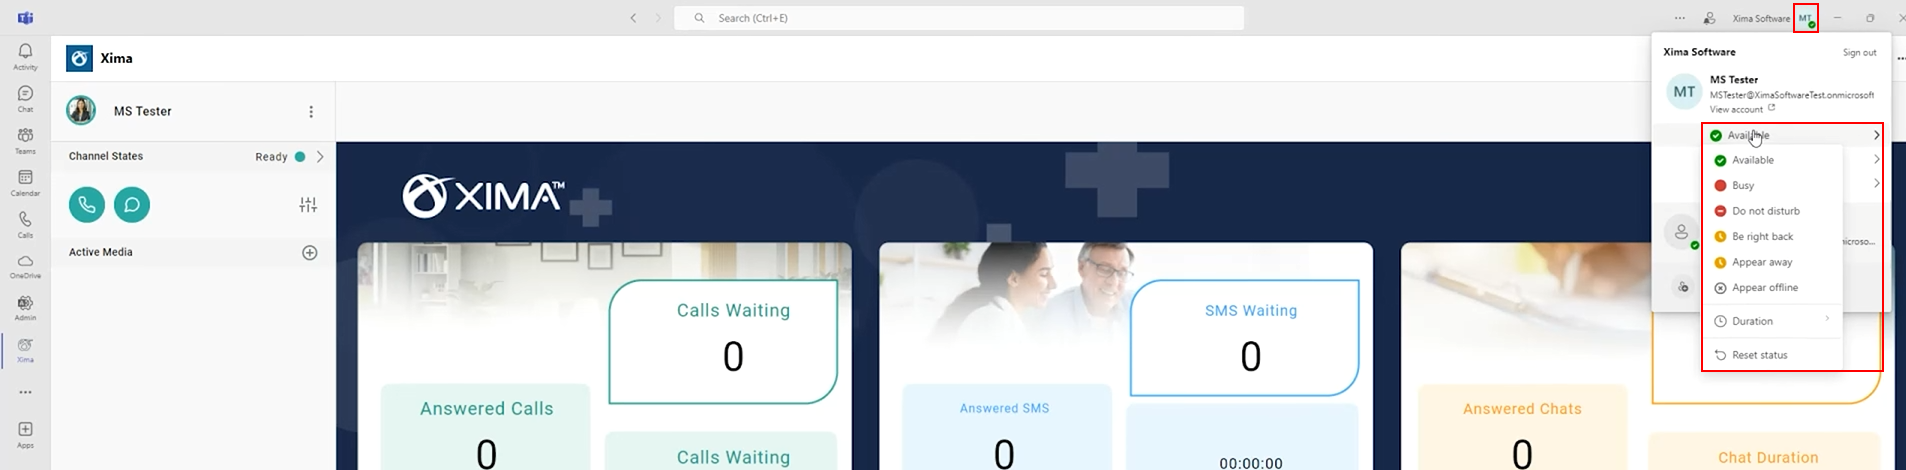
The Sync Teams DND setting can be disabled if agents prefer to manage presence exclusively within the Agent Client.
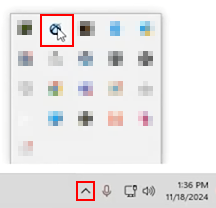
The embedded app uses an iFrame. The Xima Voice Agent application (installed during setup) maintains the connection and prevents session timeouts. To verify it is running, check the system taskbar for the Xima icon. Right-clicking and selecting Quit will manually close the agent.
Reporting
The Reason Code Trace report is the recommended starting point for reporting on agent presence in the context of Teams. It shows how long agents spent in each presence state, which is useful for determining call eligibility and reviewing availability patterns.
Tip: Run the report with all Reason Codes included initially, then narrow the results as needed.
Updated 3 months ago