
(RC/ACO) Provisioning an Avaya J-Series Phone
Registers a physical Avaya J-Series desk phone to an RC/ACO extension for use with CCaaS, either through the phone's keypad or its web GUI.
An Avaya J-Series phone registers to RC/ACO by entering the same set of SIP fields directly on the device — either using the phone's own keypad, or through its web GUI once the phone's IP address is known. Both methods configure identical settings; the web GUI is generally faster for entering longer values such as the SIP domain or Outbound Proxy.
Retrieving RC/ACO SIP Information
Both provisioning methods below require SIP credentials obtained from the RC/ACO admin interface first — see Obtaining SIP Credentials from RC/ACO for the general flow.
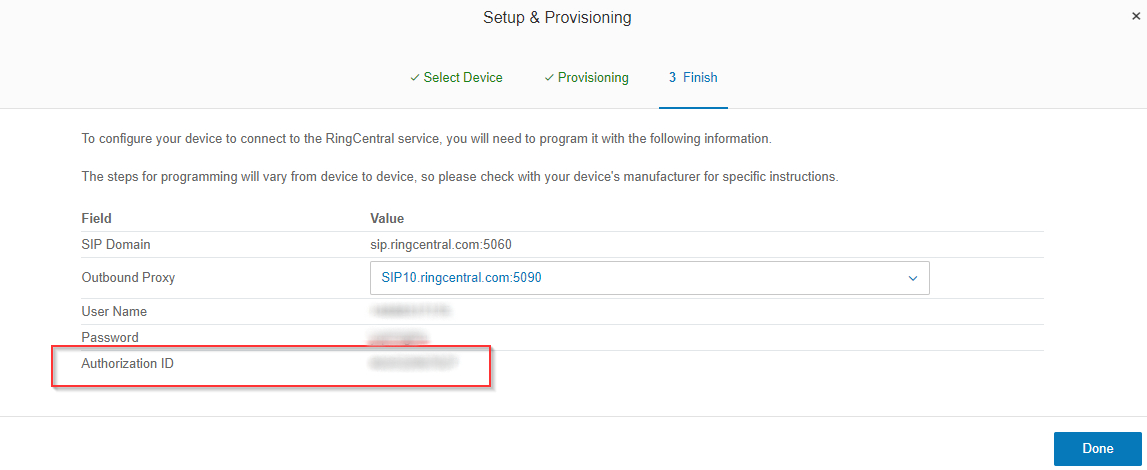
For an Avaya J-Series phone specifically:
- Navigate to
Phone System > Phones & Devices > User Phonesand select the extension - Select
Setup and Provision > Other Phones, then select theExisting Phonetab - Select the appropriate
Outbound Proxyfrom the dropdown — this varies by region (e.g.,sip10.ringcentral.com:5090for North America) - Note the
Authorization IDlisted in this view — RC/ACO requires this value to register the phone
Provisioning via the Phone's Keypad
- On the phone, log into
Administrationusing the default credentials — the login is27238(spells "craft") - Using the phone's keypad, navigate to the SIP section — approximately 10 clicks down from the Administration menu
- Under
SIP Global Settings, enter the following values:
| Field | Value |
|---|---|
| SIP Domain | The SIP domain noted in the RC/ACO portal |
| Registration Policy | Simultaneous |
| Failback Policy | Admin |
| SIP Proxy Policy | Manual |
| User ID Field | Toggled on — required for RC/ACO |
- Save and exit
SIP Global Settings - Select
SIP Proxy List, then selectNew, and enter theOutbound Proxyvalue obtained from RC/ACO - Return to the phone's main screen — it will prompt for the extension's username and password, obtained from RC/ACO
Entering the IP Address on the KeypadWhen entering a numeric address using the phone's keypad, the
*button types the period (.) between number groups.
Provisioning via the Phone's Web GUI
Finding the Phone's IP Address
- On the phone, log into
Administrationusing the default credentials —27238(spells "craft") - Navigate to
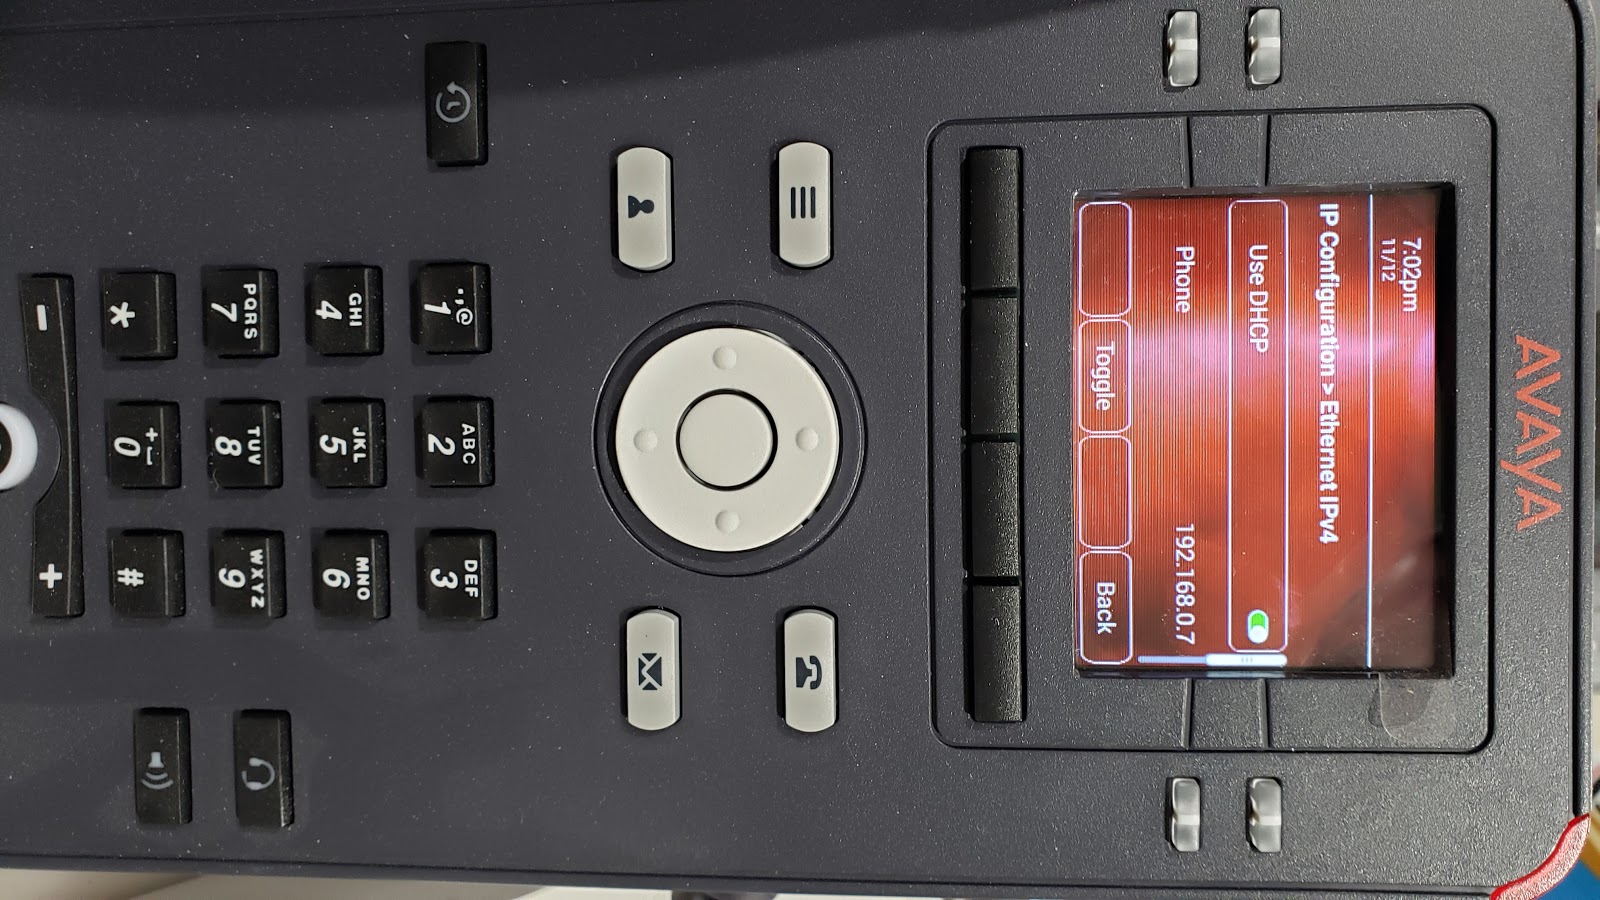
IP Configuration > Ethernet IPv4 - Note the IP address listed under
Phone
Accessing the Web GUI
- From a browser on the same network, navigate to
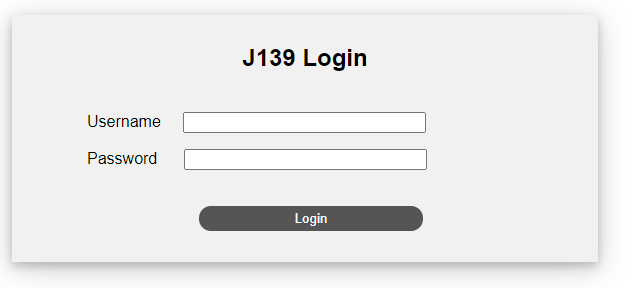
https://<phone IP address>using the IP address found above - Log in using the default credentials: username
admin, password27238(spells "craft") - Change the password when prompted on first login
Configuring SIP Settings in the Web GUI
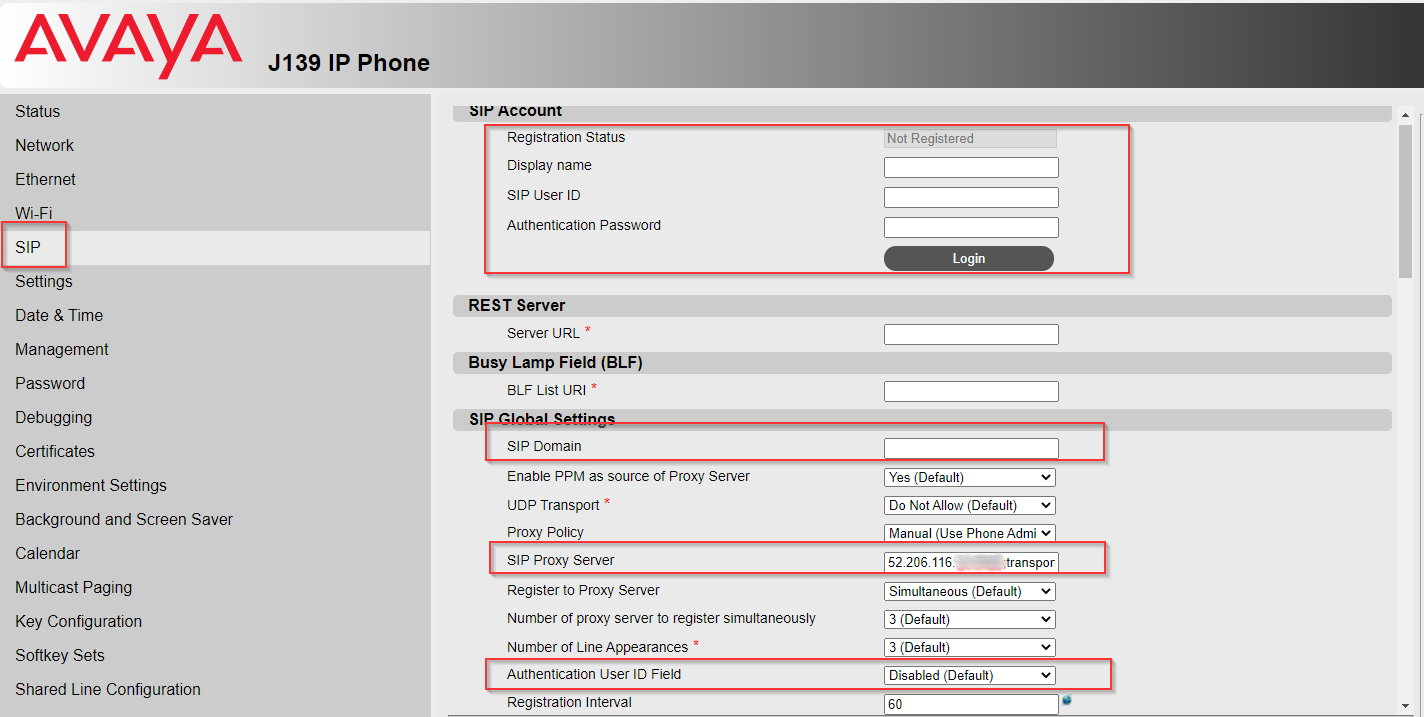
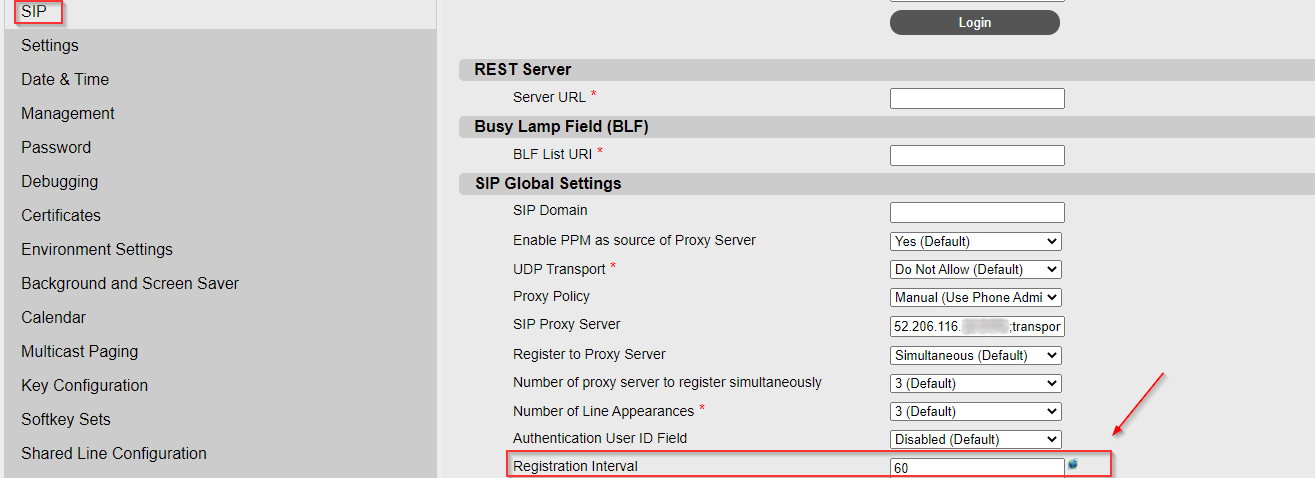
The same fields configured on the keypad are available in the web GUI's SIP section, typed or toggled directly rather than entered via the dial pad: SIP Domain, Registration Policy, Failback Policy, SIP Proxy Policy, the User ID Field toggle, and the Outbound Proxy value under SIP Proxy List.
Registration Interval
Change the Default Registration IntervalAvaya J-Series phones default to a 900-second Registration Interval, which does not work reliably with CCaaS. Change this value to
60in the SIP settings, using either the keypad or the web GUI.
Registering the Extension in CCaaS
Once the phone is registered to RC/ACO, its SIP credentials are entered in CCaaS the same way as any other extension — see SIP Extensions.
Updated 3 months ago