
IVR
The Interactive Voice Response (IVR) provides a flexible, automated call-handling experience that greets callers, collects input, and intelligently routes calls before an agent is engaged.
Designed to reduce wait times and improve call efficiency, Interactive Voice Response (IVR) allows organizations to guide callers through self-service options or direct them to the most appropriate queue, agent, or destination.
Using menu prompts, Dual-Tone Multi-Frequency (DTMF) keypress input, and configurable routing logic, the IVR can support common workflows such as call distribution by department, business hours handling, announcements, and pre-queue data collection. This ensures callers reach the right resource faster while agents receive better-contextualized interactions.
Key benefits of the CCaaS IVR:
- Improved caller experience through structured, self-guided call flows
- Reduced agent workload by filtering and routing calls efficiently
- Faster resolution by delivering calls to the correct queue or agent
- Scalable design that supports growing and evolving businesses
Accessing IVR
IVR is accessible to accounts with Supervisor or Admin permissions.
- Navigate to
Routing Configuration > IVR - All configured IVR flows are listed in the modal
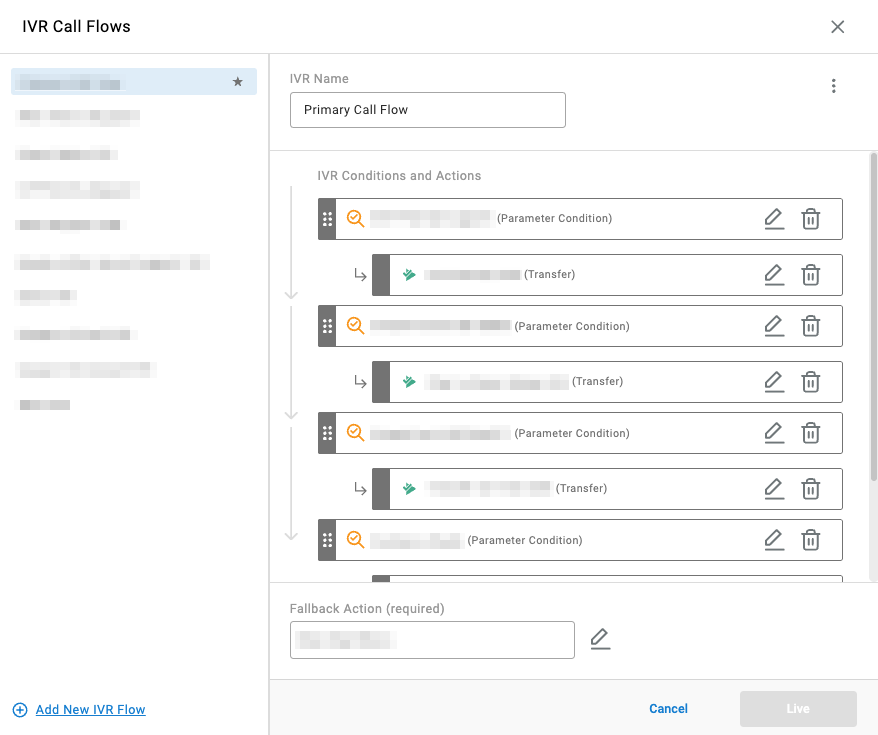
Building the Call Flow
The IVR flows from top to bottom. Each action or condition is a purposeful call scenario that navigates the caller at a specific step of the flow. See Components for how these building blocks work together, or go directly to the Actions, Conditions, and Parameters references.
- Select
Add a New IVR Flowin the bottom left of the modal - Name the IVR — this name appears in reporting details such as Cradle-to-Grave and Reports
- Add a condition or action by selecting the icon, then choose the appropriate type from the dropdown
- Each action or condition prompts different inputs upon selection
- A sub-action falls under a condition; a condition cannot be nested as a sub-condition under an action
- Repeat step 3 to add additional actions or conditions
- Add a
Fallback Action:Drop Call— terminates the caller in this IVRTransfer— transfers the caller out of this IVRDigit Menu— transfers the caller to a digit menu
- Click
Make Liveon the bottom-right of the modal to save and apply the IVR
Setting an IVR as the Primary IVRIf only one IVR is configured, it will automatically be set as the Primary IVR.
If there are more than one IVR, only one IVR can be set as the Primary IVR. It can be set by clicking the ellipsis in a selected IVR and clicking
Assign as Primary. A prompt will appear to confirm that the IVR selected will be the Primary IVR.
Every call presented to CCaaS reaches the Primary IVR first — see Call Routing Methods for how to redirect specific calls to a different destination from there, such as routing by the number dialed.
Updated 7 days ago