
(NS) Provisioning an Avaya J-Series Phone
Registers an Avaya J-Series phone to a NetSapiens extension either through manual SIP configuration or by auto-provisioning it from the Xima UCaaS Admin Portal.
An Avaya J-Series phone can be registered to a NetSapiens extension in one of two ways: manually, through the phone's own keypad menus or web GUI, once the extension's registration details have been retrieved from NetSapiens; or automatically, by adding the device under the user's extension in the Xima UCaaS Admin Portal and pointing the phone at an HTTPS provisioning server.
Retrieving Registration Information from NetSapiens
-
In the NetSapiens Manager Portal, navigate to
Usersand locate the extension the phone should register to
-
Select the
Phonetab, then edit the device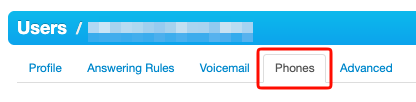
-
Set the
Modeldropdown toManual or Softphoneto reveal the registration information, including the Outbound Proxy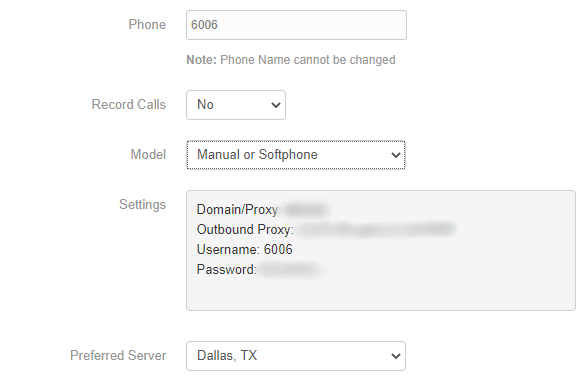
-
Resolve the Outbound Proxy to an IP address by running
tracert <address>(excluding the port) from a command line, and note the top-most resolved IP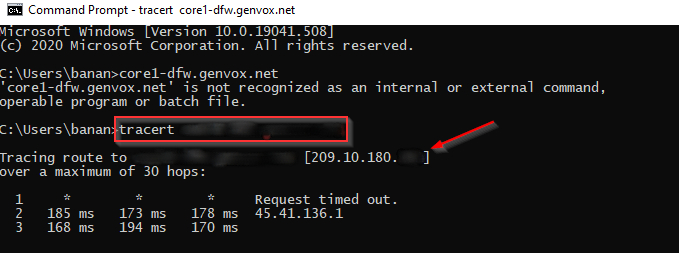
Manual SIP Registration
Provisioning via the Phone's Keypad
- From the phone's Administration menu, log in using the default craft login of
27238 - Under SIP Global Settings, complete the following fields:
| Field | Value |
|---|---|
| SIP Domain | The NetSapiens domain |
| Registration Policy | Simultaneous |
| Failback Policy | Admin |
| SIP Proxy Policy | Manual |
- Add the resolved IP address from the step above to the SIP Proxy List, with Protocol set to
TCPand the SIP Port set to5060(unless otherwise specified) - Enter the extension's username and password using the phone's keypad
Provisioning via the Web GUI
Finding the phone's IP address
- From the phone's menu, navigate to
IP Configuration > Ethernet > IPv4to find its current IP address
Accessing the web GUI
-
Browse to
https://<phone's IP address> -
Log in with the default credentials, username
adminand password27238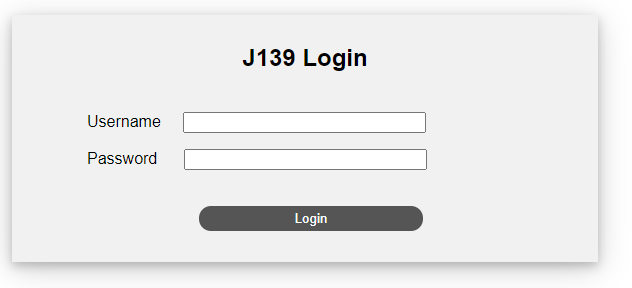
-
Change the password when prompted on first login
Configuring SIP settings
- Complete the same SIP Global Settings fields and SIP Proxy List entry described above
- Enter the extension's username and password
Auto-Provisioning via HTTPS Server
Rather than entering SIP settings manually, the phone can instead be added under a user's extension in the Xima UCaaS Admin Portal and configured to pull its settings automatically from an HTTPS provisioning server.
Provisioning via the Phone's Keypad
-
From the phone's Administration menu, log in using the default craft login of
27238 -
Navigate to
IP Configuration > Servers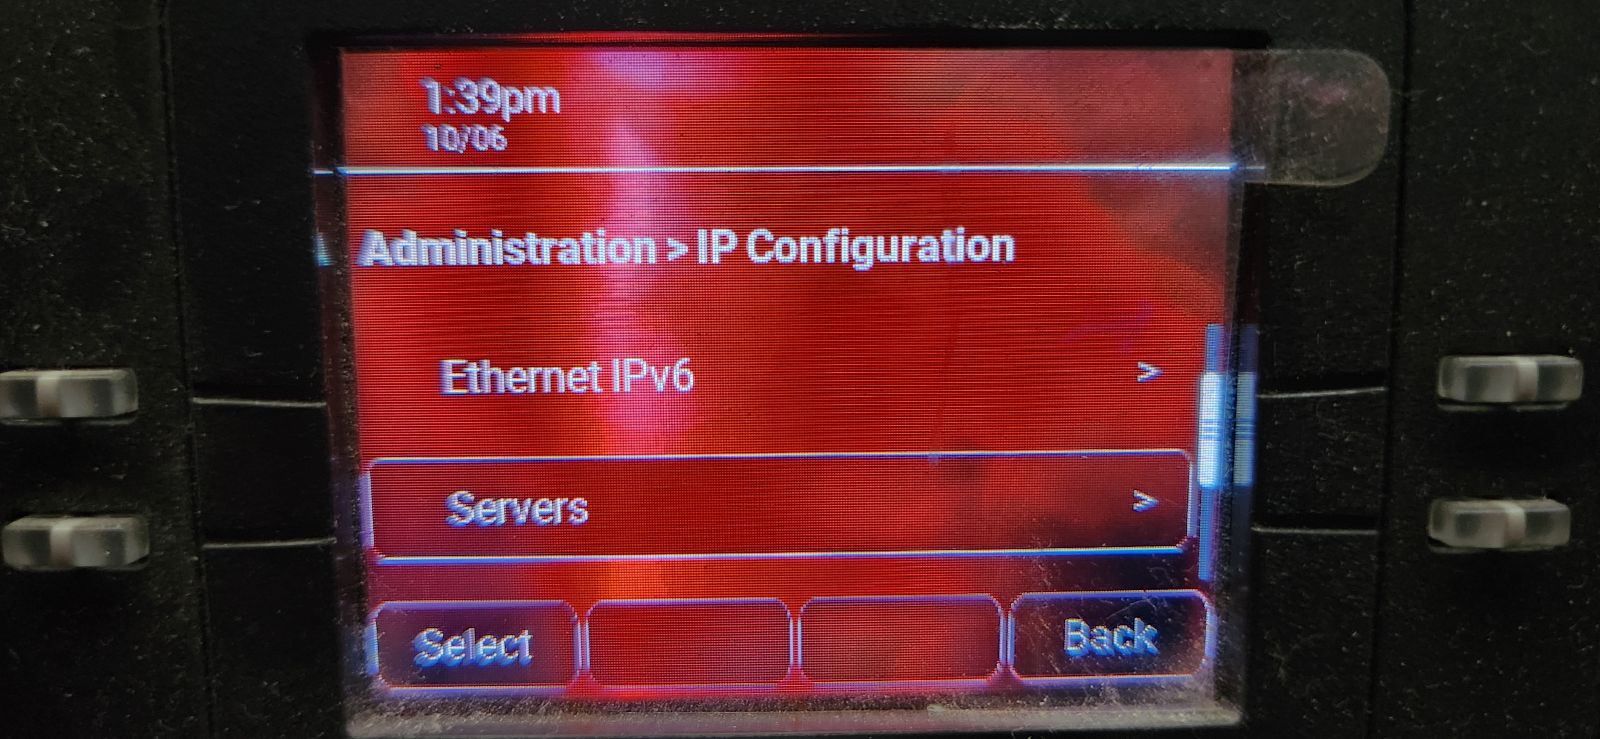
-
Enter the provisioning server address, port, and directory path in the HTTPS field, using the format
<address>:443/cfg -
Save the changes; the phone may need to be rebooted for the change to take effect
Confirming the Provisioning Server AddressThe provisioning server address depends on the NetSapiens data center the deployment is hosted on (for example,
p-nj.5060.cloudfor a New Jersey–based instance). The NetSapiens partner responsible for the deployment can confirm the correct address if it is not already known.
Provisioning via the Web GUI
Finding the phone's IP address
- From the phone's menu, navigate to
IP Configuration > Ethernet > IPv4to find its current IP address
Accessing the web GUI
-
Browse to
https://<phone's IP address> -
Log in with the default credentials, username
adminand password27238 -
Change the password when prompted on first login
Configuring HTTPS settings
-
Select the
Managementtab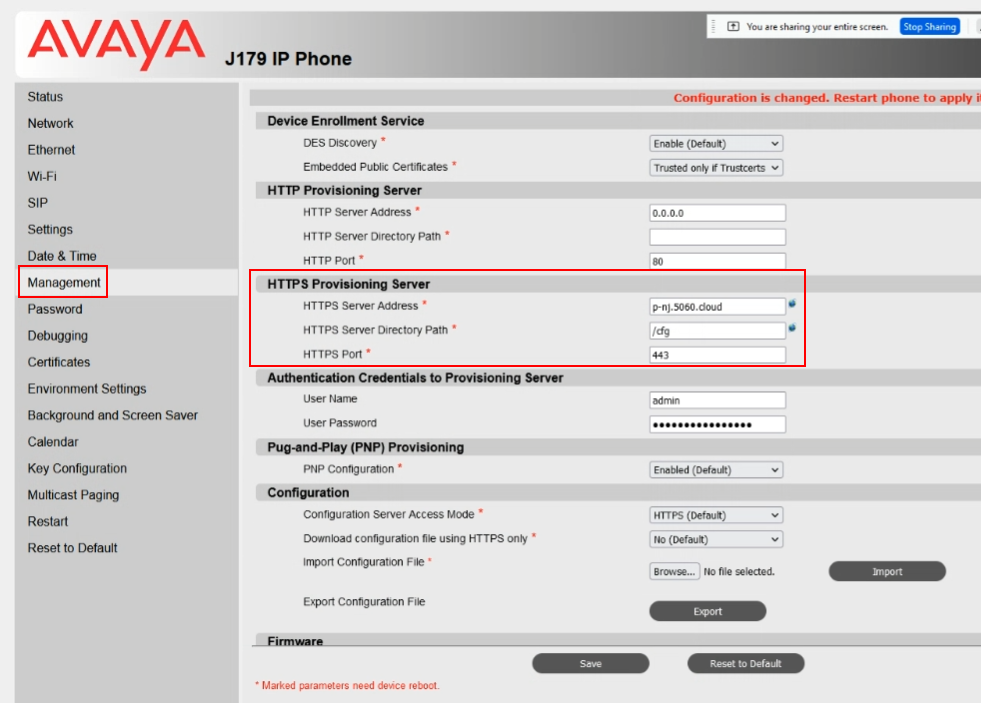
-
Under
HTTPS Provisioning Server, complete the following fields:
| Field | Value |
|---|---|
| HTTPS Server Address | The provisioning server address for the deployment's NetSapiens data center |
| HTTPS Server Directory Path | /cfg |
| HTTPS Port | 443 |
- Select
Save - The phone may need to be rebooted for the change to take effect
Registration Interval
Change the Default Registration IntervalThe phone's default Registration Interval of 900 seconds should be changed to 60 seconds. NetSapiens and CCaaS do not interact well with the 900-second default.
Registering the Extension in CCaaS
Once the phone registers successfully to NetSapiens, the extension must still be registered in CCaaS before it can be used by the Contact Center.
See SIP ExtensionsFollow SIP Extensions to register the extension in CCaaS.
Updated 2 months ago