
EHR / EMR On-Prem — JumpAgent Client
Installation walkthrough for the JumpAgent client, required when a connected EHR/EMR system is hosted on-premises.
For sites where the EHR/EMR is hosted on-premises, a local client is installed to securely access demographics and appointment data. Installation typically takes between 5 and 15 minutes.
Preparations
Before starting, the IT specialist responsible for the install should confirm the following:
- Access to one of the following:
- The database server of the EHR, or
- Another server within the same subdomain as the EHR's database server
- Web access on the server that will run the installer
- Installation rights on the target server
- Read-only credentials to the EHR / PM database
Once the connecting practice has the required information and a license has been generated, installation can begin.
Phase 1: Web Form
-
Open the custom
start.healthjump.comURL provided by Xima/Healthjump on the server that will host the JumpAgent -
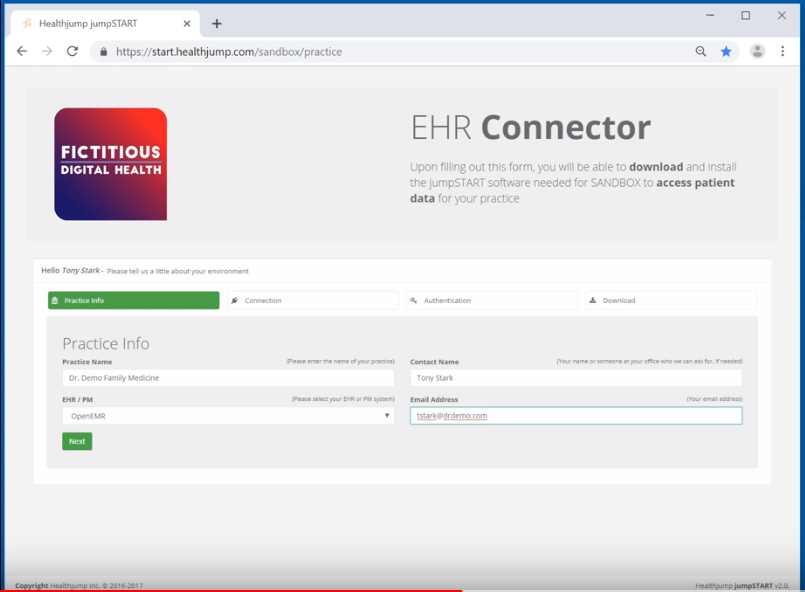
Enter the practice name, EHR, contact name, and email address in the web form
Contact FieldThe contact entered should be the person or team able to restart the JumpAgent if it becomes unresponsive and Healthjump is unable to restart it remotely.
-
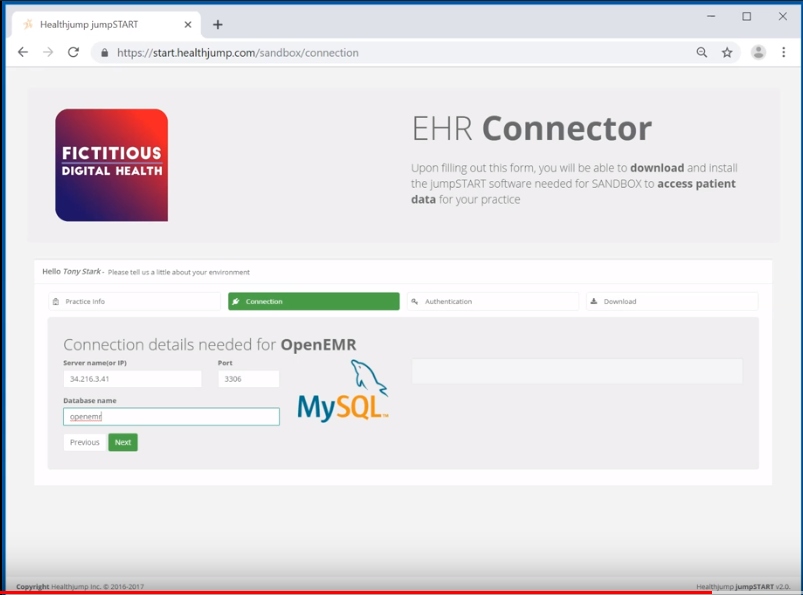
Continue to the next screen and enter the connection details. This page is pre-populated in some instances; if not, only the server name, port number or IP address, and database name need to be entered.
Database NameThe database name should include the EHR typically used by the vendor. If the database name differs, it can be overwritten later.
-
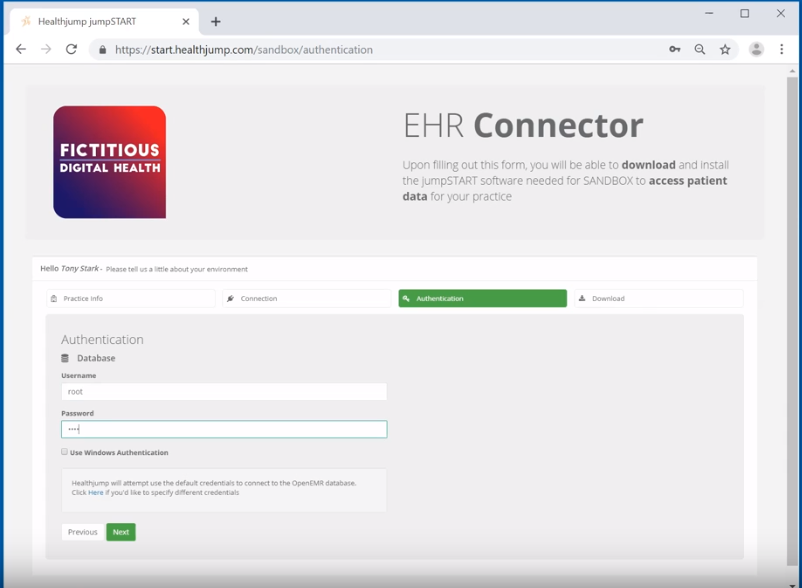
Continue to the next page and enter the database credentials (username and password). Depending on the database, either direct database credentials or Windows authentication is required.
Windows AuthenticationWindows authentication for database access requires an extra step once installation is complete — see Phase 3 below.
-
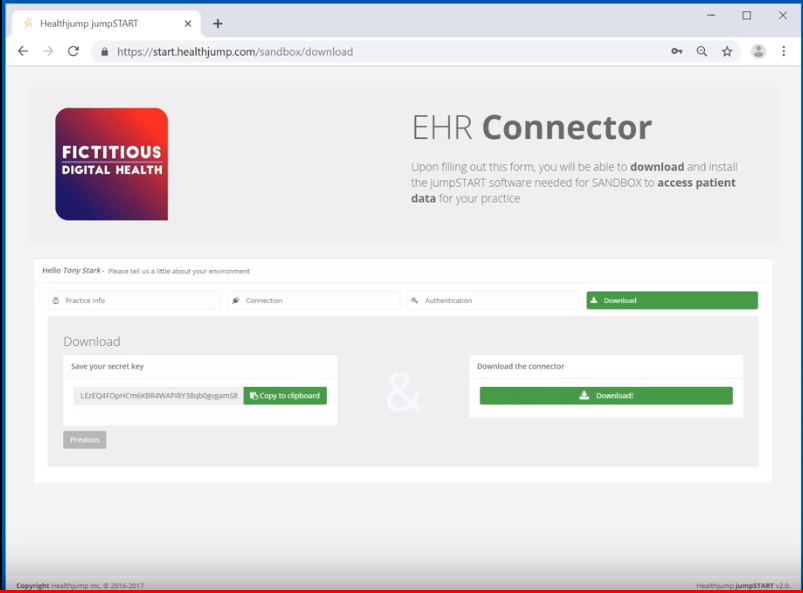
On the final page of the web form, Healthjump generates a secret connection key unique to the install. This key is needed to ensure secure communication with the EHR database and should be stored securely, since it is needed for the next phase. Once the key is stored, the JumpAgent download can proceed.
Phase 2: Installation
-
Once downloaded, JumpAgent can be unzipped. In the unzipped installer folder, the IT specialist right-clicks the setup executable (
setup.exe) and selectsRun as administrator. The installer downloads the JumpAgent application into theProgram Files (x86)folder.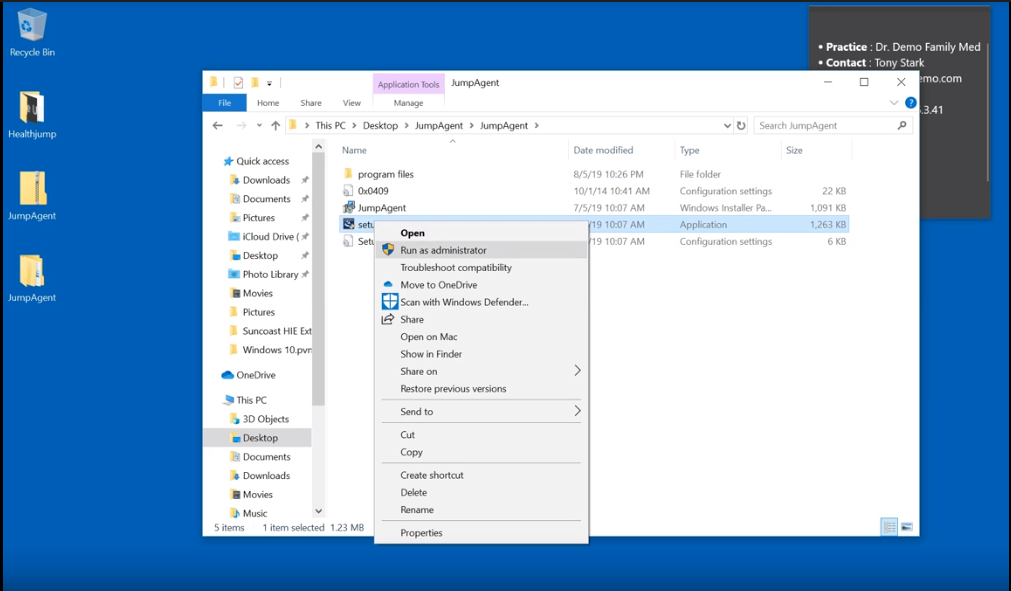
-
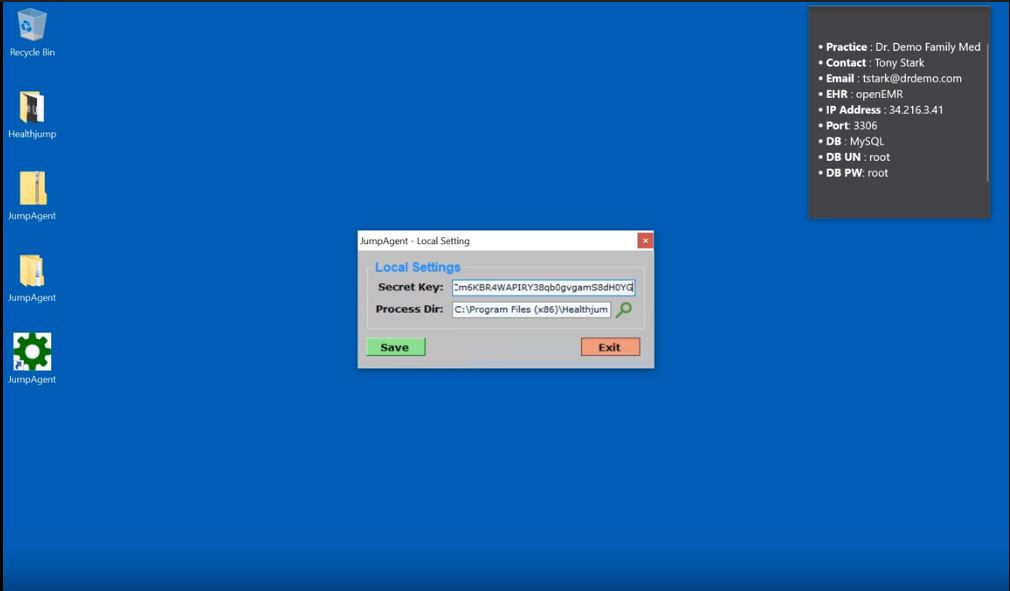
Once installation finishes, double-clicking the cogwheel icon on the server desktop opens an interface for entering the secret key from the final page of the web form. If the key is correct and the program folder permissions are sufficient, the server connects to the Healthjump servers and the JumpAgent app opens.
-
All information entered in the web form is pre-populated. Selecting
Test connectionverifies the connection.Troubleshooting a Failed Connection- Wrong IP address/server name — replacing the server name with the IP address (or vice versa) often resolves this
- Wrong database credentials — credentials should be tested prior to installation to confirm connectivity to the specified database
If the connection continues to fail after these changes, a Healthjump support technician should be contacted for further assistance.
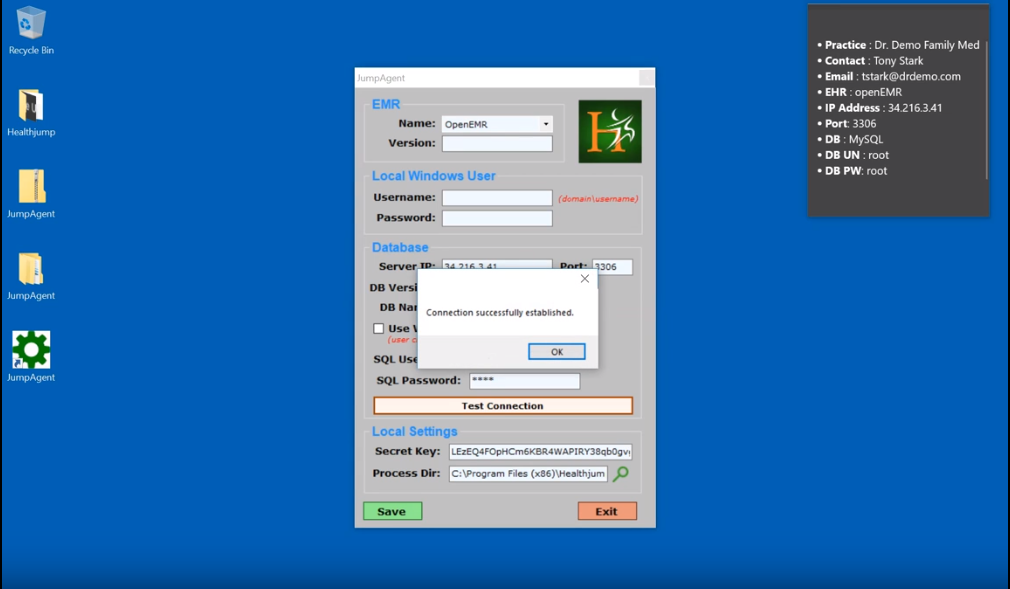
Once the connection succeeds, installation is complete and the process moves to the final phase — starting the agent.
Phase 3: JumpAgent Services
-
Open Services (
services.msc) and scroll toJumpAgent. Two related services,JumpAgentMonitorandJumpAgentRestart, should already be running —JumpAgentMonitormonitors the JumpAgent service's behavior, andJumpAgentRestartis used by Healthjump to restart and upgrade the JumpAgent service remotely. -
Start
JumpAgent.exe. Windows Authentication Follow-Up
If Windows authentication was used for the database credentials during the web form process, the service credentials need to be updated to match. In the Services window, right-click the JumpAgent service, open Properties, select the
Log Ontab, chooseThis account, and browse for the Windows user entered during setup. Enter the password and apply.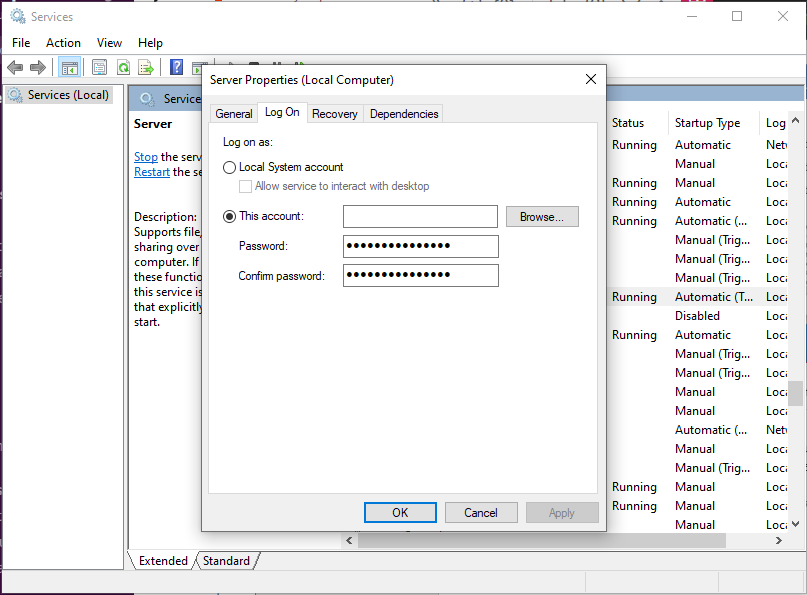
Once complete, the service can be started. If the customer plans to use the JumpConnect data platform, a time should be collected for when agent scripts can be executed each evening — coordinated with either the digital health vendor or the Xima/Healthjump installation technician.
This completes the JumpAgent installation process.
Updated 3 months ago