
Performing Transfer with Xima's WebRTC using CallHub
Requires Call HubMultiple line appearances are not available for all sites yet. If you do not know if you have Call Hub enabled or if you are a good candidate for it, feel free to contact Xima Support
This article covers how to perform both a Blind Transfer and an Assisted Transfer when using Xima's Contact Center Agent Client (CCAC) in CallHub mode.
Confirming You Are Using CallHub Mode
-
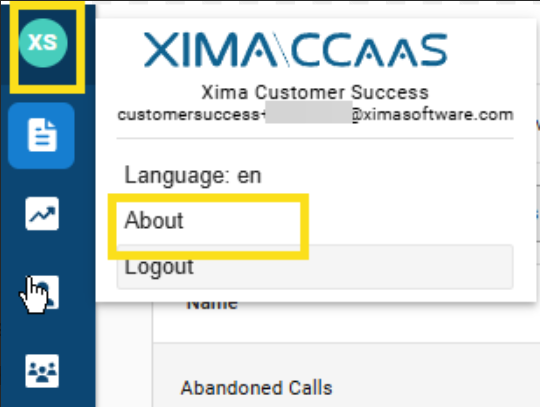
In the top-left corner of the CCAC interface, click your name/avatar icon to open the user menu
-
Select About from the menu. A dialogue box will appear showing your version information
-
Confirm that the CallHub Enabled badge is displayed in the About dialogue. If you see this badge, this article applies to you.

-
Click OK to close the dialogue and proceed.
Understanding the Difference: Blind Transfer vs. Assisted Transfer
| Transfer Type | What Happens |
|---|---|
| Blind Transfer | The call is immediately transferred to the destination. The agent is removed from the call at the moment of transfer, without speaking to the receiving party first. |
| Assisted Transfer | The agent first calls the destination party and speaks with them privately before connecting the original caller. The agent controls when the transfer is completed. |
Initiate a Transfer
Before You BeginThis article assumes you are already on an active call — whether that is an inbound call from a customer, an internal call to a colleague, or an outbound call you initiated. You must be on an active call to perform a transfer of any kind.
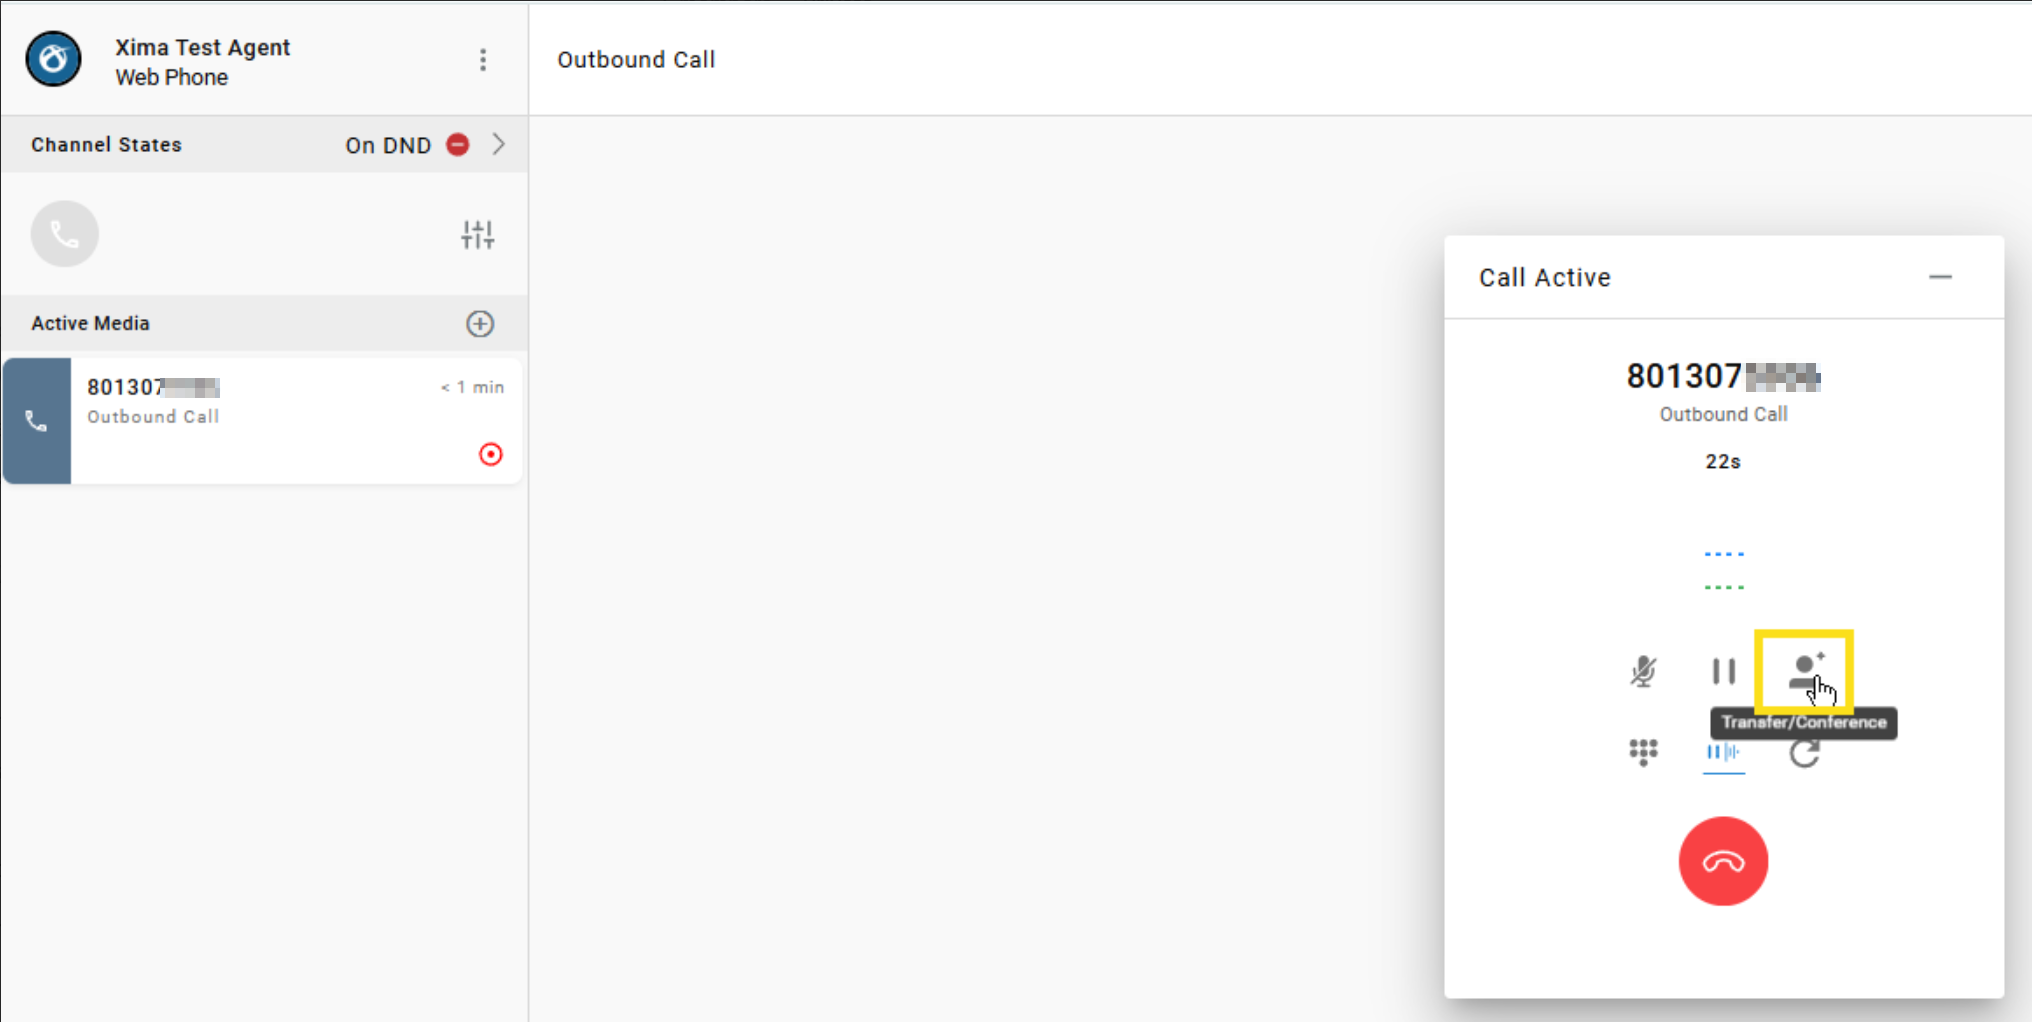
While on an active call, the call control widget will be displayed on screen. To begin any transfer:
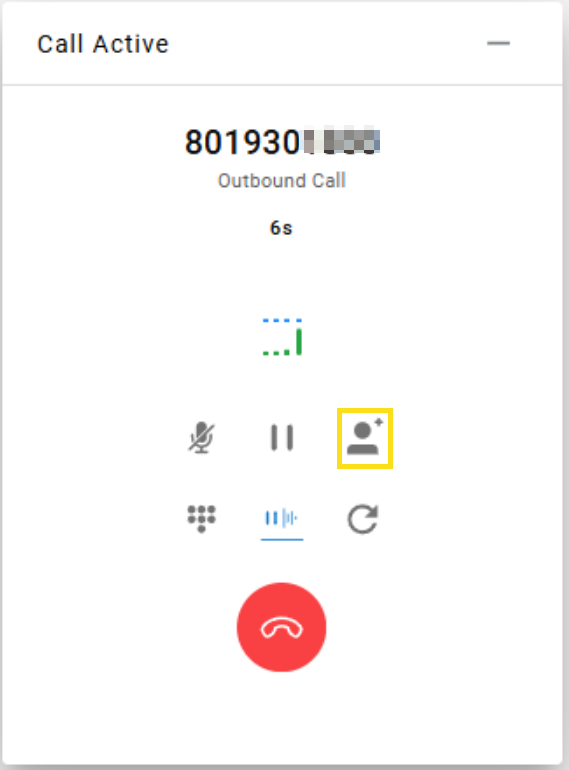
- Click the Transfer/Conference icon
-
This is the person-with-a-plus icon located in the top row, far right of the call control widget.
-
- A transfer menu will appear with three options:
- Blind Transfer
- Assisted Transfer
- Conference
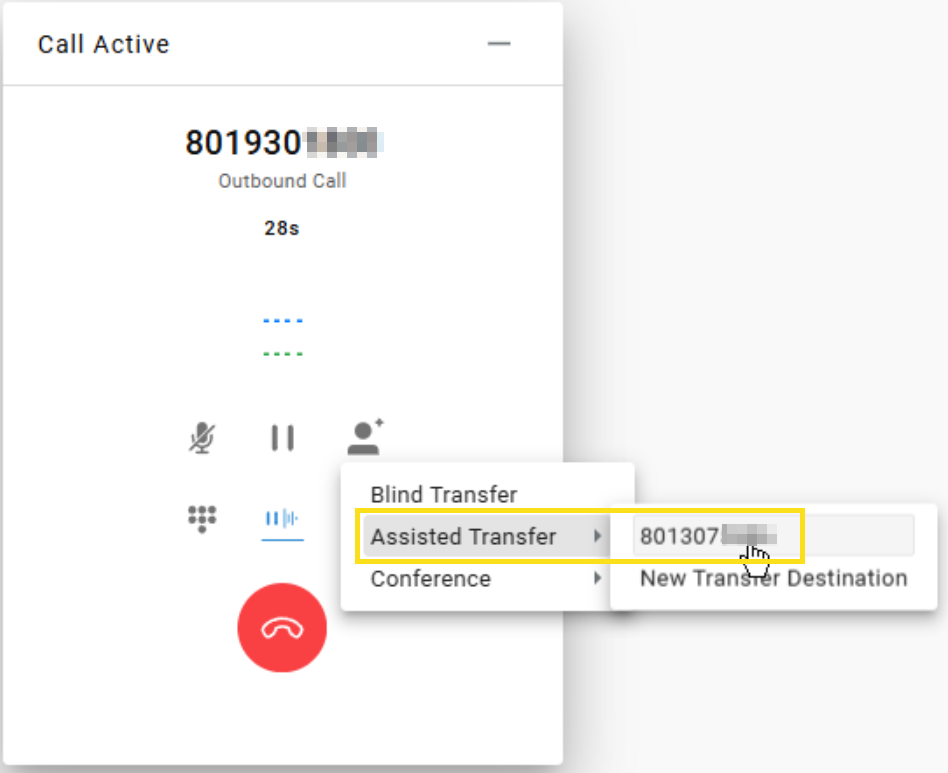
Step 1 - Performing an Assisted Transfer
-
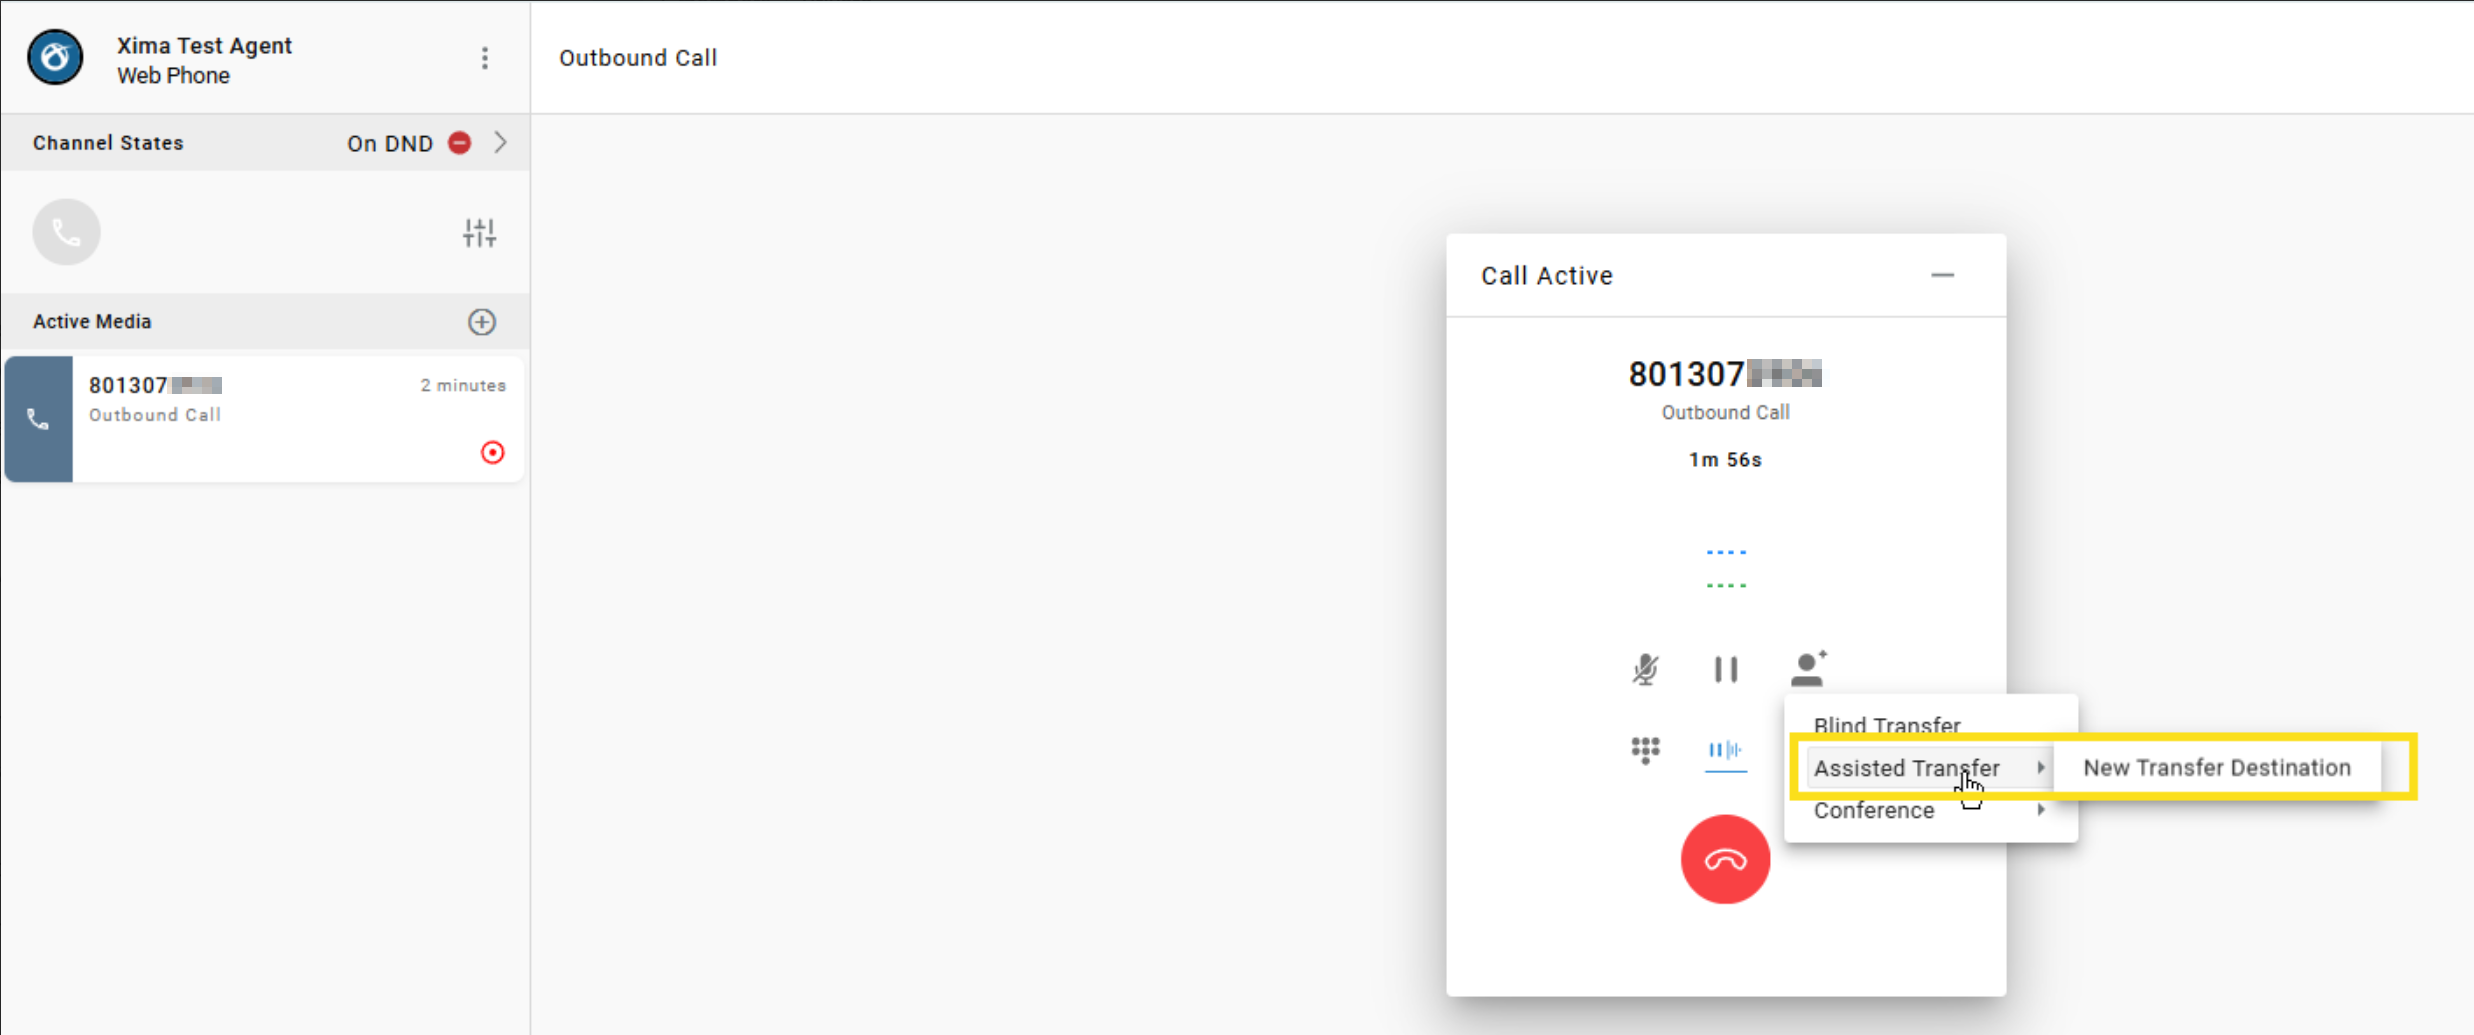
From the Transfer/Conference menu, hover over Assisted Transfer
- A submenu arrow will appear to the right
-
Select New Transfer Destination from the submenu
Assisted TransferAs soon as you initiate an Assisted Transfer, the system will automatically place your original caller on hold. You do not need to press Hold manually — CCAC handles this for you.
Step 2 - Choose Your Transfer Destination
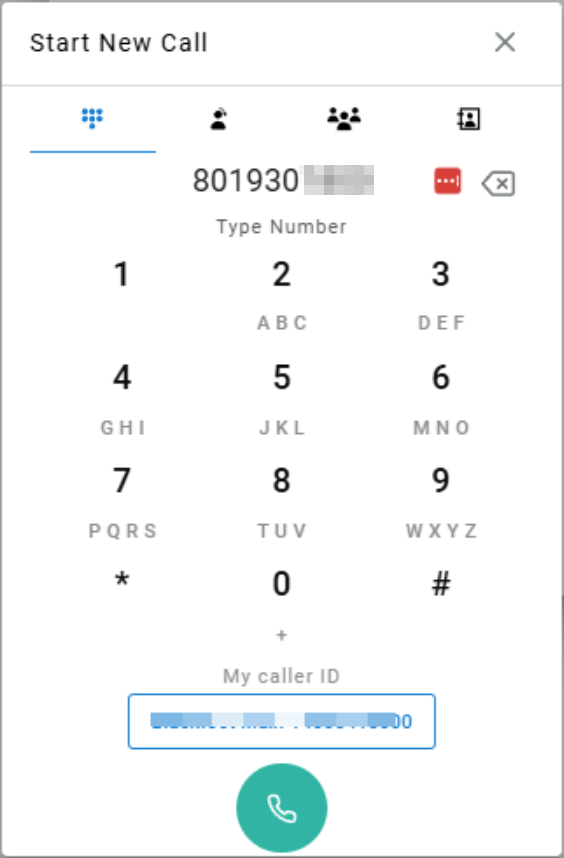
The Start New Call dialogue menu will appear. You have four ways to select where you want to transfer the call:
-
Dial Pad (Manual Number Entry)
- Select the dial pad icon (first tab)
- Use your mouse to click the digits on screen, or type the number using your computer keyboard
-
This method works for any destination — internal extensions, external phone numbers, or anything in between
-
-
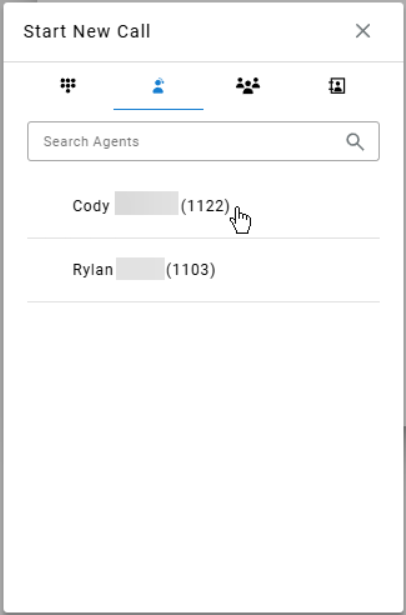
Agent List
-
Select the agent icon (second tab) to view a list of available CCAC agents.
-
You can use the Search Agents field to filter by name
-
Available agents will be displayed in the list along with their extension numbers.
-
-
-
Skill Groups
-
Select the skill group icon (third tab — the icon showing three people) to view a list of all skill groups configured in your contact center
-
Use the Search Skills field to filter the list
-
Select the skill group you wish to transfer the call into.

-
-
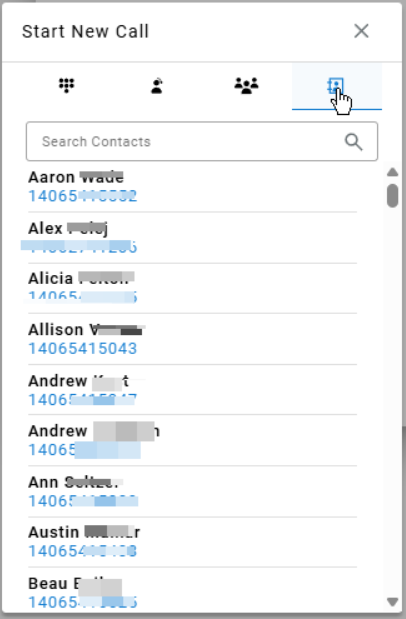
Phone Book
-
Select the phone book icon (fourth tab) to browse your organization's contact directory
-
This list includes both internal and external contacts
-
Use the Search Contacts field to find the person you need
-
Step 3 - Speak with the Transfer Destination
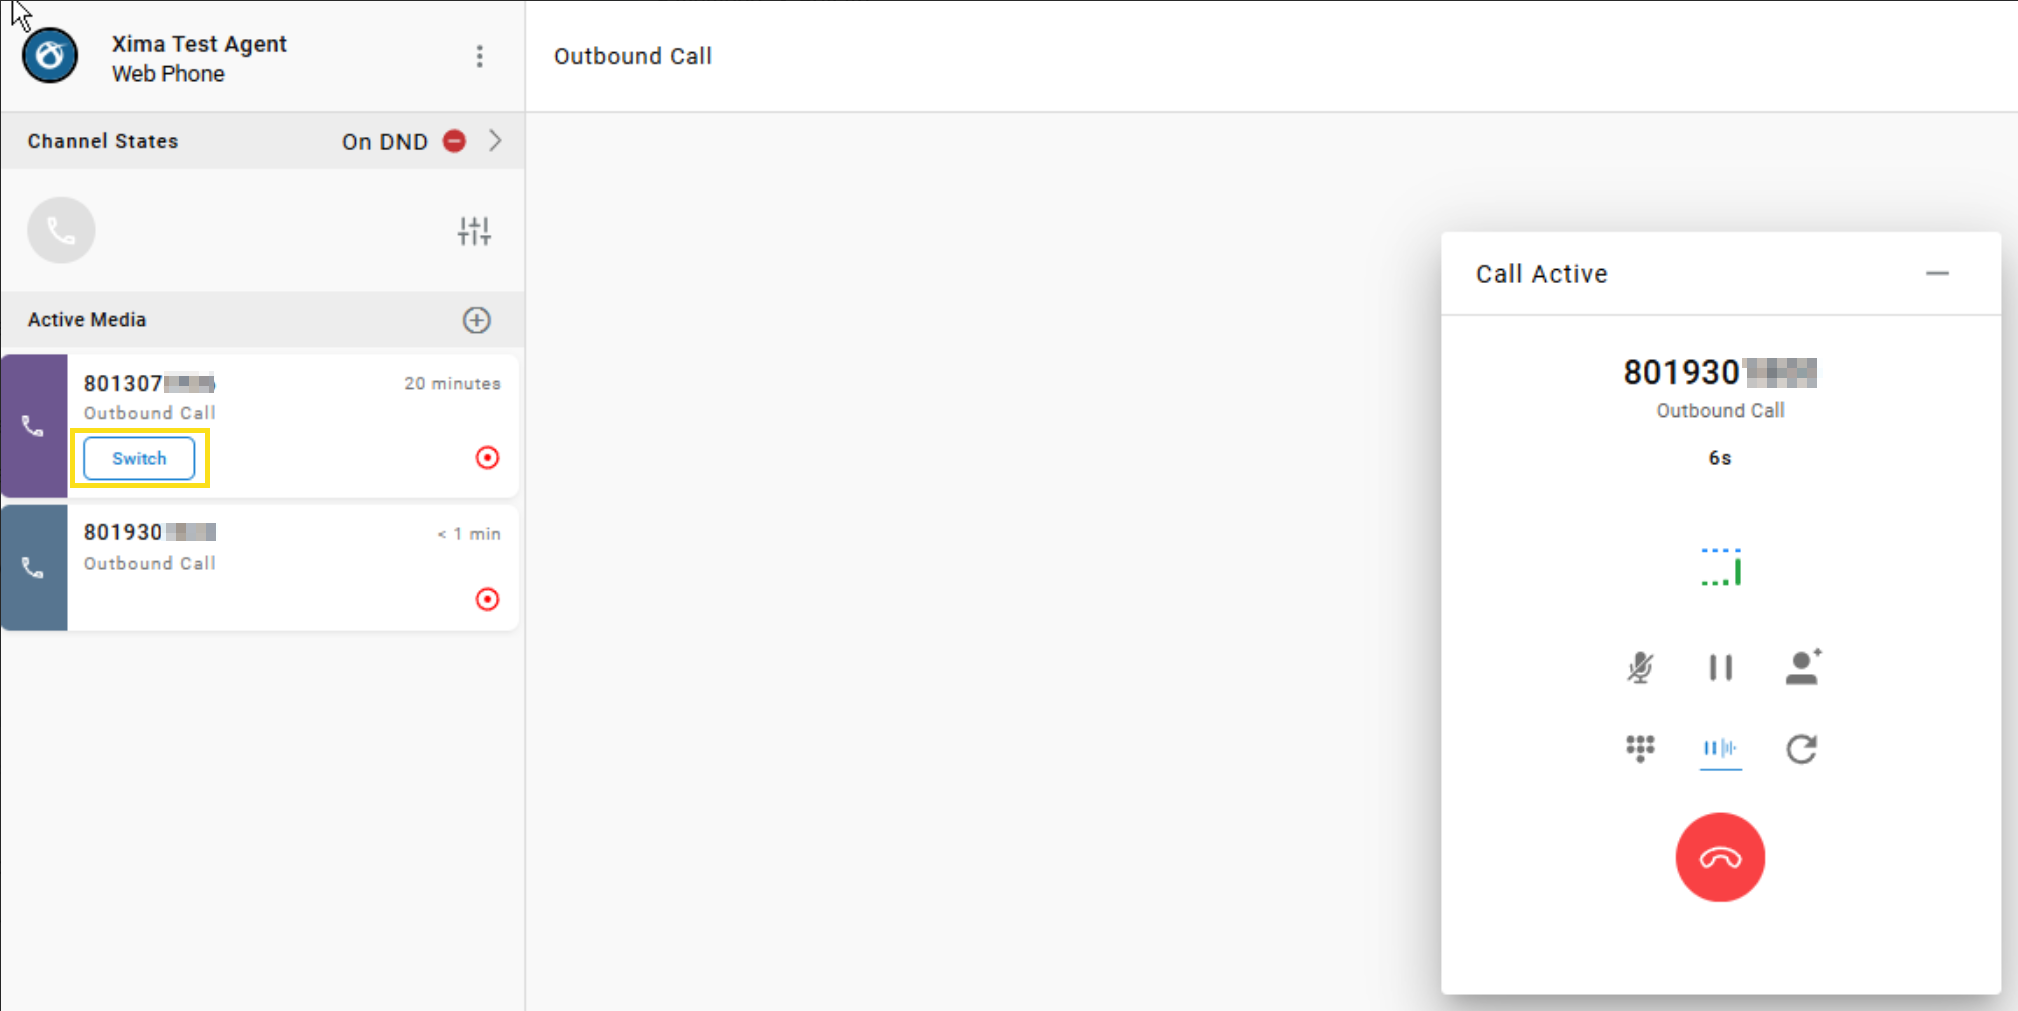
Once the destination party answers your call, you will see the following:
- The call control widget will update to show the new call as the active call
- In the Active Media panel on the left side of the screen, you will see two calls listed — your original caller (who is on hold) and the new party you just connected with.
- A Switch button will appear next to the held call
-
Clicking Switch will place the current call on hold and bring the held call back to active — allowing you to toggle between the two parties as needed.
-
At this point, you can speak privately with the transfer destination — for example, to introduce the caller, provide context, or confirm they are ready to take the call — before completing the transfer.
Step 4 — Complete the Assisted Transfer
When you are ready to connect the original caller with the transfer destination:
-
Click the Transfer/Conference icon again in the call control widget
-
Hover over Assisted Transfer
-
The submenu will now show the original caller's number as a selectable option, in addition to New Transfer Destination
-
-
Select the original caller's number from the submenu
-
The transfer will complete immediately
- The two parties will be connected, and you will be removed from the call
-
The Call Ended screen will be displayed.
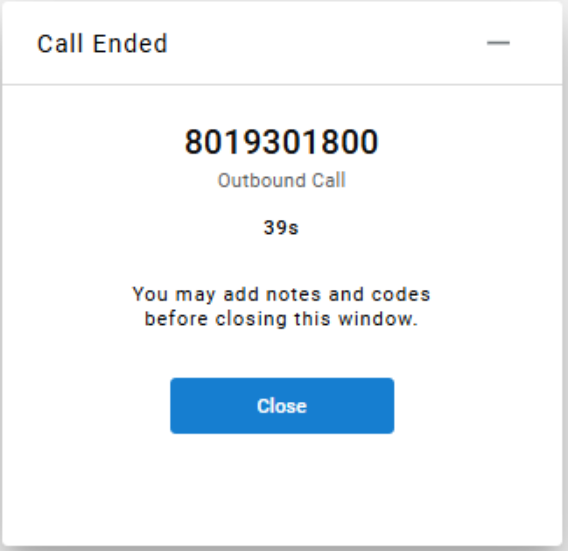
Call EndedBefore clicking Close on the Call Ended screen, you have the opportunity to add any notes or account codes relevant to the call.
Summary of the Assisted Transfer Flow
- Be on an active call
- Click Transfer/Conference → Assisted Transfer → New Transfer Destination
- Original caller is automatically placed on hold by the system
- Select your transfer destination (dial pad, agent, skill group, or phone book)
- Speak privately with the transfer destination to introduce the call
- Use Switch in the Active Media panel if you need to toggle between parties
- Click Transfer/Conference → Assisted Transfer → select the original caller's number
- Transfer completes — both parties are connected, and you are removed from the call
- Add notes/codes on the Call Ended screen before closing
Performing a Blind Transfer
-
From the transfer menu, select Blind Transfer
-
The Start New Call dialogue will appear
-
Select your transfer destination using one of the four methods described in the Choosing a Transfer Destination section above
-
Once you select or dial your destination, the call is immediately transferred. You will be removed from the call, and the Call Ended screen will be displayed.
Blind TransferWith a Blind Transfer, you will not have the opportunity to speak with the receiving party before the call connects. Use an Assisted Transfer if you need to introduce the caller or confirm availability first.