
Alianza One (BCC) Integration with Xima CCaaS
This guide walks through configuring a SIP Trunk on the Alianza One Business Cloud Communications (BCC) platform to integrate with Xima CCaaS.
Configuration
Platform Steps
-
Navigate to the Alianza One portal and sign in with your credentials
-
Once logged in, scroll to the bottom of the left-hand navigation pane and select Settings.

Add the SIP Trunk Product
-
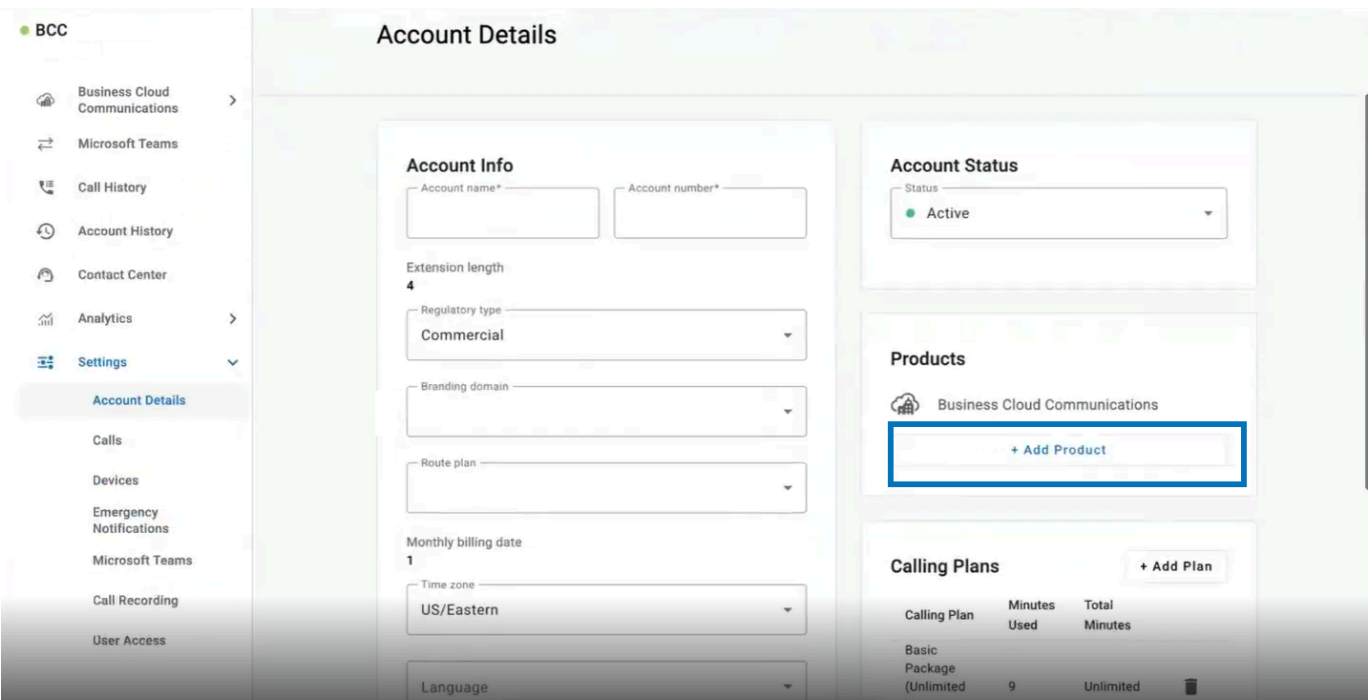
Go to Account Details > Products and select + Add Product
-
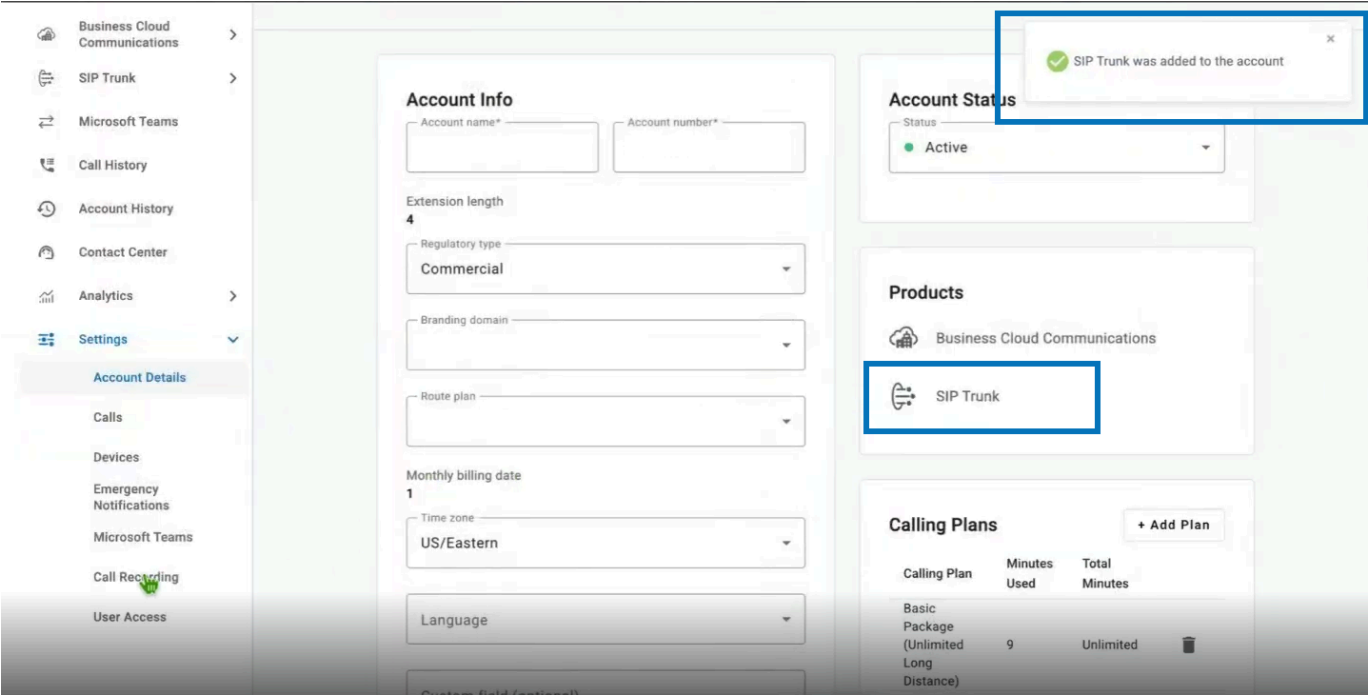
In the Add Product window that appears, select SIP Trunk

-
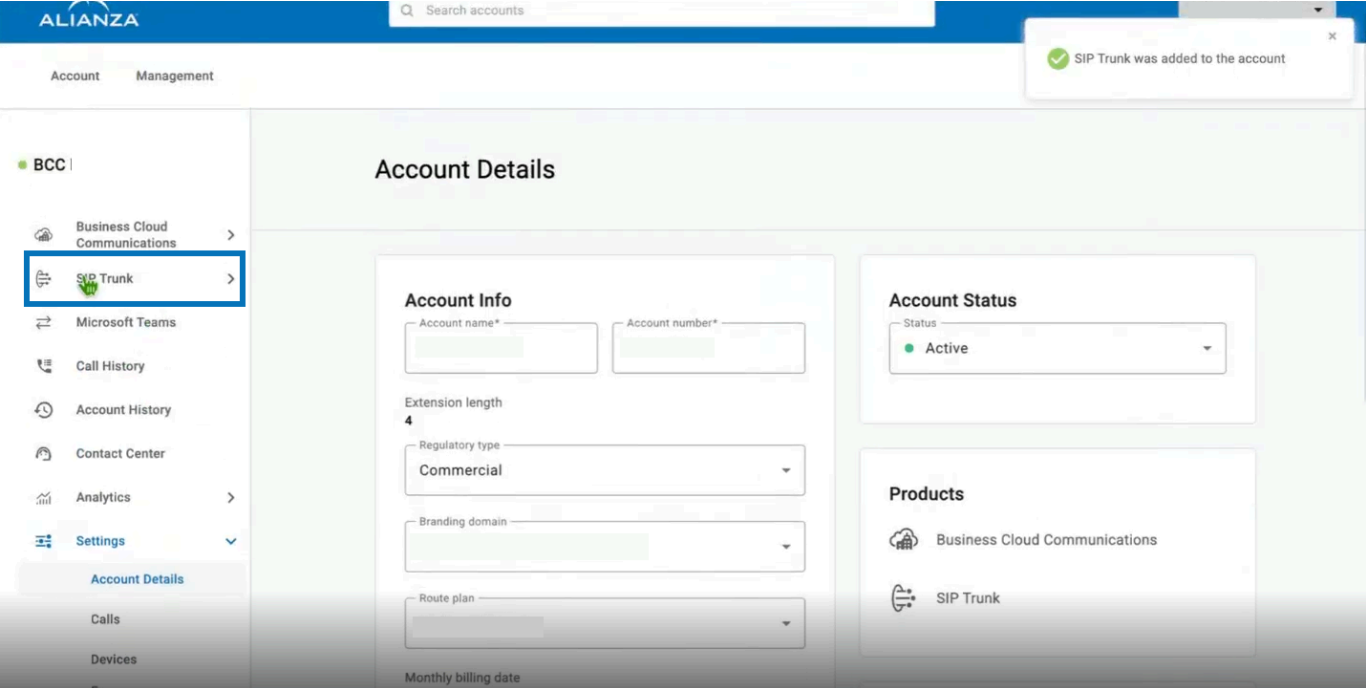
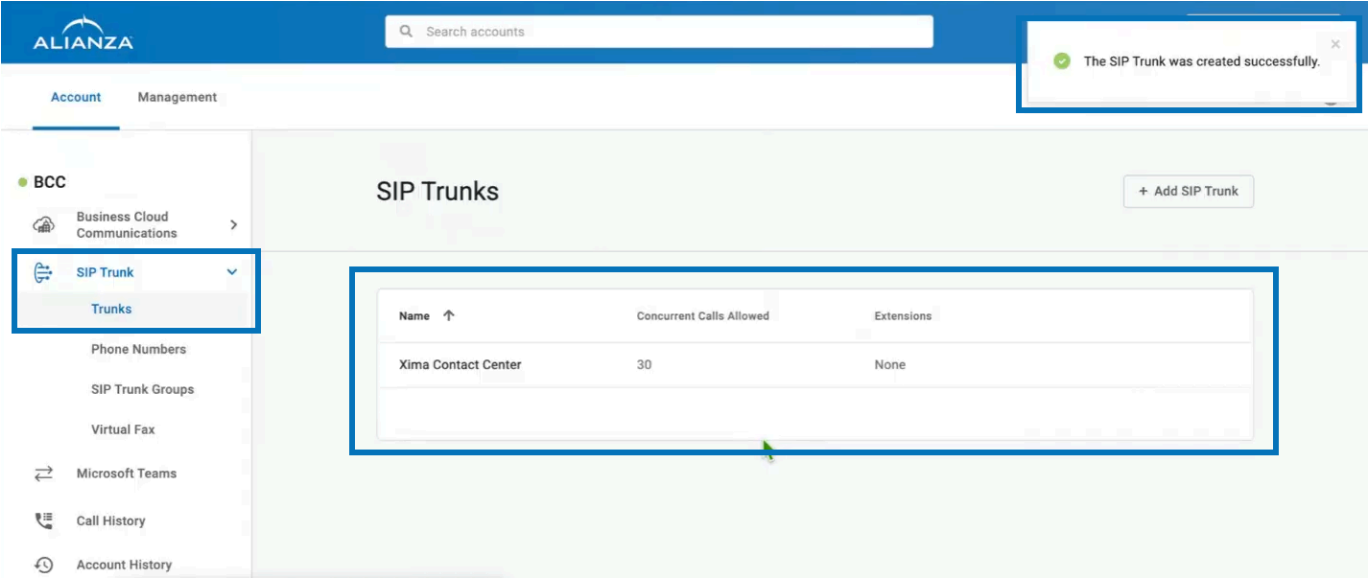
When the SIP Trunk has been added successfully, a confirmation banner will appear
-
From the left-hand navigation pane, select SIP Trunk
-
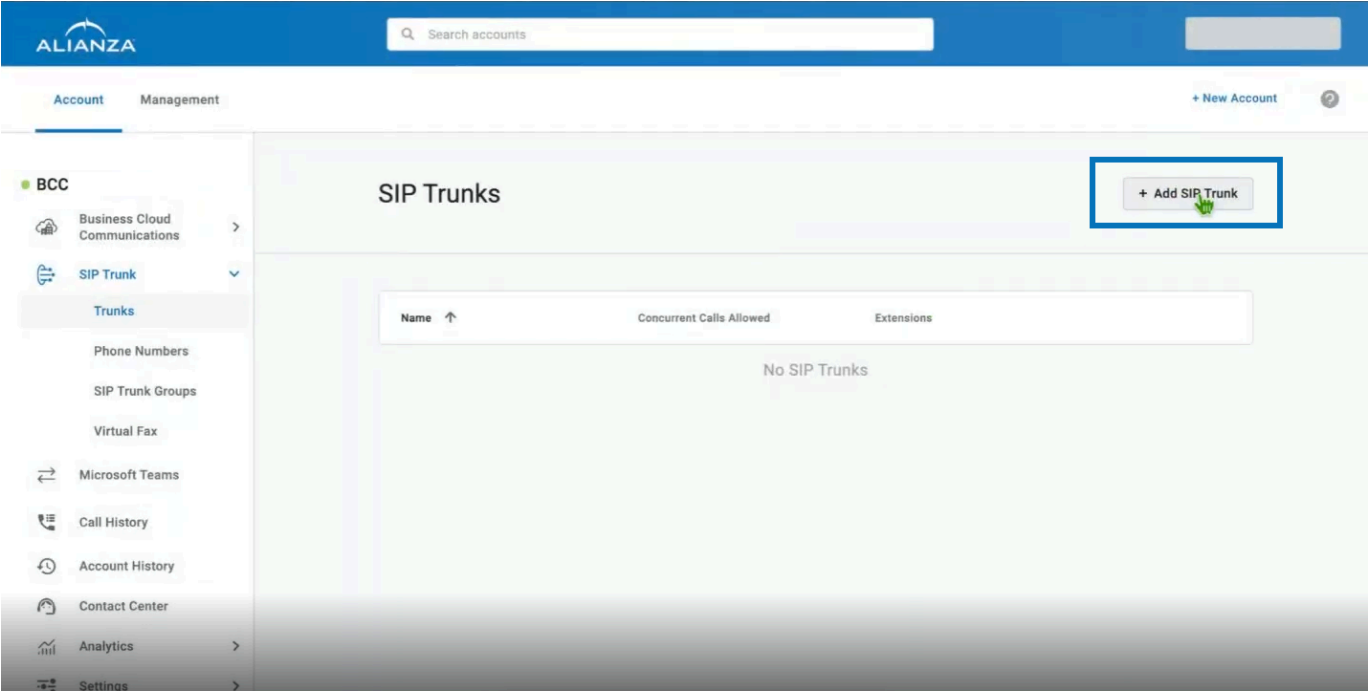
In the top right corner of the SIP Trunks page, select + Add SIP Trunk
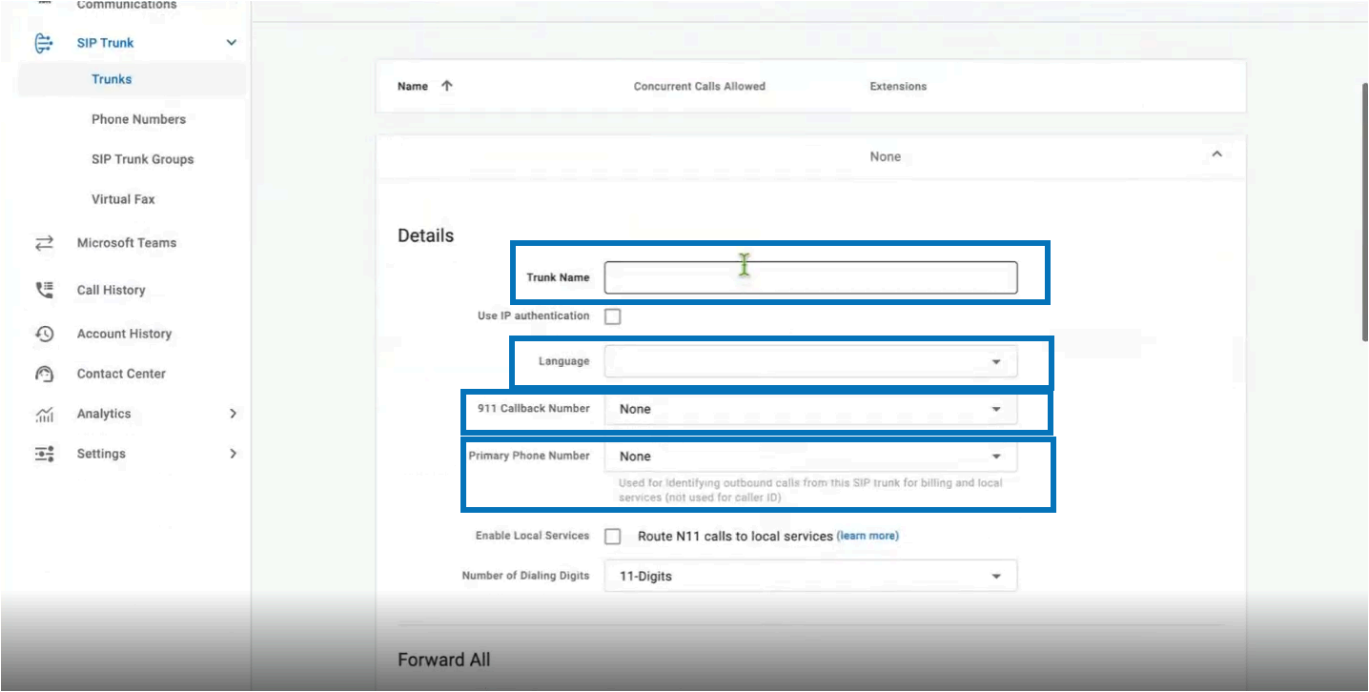
Configure Trunk Details
- Fill in the following fields:
-
Trunk Name
-
Language
-
911 Callback Number
-
Primary Phone Number
-
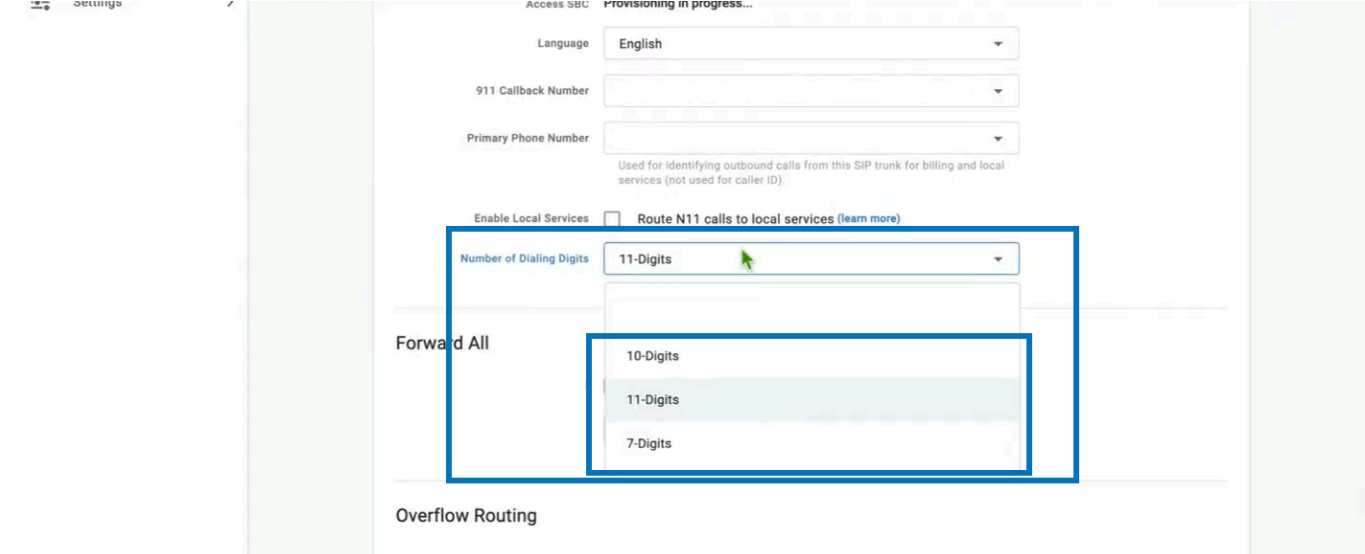
- Configure Number of Dialing Digits
-
Using the drop-down, set the Number of Dialing Digits
- This controls how many digits are allowed to pass back and forth on the trunk.
-
Options are 7-Digits, 10-Digits, or 11-Digits
-
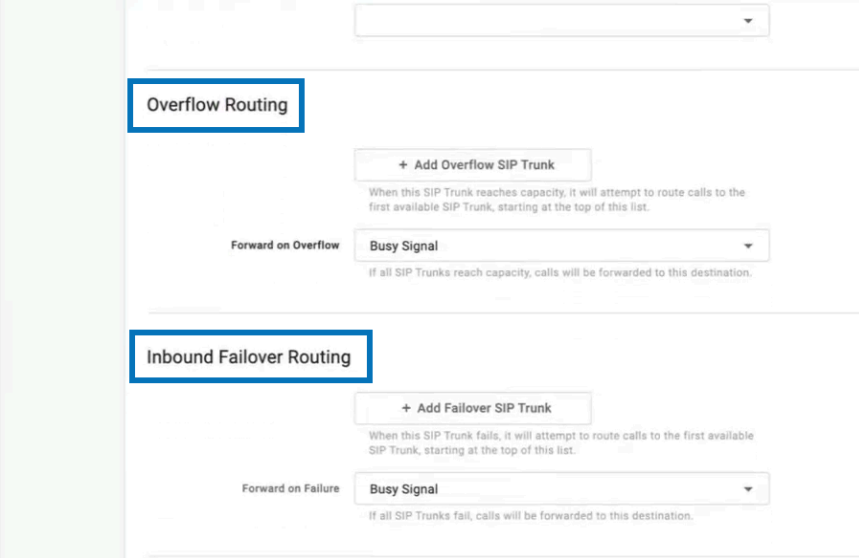
Configure Failover Routing (Recommended)
While not required at initial setup, Xima strongly recommends configuring both of the following:
-
Overflow Routing — used if the SIP Trunk to Xima is busy or goes down
-
Inbound Failover Routing — used for the same reasons as above
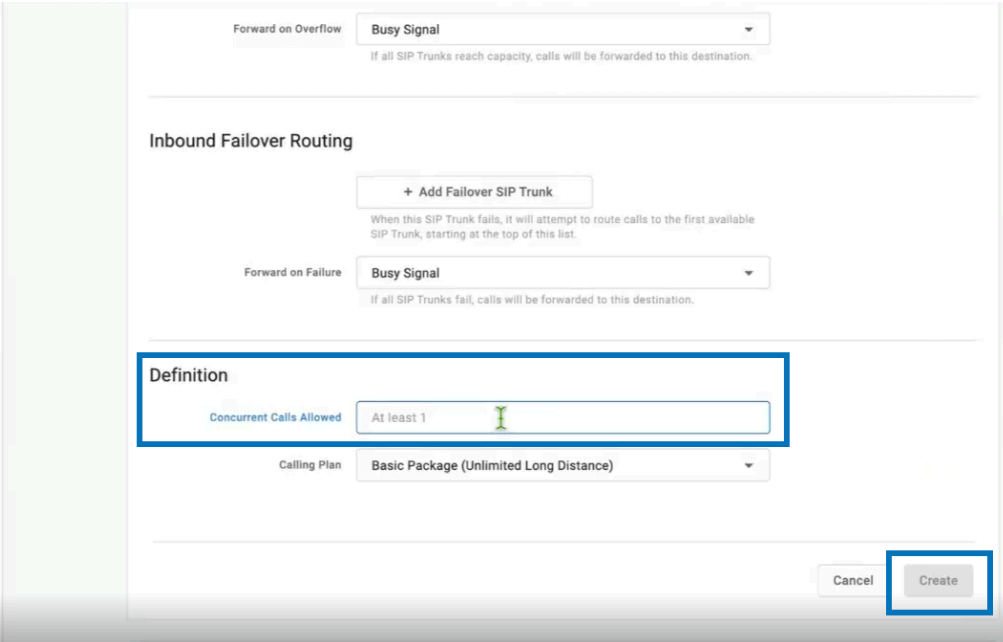
Set Concurrent Calls and Create the Trunk
- Under Definition, set the Concurrent Calls Allowed value
-
This defines the total number of simultaneous conversations ("talk paths") between Alianza One (BCC) and Xima CCaaS
-
ConfigurationThis same number must also be configured in Xima CCaaS under Target Platform > Max Calls per Handset.
- Select Create when finished
- A successfully created trunk will appear in the SIP Trunks list
-
For example, a trunk named "Xima Contact Center" with 30 Concurrent Calls Allowed.
-
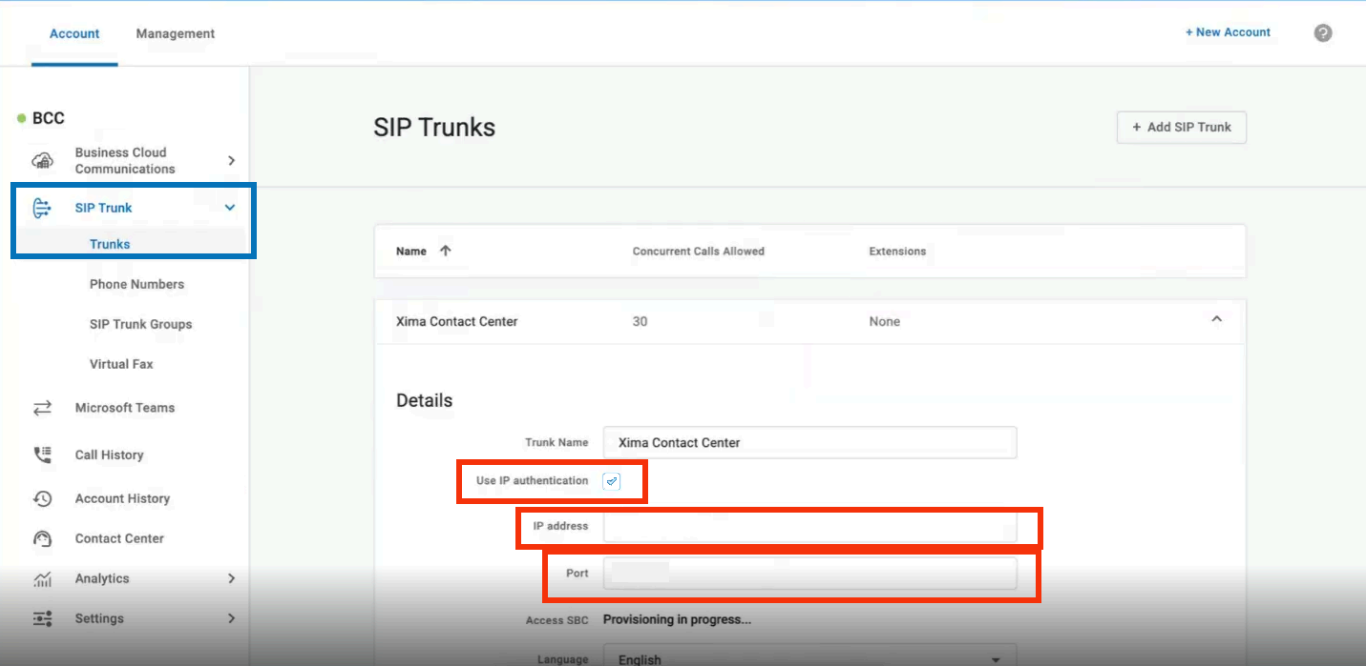
Configure Authentication Credentials
Do Not Use IP AuthenticationDo not enable Use IP Authentication, and do not fill in IP Address or Port.
-
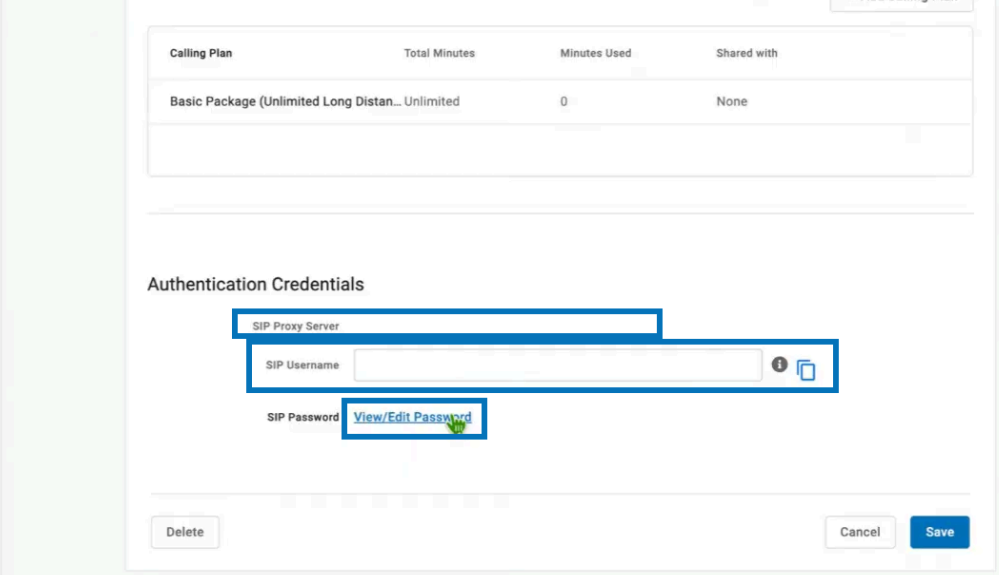
Note the SIP Proxy Server and Create a SIP Username
-
Create a SIP Username
- Xima prefers numeric characters only
- This value will be used in Xima CCaaS under SIP Extensions > SIP Extension and SIP Username.
- Note: SIP Authorization ID is not required in CCaaS.
-
Then select View/Edit Password
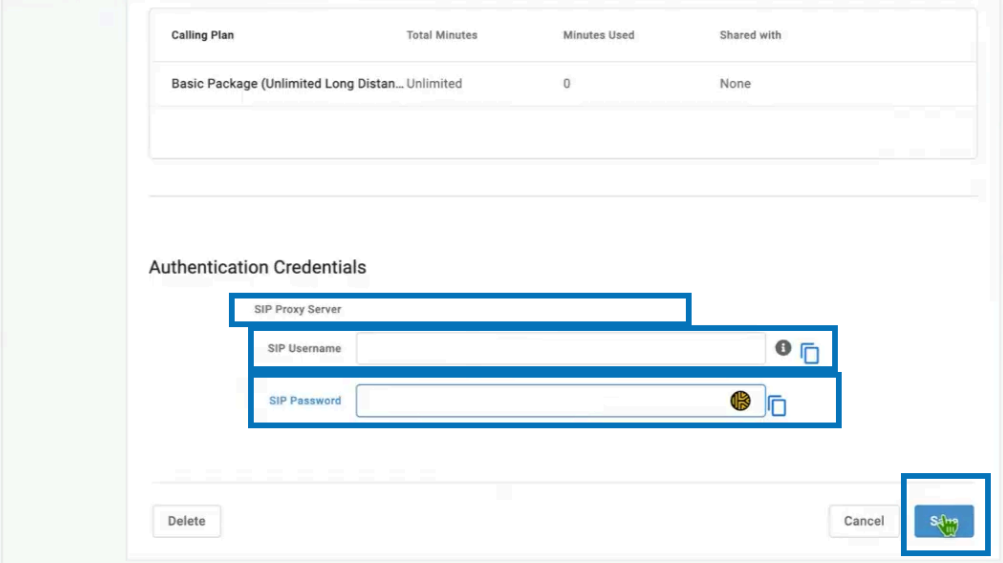
Set the SIP Password
-
Once the SIP Password field is available, enter a password
- Xima prefers at least 12 alphanumeric characters
- This value will be used in Xima CCaaS under SIP Extensions > SIP Password
-
Select Save when done
-
Allow 30–60 seconds for initialization, registration, and authentication to complete
Updated about 1 month ago